Have you ever dreamed of catching fish with a rod made just for you? Building your own custom fishing rod lets you create the perfect tool tailored to your style and needs.
Imagine the pride you’ll feel knowing every cast comes from a rod you built yourself. In this guide, you’ll learn simple steps to craft a fishing rod that fits your hands, matches your favorite fishing spots, and improves your chances of landing the big one.
Ready to turn your fishing experience into something truly personal? Let’s dive in and make your perfect fishing rod a reality.

Credit: anglersresource.net
Choosing The Right Materials
Building a custom fishing rod needs the right materials. Each part affects how the rod performs and feels.
Choosing good materials helps you create a rod that fits your fishing style and lasts long.
Selecting Rod Blanks
Rod blanks are the main part of the fishing rod. They come in many lengths and powers. Pick a blank based on the fish you want to catch and your casting style.
- Graphite blanks are light and sensitive.
- Fiberglass blanks are strong and flexible.
- Composite blanks blend graphite and fiberglass.
- Longer blanks cast farther, shorter blanks offer better control.
Picking Suitable Guides
Guides help the fishing line flow smoothly. They reduce friction and prevent line damage. Choose guides made from quality materials to match your rod blank.
| Guide Material | Benefits |
| Stainless Steel | Strong and rust-resistant |
| Aluminum Oxide | Light and smooth for better casting |
| Sic (Silicon Carbide) | Very smooth and durable, ideal for braided lines |
Choosing Handles And Reel Seats
Handles give comfort while fishing. Reel seats hold the reel firmly. Pick materials that feel good in your hand and fit your reel size.
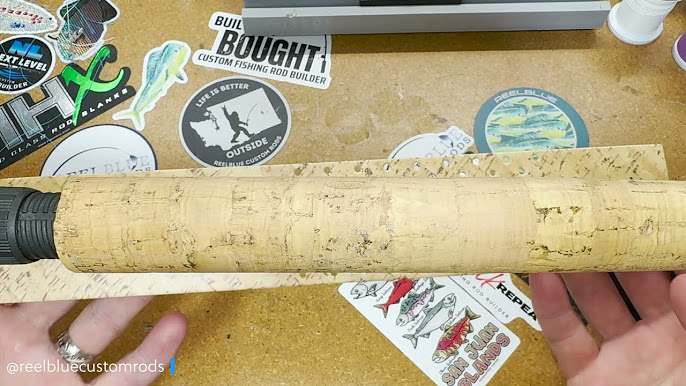
- EVA foam handles are soft and resist water well.
- Cork handles offer a classic look and good grip.
- Graphite reel seats are light and strong.
- Metal reel seats add durability but increase weight.
Tools And Equipment Needed
Building custom fishing rods needs special tools and equipment. These help make the rod strong and easy to use.
Using the right tools makes the building process smooth and safe. It also improves the rod’s quality.
Essential Tools For Assembly
Some tools are required to put together a fishing rod. These tools help you handle small parts and keep everything tight.
- Rod blank – the main body of the rod
- Reel seat – holds the fishing reel in place
- Handle grips – for comfortable holding
- Guides – rings that guide the fishing line
- Epoxy glue – to stick parts securely
- Brushes – to apply epoxy evenly
- Thread – to wrap guides onto the rod
- Rod wrapping jig – holds the rod while wrapping thread
- Sandpaper – to smooth rod and parts
- Cutting tools – scissors or knives for trimming thread
- Measuring tape or ruler – for accurate measurements
Having these tools ready saves time and helps avoid mistakes. It also keeps the rod balanced and strong.
Optional Accessories For Customization
You can add extra tools and accessories to make your fishing rod unique. These help improve look and function.
- Colored thread – for decorative wraps
- Custom handle materials – cork, foam, or wood
- Guide inserts – smooth liners to protect the fishing line
- Rod drying motor – spins the rod to dry epoxy evenly
- Heat gun – helps cure epoxy faster
- Decals or stickers – to personalize your rod
- Protective rod tube – stores and protects finished rods
These accessories let you design rods that fit your style. They also increase rod lifespan and comfort.
Step-by-step Rod Assembly
Building a custom fishing rod lets you create a tool made just for you. Follow these simple steps to assemble your rod carefully and correctly.
This guide covers preparing the blank, attaching guides, securing the handle and reel seat, and applying finishing touches.
Preparing The Blank
Start by selecting a blank that fits your fishing style. Clean it with a soft cloth to remove dust. Mark guide positions gently with a pencil. This prepares the rod for the next steps.
Attaching Guides
Attach the guides carefully along the blank where you marked. Use rod wrapping thread to secure each guide tightly. Make sure they line up straight for better casting and control.
- Place the tip-top guide first at the end of the blank.
- Space the remaining guides evenly along the blank.
- Wrap thread around each guide foot securely.
- Apply a thin coat of epoxy to protect the wraps.
Securing The Handle And Reel Seat
Slide the handle onto the blank. Fit the reel seat in place next. Use strong adhesive inside the handle and reel seat to keep them fixed. Align the reel seat with the guides for comfort and balance.
| Part | Material | Purpose |
| Handle | Cork or Foam | Grip and comfort |
| Reel Seat | Metal or Plastic | Holds the fishing reel |
| Adhesive | Epoxy or Glue | Secures handle and reel seat |
Applying Finishing Touches
Check all parts for tightness and alignment. Sand any rough edges on the handle or wraps. Apply a final coat of epoxy on the thread wraps. Let everything dry completely before use.
Tip:Work in a clean, well-lit area. Take your time to avoid mistakes.

Credit: anglersresource.net
Customizing For Performance
Building a custom fishing rod lets you improve your fishing experience. You can adjust the rod to fit your style and the fish you want to catch.
Focus on key parts like rod action, power, line, and lure to get the best results. Balancing these elements helps you catch fish more easily.
Matching Rod Action And Power
Rod action shows how much the rod bends when you pull the line. Power tells how strong the rod is to handle heavy fish and big lures.
- Fast action rods bend near the tip for quick hook sets.
- Medium action rods bend in the middle for better control.
- Slow action rods bend from the base for flexibility with small fish.
- Light power rods suit small fish and light lines.
- Medium power rods work well for a variety of fish sizes.
- Heavy power rods are best for big fish and tough conditions.
Selecting Line And Lure Compatibility
Choose a fishing line that fits the rod power and the lure weight. Using the right combo helps you cast farther and fight fish without breaking your gear.
| Rod Power | Line Weight (lbs) | Lure Weight (oz) |
|---|---|---|
| Light | 2-6 | 1/16 – 1/4 |
| Medium | 6-12 | 1/4 – 3/4 |
| Heavy | 12-20+ | 3/4 – 2+ |
Balancing Sensitivity And Strength
Sensitivity helps you feel bites, while strength stops fish from breaking the rod. Find a balance that fits your fishing spots and fish type.
Tips for balancing sensitivity and strength:
- Use graphite for more sensitivity and less weight.
- Choose fiberglass for strong and durable rods.
- Combine materials to get both benefits.
- Pick guides and reel seats that add support but stay light.
Common Mistakes To Avoid
Building custom fishing rods takes skill and care. Avoiding common mistakes helps make a strong, reliable rod.
Here are key mistakes many beginners make. Fixing these will improve your rod’s performance and lifespan.
Incorrect Guide Placement
Placing guides in the wrong spots can cause line damage and poor casting. Guides must be spaced evenly and aligned straight.
- Do not place guides too close together.
- Align guides so the line flows smoothly.
- Use the correct size guides for each section.
- Check guide alignment with a straight line before gluing.
Poor Epoxy Application
Epoxy holds guides and wraps in place. Applying it unevenly causes weak spots and a messy finish.
| Common Epoxy Errors | Effects |
|---|---|
| Applying too much epoxy | Runs and drips that look untidy |
| Applying too little epoxy | Weak glue bonds and guide movement |
| Not curing epoxy correctly | Sticky surface and poor durability |
| Mixing epoxy improperly | Sticky or soft spots on the rod |
Use thin, even coats and let each dry fully for best results.
Ignoring Rod Balance
Balance affects how the rod feels in your hand. A poorly balanced rod tires your arm quickly.
- Do not add heavy components near the tip.
- Distribute weight evenly along the rod blank.
- Test balance by holding the rod at the handle.
- Adjust guide sizes and reel seat position to improve balance.
Maintenance And Repair Tips
Keeping your custom fishing rods in good shape helps them last longer. Regular care prevents damage and keeps the rod working well.
Learn how to clean, store, fix, and renew your fishing rods with simple methods anyone can follow.
Cleaning And Storage
Cleaning your fishing rod after each use removes dirt and salt. Store rods in a dry place to avoid rust and damage.
- Wipe the rod with a soft cloth after fishing
- Use mild soap and water for deeper cleaning
- Dry the rod fully before storing
- Keep rods away from direct sunlight and moisture
- Store rods upright or in a rod rack to prevent bending
Fixing Guide Damage
Rod guides can break or bend, affecting casting and line flow. Fix small guide issues early to avoid bigger problems.
| Damage Type | Fixing Method |
| Bent Guide | Carefully bend back with pliers |
| Broken Guide Ring | Remove and replace with a new guide |
| Loose Guide | Apply epoxy glue to secure it |
Rewrapping And Refinishing
Rewrapping protects guides and adds style. Refinishing keeps the rod smooth and strong.
Follow these steps to rewrap your rod:
- Remove old thread wrapping carefully.
- Clean the blank where you will wrap.
- Use quality thread and wrap tightly around the guide foot.
- Apply epoxy finish evenly over the thread.
- Let it dry fully before use.
Credit: erinmills.ca
Frequently Asked Questions
What Materials Are Best For Custom Fishing Rods?
The best materials for custom fishing rods are graphite, fiberglass, and composite blends. Graphite offers sensitivity and light weight, while fiberglass provides durability. Composite blends offer a balance of both. Choose based on your fishing style and target species for optimal performance and longevity.
How Do I Choose The Right Rod Length?
To choose the right rod length, consider the type of fishing and environment. Shorter rods offer precision for tight spaces, while longer rods provide better casting distance. For general use, a length between 6 to 8 feet is versatile. Match the length to your specific needs for best results.
What Tools Are Needed For Rod Building?
For rod building, you’ll need a rod blank, guides, reel seat, and handle. Additional tools include thread, epoxy, a drying motor, and measuring tools. These tools and materials help in assembling and customizing your fishing rod to your specific requirements and preferences.
How Can I Customize My Fishing Rod Handle?
Customize your fishing rod handle by choosing materials like cork, EVA foam, or split grips. Select a comfortable diameter and length that suits your hand size. Personalize further with custom colors or patterns. This ensures a comfortable grip and enhances your fishing experience.
Conclusion
Building custom fishing rods takes patience and care. Choose the right parts that fit your fishing style. Take your time to assemble each piece carefully. Test your rod before heading out to fish. Enjoy the feeling of catching fish with your own rod.
Custom rods bring more fun and pride to fishing trips. Keep practicing to improve your building skills. Soon, you will create rods that match your needs perfectly.