Ever found yourself standing by the water, dreaming of catching the perfect fish with a rod you built yourself? Imagine the thrill of feeling the tug on a fishing line from a rod crafted by your own hands.
Building your own fishing rod isn’t just a hobby; it’s a deeply satisfying experience that connects you with nature and your passion for fishing. You might think it’s complicated, but you’ll be surprised at how straightforward it can be. This guide will break down each step, making it easy for you to create a rod that reflects your personal style and needs.
Ready to dive into this rewarding challenge? Let’s get started, and soon, you’ll be fishing with your very own handmade rod.
Choosing Materials
Building a fishing rod starts with picking the right materials. These materials affect the rod’s strength and flexibility.
Choosing good materials helps you catch more fish and enjoy your time on the water.
Types Of Rod Blanks
Rod blanks are the main part of the fishing rod. They come in different materials and shapes. Each type offers different strength and weight.
Common rod blank materials include:
- Graphite: Lightweight and sensitive, good for feeling bites.
- Fiberglass: Strong and flexible, lasts a long time.
- Composite: Mix of graphite and fiberglass, balances strength and sensitivity.
Selecting Guides And Tips
Guides and tips help control the fishing line. They keep the line from tangling and improve casting distance.
Choose guides made of strong materials like stainless steel or ceramic. These last longer and reduce line wear.
- Stainless steel guides resist rust and damage.
- Ceramic inserts reduce friction for smooth line movement.
- Tip tops protect the rod tip and guide the line.
Handles And Reel Seats
Handles give you a place to hold the rod comfortably. Reel seats attach the reel to the rod securely.
Pick handle materials that feel good in your hand and resist water damage. Choose reel seats that fit your reel size well.
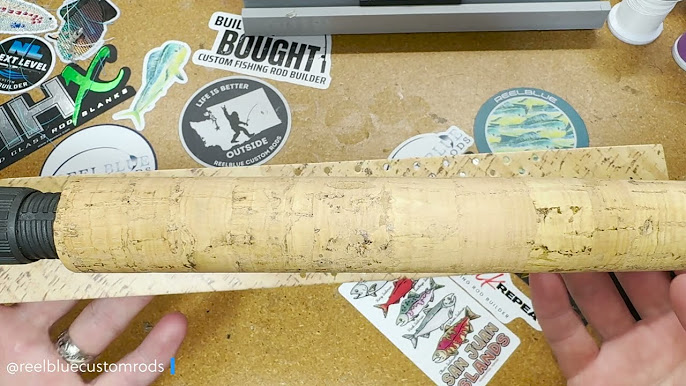
- Cork handles are light and comfortable to grip.
- EVA foam handles are durable and provide good grip when wet.
- Reel seats come in graphite or aluminum for strength and lightness.
Credit: erinmills.ca
Tools You Need
Building a fishing rod needs the right tools. These tools help you work with materials safely and neatly.
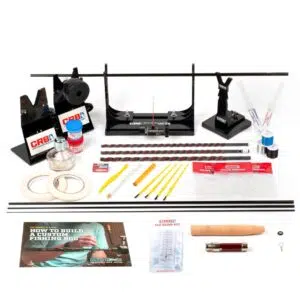
This guide shows the essential tools and some optional accessories for making a fishing rod.
Essential Building Tools
You need basic tools to cut, shape, and assemble your fishing rod parts. These tools make the building process smooth.
- Rod Blank: The main shaft of the fishing rod
- Rod Wrapping Thread: To wrap guides onto the rod
- Guide Set: The loops that guide the fishing line
- Epoxy Resin: To seal and protect the thread wraps
- Cutting Tools: Sharp knives or scissors to cut thread and guides
- Sandpaper: To smooth the rod blank and handle areas
- Measuring Tape: To measure guides and thread lengths accurately
- Clamps or Rod Dryer: To hold the rod steady while epoxy cures
Optional Accessories
These tools are not required but can help improve your rod-building experience and results.
- Rod Wrapping Jig: Helps spin the rod for even thread wrapping
- Heat Gun: Speeds up epoxy drying time
- Handle Materials: Cork or foam for comfortable grip
- Thread Burner: To cut and seal thread ends cleanly
- Small Paintbrushes: For applying epoxy smoothly
- Magnifying Glass: Helps see small thread wraps clearly
Preparing The Rod Blank
Preparing the rod blank is an important part of building a fishing rod. It helps ensure the rod works well and lasts a long time.
This stage includes measuring, marking, sanding, and cleaning the blank. Each task makes the rod ready for the next steps.
Measuring And Marking
First, measure the rod blank carefully. Use a tape measure to find the exact length you want.
Mark the spots for guides, reel seat, and handle with a pencil. These marks guide you in the assembly process.
- Measure from the bottom to the tip of the blank
- Mark guide positions evenly along the blank
- Mark where the handle and reel seat will go
Sanding And Cleaning
Lightly sand the rod blank to remove rough spots. Use fine sandpaper to avoid damage.
After sanding, clean the blank with a cloth. Remove dust and oils so glue and paint will stick well.
- Use 400 to 600 grit sandpaper for smooth sanding
- Wipe the blank with a damp cloth after sanding
- Let the blank dry fully before moving on
Attaching The Guides
Attaching guides is a key part of building a fishing rod. Guides help the line move smoothly when casting and reeling.
Placing and securing guides properly improves the rod’s strength and performance. Careful work makes a better fishing experience.
Guide Placement Techniques
Place guides evenly along the rod’s length. This spreads the stress when the line pulls on the rod.
Start with the largest guide near the handle. Then add smaller guides closer to the tip for smooth line flow.
- Keep guides aligned in a straight line
- Space guides closer near the tip
- Use the same side of the rod for all guides
- Check guide angle to match rod curve
Securing Guides With Thread
Use strong thread to wrap the guides tightly to the rod. Tight wraps keep guides from moving or falling off.
Wrap the thread evenly and cover the guide feet fully. Use several layers for strength but avoid lumps.
- Start wrapping a few millimeters before the guide foot
- Keep the thread tight and close together
- Cover the entire guide foot area
- Finish with a secure knot or whip finish
- Apply epoxy to protect the thread
Applying Epoxy
Applying epoxy is a key part of building a fishing rod. It helps protect the rod and keep parts strong.
This guide covers tips for mixing and applying epoxy, plus how to cure and finish it well.
Mixing And Application Tips
Mix epoxy resin and hardener carefully. Use a clean container and stir slowly to avoid air bubbles.
- Measure resin and hardener in the right ratio.
- Stir gently for at least two minutes.
- Apply epoxy with a soft brush or applicator.
- Work in a well-ventilated area to avoid fumes.
- Cover all parts evenly without thick layers.
Curing And Finishing
Let the epoxy cure fully before handling. Curing time depends on temperature and product type.
| Temperature | Approximate Curing Time | Notes |
|---|---|---|
| 70°F (21°C) | 24 hours | Standard room temperature |
| 85°F (29°C) | 12 hours | Faster curing in warm conditions |
| Below 60°F (16°C) | 48 hours or more | Slower curing, may affect finish |
After curing, sand the epoxy lightly to smooth the surface. Use fine-grit sandpaper for best results.
Apply a final thin coat if needed. This adds shine and extra protection to your fishing rod.
Installing The Handle
The handle is an important part of a fishing rod. It helps you hold and control the rod. Installing it correctly makes fishing easier and more comfortable.
This guide covers the main steps for installing the handle. You will learn about different handle types and how to fit and glue the handle to the rod blank.
Handle Types And Selection
Fishing rod handles come in several types. Each type offers different comfort and grip styles. Choose the right handle based on your fishing style and rod use.
- Cork Handles:Lightweight and comfortable. They give a good grip even when wet.
- EVA Foam Handles:Durable and soft. They resist wear and tear well.
- Wood Handles:Classic look with solid feel. They add weight to the rod.
- Composite Handles:Made from mixed materials. They balance strength and comfort.
Fitting And Gluing
Fitting the handle tightly to the rod blank is key. You must prepare the blank and handle before gluing. Use the right glue to keep the handle secure.
| Step | Action | Tip |
|---|---|---|
| 1 | Clean the rod blank and handle inside | Remove dirt and oils for better glue hold |
| 2 | Test fit the handle on the blank | Check if the handle slides on snugly without force |
| 3 | Apply epoxy glue evenly inside the handle | Use a small brush or stick for even spread |
| 4 | Slide the handle onto the blank quickly | Align handle before glue starts to set |
| 5 | Let glue cure fully before use | Follow glue manufacturer’s curing time |
Mounting The Reel Seat
Mounting the reel seat is an important step in building a fishing rod. It holds the reel firmly in place. A well-mounted reel seat ensures comfort and control while fishing.
This guide explains how to position the reel seat and secure it properly on the rod.
Positioning The Reel Seat
Place the reel seat where your hand naturally grips the rod. This spot is usually near the bottom of the handle. It should feel balanced and comfortable.
Check the alignment so the reel faces the correct direction. The reel seat must be straight along the rod’s axis for smooth casting.
- Measure the handle length to find the best spot
- Align the reel seat with the rod guides
- Ensure it fits your hand size
- Mark the position before attaching
Securing Methods
Secure the reel seat firmly to the rod blank. Use strong epoxy or glue made for fishing rods. This prevents the reel from moving during use.
Wrap the reel seat with thread or tape if needed. This adds extra support and keeps it tight. Let the glue dry completely before use.
- Apply a thin layer of epoxy inside the reel seat
- Slide the reel seat onto the marked position
- Use thread wraps for extra hold if needed
- Allow 24 hours for glue to cure fully
- Check the reel seat for tightness before fishing
Testing Your Rod
Testing your fishing rod is an important step after building it. This process ensures your rod works well and lasts long.
You will check its flexibility, strength, and make any needed adjustments or repairs.
Flexibility And Strength Checks
Start by bending your rod gently to see how it flexes. The rod should bend without cracking or feeling weak.
- Hold the handle firmly and press the tip down slowly.
- Look for smooth bending along the rod’s length.
- Test the rod’s strength by applying more pressure carefully.
- Listen for any unusual sounds like cracks or snaps.
- Check the guides and tip for any looseness or damage.
Adjustments And Repairs
If your rod shows weak spots or loose parts, you need to fix them before use. Small repairs keep your rod safe and effective.
| Issue | Cause | Solution |
| Loose guides | Glue failure | Re-glue guides with epoxy |
| Weak bending point | Material defect | Wrap with thread and apply resin |
| Damaged tip | Impact or wear | Replace the tip or reinforce with tape |
| Cracks in blank | Excessive pressure | Use rod repair filler or replace blank |
Tips For Customization
Building your own fishing rod lets you add special features. Customizing makes your rod fit your fishing style.
Use simple ideas to change the look and feel of your rod. Personal touches make your fishing trips more fun.
Adding Personal Touches
Adding your own details gives your rod a unique look. You can change handles, wraps, and guides for comfort and style.
- Use cork or foam grips for better hold
- Wrap handles with colorful thread or tape
- Attach custom decals or name tags
- Choose guides that match your fishing type
- Balance the rod weight for easier casting
Color And Design Ideas
Colors and patterns bring personality to your rod. Pick tones that match your gear or favorite colors.
| Part | Color Ideas | Design Tips |
| Handle | Earth tones, black, or white | Use textured tape for grip and style |
| Rod Blank | Bright red, blue, or green | Try spray paint with clear coat finish |
| Thread Wraps | Contrasting colors like yellow or orange | Use patterns like stripes or diamonds |
| Guides | Silver or black metal | Match guide color to rod blank |

Credit: www.youtube.com
Credit: anglersresource.net
Frequently Asked Questions
What Materials Do I Need To Build A Fishing Rod?
You need a rod blank, guides, reel seat, handle, epoxy, and thread. These basic materials ensure strength, flexibility, and comfort for fishing.
How Do I Choose The Right Rod Blank?
Select a blank based on your fishing style and target fish. Consider length, power, and action for optimal performance and control.
What Is The Best Way To Attach Guides?
Wrap guides tightly with thread near the blank. Use epoxy to secure and protect the wraps for durability and smooth line flow.
How Do I Install The Reel Seat Properly?
Slide the reel seat onto the blank in the correct position. Secure it firmly with epoxy to prevent movement during fishing.
Conclusion
Building your own fishing rod brings joy and pride. It lets you choose each part carefully. You learn how each piece works together. This skill helps you fix rods in the future. Start simple, then try more advanced steps. Enjoy the process, not just the catch.
Fishing feels better with a rod you made. Keep practicing and exploring new techniques. Soon, you’ll have a rod that fits you perfectly. Happy fishing!