Have you ever wanted to create your own fishing rod, tailored exactly to your style and needs? Building your own fishing rod can give you a deeper connection to your hobby and improve your fishing experience.
Imagine casting a rod you crafted with your own hands, designed for the perfect balance and strength. In this guide, you’ll discover simple steps to build a fishing rod that feels just right for you. Keep reading, and soon you’ll have the skills to make a rod that’s truly yours.
Credit: erinmills.ca
Choosing The Right Materials
Building a fishing rod starts with picking good materials. The right parts make the rod strong and easy to use.
Focus on the rod blank, guides, reel seat, and handle. Each part affects how the rod works.
Selecting Rod Blanks
Rod blanks are the main body of the fishing rod. They come in different materials like graphite or fiberglass.
Graphite blanks are light and sensitive. Fiberglass blanks are strong and flexible. Choose based on your fishing style.
- Light blanks are good for small fish and delicate bites.
- Strong blanks work well for big fish and rough conditions.
- Medium blanks are a balance for many fishing types.
Picking Suitable Guides
Guides are the rings on the rod that hold the fishing line. They help the line move smoothly.
Pick guides that match the rod’s length and power. Quality guides reduce friction and wear on the line.
- Metal guides are strong and last long.
- Ceramic inserts help the line slide easily.
- Check guide size to fit your fishing line and reel.
Choosing Reel Seats And Handles
The reel seat holds the reel firmly on the rod. Handles give you a good grip during fishing.
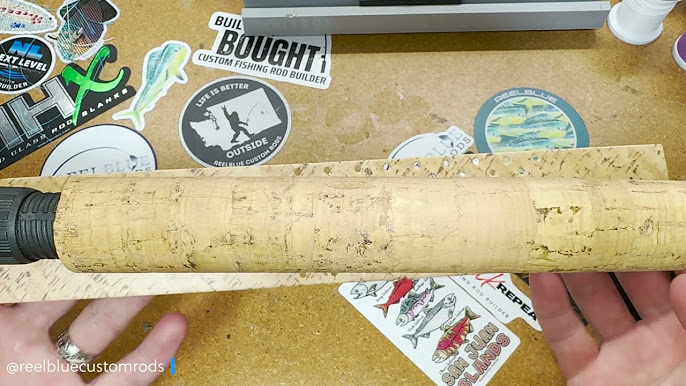
Pick reel seats that fit your reel size. Choose handles made from cork or foam for comfort.
- Cork handles are light and feel good in the hand.
- Foam handles are durable and easy to clean.
- Make sure the reel seat locks tightly to avoid movement.

Credit: anglersresource.net
Essential Tools For Rod Building
Building your own fishing rod takes the right tools. These tools help you work with small parts and delicate materials.
Using proper tools makes the rod strong and easy to use on fishing trips.
Basic Tool Kit
The basic tool kit has items needed for most rod building tasks. These tools help with measuring, cutting, and assembling.
These tools are easy to find and are useful for beginners and experienced builders alike.
- Measuring tape or ruler for exact lengths
- Sharp scissors for cutting thread and tape
- Small pliers for bending and holding parts
- Sandpaper for smoothing rough edges
- Utility knife for precise cuts
- Masking tape to hold parts in place
- Fine-tip marker to mark measurements
Specialized Equipment
Specialized equipment helps with detailed work and increases quality. These tools are more advanced and may cost more.
They help you wrap guides, cure epoxy, and handle delicate rod blanks.
- Rod wrapping jig to hold the rod steady
- Thread tensioner for tight guide wraps
- Epoxy curing light or heat source
- Rod dryer to evenly dry coatings
- Guide alignment tool to place guides correctly
- Flexometer to check rod action and flex
- Brushes for applying epoxy smoothly
Step-by-step Rod Assembly
Building a fishing rod by yourself is a rewarding project. It lets you customize your rod for your fishing style.
This guide explains how to assemble a rod in clear steps. Follow each part carefully for the best results.
Preparing The Blank
The blank is the main rod piece. Start by cleaning the blank to remove dust and oils.
Check the blank for any cracks or damage. Sand the areas where parts will attach to help glue stick better.
Installing Guides
Guides help control the fishing line. Lay them out on the blank to space evenly from tip to handle.
Use epoxy glue to attach each guide. Hold them in place until the glue sets to keep them straight.
- Start with the tip-top guide
- Space the remaining guides evenly
- Align guides in a straight line
- Apply glue carefully to avoid mess
Attaching The Reel Seat
The reel seat holds your fishing reel. Slide it onto the blank where you want to hold the rod.
Use epoxy or rod-building glue to fix the reel seat. Make sure it is tight and aligned with the guides.
- Check the reel seat fits your reel
- Align it with the rod guides
- Apply glue inside the reel seat
- Slide the seat on and let glue dry
Wrapping And Finishing
Wrapping secures the guides and reel seat. Use thread to wrap tightly around these parts.
Apply a clear finish over the wraps. This protects the thread and gives a smooth look.
- Wrap thread evenly without gaps
- Tie knots carefully to secure thread
- Use epoxy finish to seal wraps
- Let finish dry completely before use
Customizing Your Rod
Customizing your fishing rod lets you create a tool that fits your style. It also adds beauty and personality to your gear.
You can change many parts of the rod, like colors and decorations. These small changes make your rod unique and special.
Selecting Thread Colors
Thread colors are important for both strength and look. Choose colors that match your taste or the fishing spot.
- Pick colors that stand out or blend in with nature.
- Use two or more colors to create patterns.
- Consider using UV-resistant threads for longer color life.
- Test colors under sunlight to see how they appear outdoors.
Adding Personal Touches
Adding personal touches makes your rod truly yours. Small details show your style and creativity.
| Personal Touch | Example |
| Handle Wrap | Leather wrap with your initials |
| Rod Decals | Fish designs or name decals |
| Custom Guides | Colored or shaped guide rings |
| Butt Cap | Engraved metal or wood cap |
Common Mistakes To Avoid
Building fishing rods can be fun and rewarding. Avoiding common mistakes helps you create a strong rod.
These errors can make your rod weak or unsafe. Learn what to watch out for during the build.
Guide Placement Errors
Placing guides incorrectly affects how the rod bends and casts. Guides too close or too far cause problems.
Make sure guides line up straight along the rod. Misaligned guides can lead to line tangles and poor casting.
- Place guides evenly from handle to tip
- Check guide alignment from all angles
- Use proper spacing based on rod length
- Avoid placing guides too close to each other
Improper Epoxy Application
Epoxy holds guides and wraps in place. Too much or too little epoxy causes weak spots or lumps.
Apply epoxy evenly and smoothly. Avoid air bubbles and drips for a clean finish that lasts.
- Mix epoxy thoroughly before use
- Use thin coats to avoid dripping
- Rotate the rod while epoxy dries
- Remove air bubbles with a brush or torch
Testing And Maintenance Tips
Building a fishing rod takes effort and care. Testing and maintenance keep it working well. Regular checks help catch problems early.
Proper care makes your rod last longer. It also keeps your fishing experience smooth and safe.
Checking Rod Flexibility
Flexibility is key for a good fishing rod. Test it by bending the rod gently. It should bend without cracking or feeling too stiff.
Look for any weak spots or cracks. These can cause the rod to break during use. Check the whole rod, especially near the guides and handle.
- Bend the rod slowly and evenly
- Listen for unusual sounds like snapping
- Check for visible cracks or chips
- Make sure the rod returns to its shape
Cleaning And Storage
Clean your fishing rod after each use. Saltwater and dirt can damage parts over time. Use fresh water and a soft cloth to wipe it down.
Store the rod in a dry, cool place. Avoid leaving it in direct sunlight or damp areas. Store it horizontally or hanging to prevent bends.
- Rinse rod with fresh water after use
- Dry completely before storing
- Keep rod away from heat and moisture
- Use rod sleeves or cases for protection

Credit: mudhole.com
Frequently Asked Questions
What Materials Are Needed To Build Fishing Rods?
Building fishing rods requires rod blanks, guides, reel seats, handles, epoxy resin, and wrapping thread. These materials ensure strength, flexibility, and durability for effective fishing.
How Long Does It Take To Make A Fishing Rod?
Making a fishing rod typically takes 4 to 6 hours. This includes assembling, wrapping guides, drying epoxy, and final inspection for quality.
Can Beginners Build Their Own Fishing Rods?
Yes, beginners can build fishing rods with proper guidance. Starting with simple rod kits and tutorials helps develop skills gradually and confidently.
What Is The Best Rod Blank For Building Rods?
Graphite rod blanks are popular for their light weight and sensitivity. They offer excellent strength and performance for various fishing styles.
Conclusion
Building fishing rods can be a fun and rewarding hobby. You can create a rod that fits your style and needs. Start with the right materials and follow each step carefully. Practice will help you improve your skills over time.
Enjoy the process and learn from each attempt. Soon, you will have a rod ready for your next fishing trip. This simple guide helps you take the first step toward making your own fishing gear. Give it a try and enjoy fishing like never before.