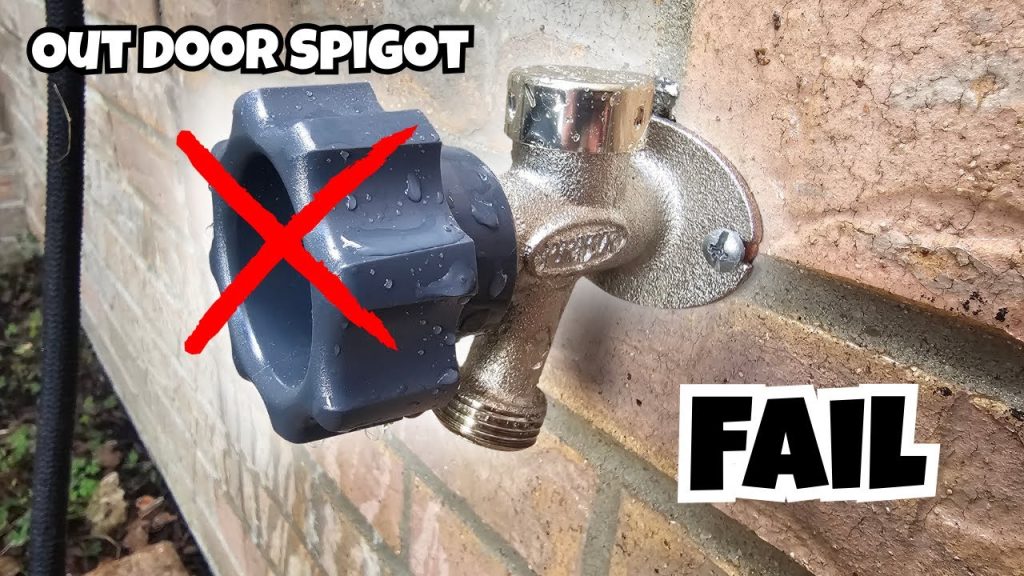
Is your garden hose spigot leaking or just not working right? Changing it yourself might seem tricky, but it’s easier than you think.
Imagine saving money and time by fixing this common problem on your own. In this guide, you’ll discover simple, step-by-step instructions to replace your garden hose spigot quickly and safely. Keep reading, and by the end, you’ll have the confidence to tackle this task with ease and keep your garden watering smoothly.

Credit: www.erynwhalenonline.com
Tools And Materials Needed
Changing a garden hose spigot is a simple task. You only need a few tools and the right materials. This guide will help you prepare.
Gather everything before you start. This saves time and makes the job easier.
Essential Tools
Having the correct tools is important. They help you remove the old spigot and install the new one safely.
- Adjustable wrench
- Pipe wrench
- Plumber’s tape (Teflon tape)
- Bucket to catch water
- Rags or towels
- Wire brush or sandpaper
Choosing The Right Spigot
Select a spigot that fits your plumbing and garden needs. Consider the size and type of connection.
| Spigot Type | Description | Best Use |
| Frost-Free | Prevents freezing in cold weather | Cold climates |
| Standard | Simple design for general use | Warm climates |
| Anti-Siphon | Prevents water backflow | Garden irrigation |
| Wall-Mount | Mounts flush to wall | Home exteriors |

Credit: www.youtube.com
Turning Off The Water Supply
Before changing a garden hose spigot, you need to stop the water. This stops water from flowing out and making a mess.
Turning off the water supply is simple but important. It keeps you safe and avoids water damage.
Locating The Main Valve
The main valve controls water to your outdoor spigot. Find it before you start any work.
Look near your water meter or where water pipes enter your home. The valve is often a round handle or a lever.
- Check near the basement or crawl space
- Look outside near the foundation
- Look for a pipe with a handle or lever
Draining The Hose
After closing the main valve, open the outdoor spigot. This lets water in the hose drain out.
Draining the hose stops water from spilling when you remove the spigot. It also stops freezing in cold weather.
- Open the hose bib fully
- Let all water flow out
- Close the spigot once drained
Removing The Old Spigot
Changing a garden hose spigot is a simple task. You need a few tools and some patience. The first step is to remove the old spigot.
Follow these steps to safely and effectively remove the old spigot. Start with loosening the fittings and handling any stuck or rusted parts.
Loosening The Fittings
Use a wrench to loosen the spigot fittings. Turn the wrench counterclockwise to unscrew the spigot from the pipe.
Be careful not to apply too much force. This could damage the pipe or fittings. If the fittings are too tight, you may need a lubricant.
- Apply lubricant to the fittings
- Let it sit for a few minutes
- Try loosening the fittings again
Handling Stuck Or Rusted Spigots
Stuck or rusted spigots can be tricky. You may need a rust remover to help with this.
Spray the rust remover on the spigot. Wait a few minutes for it to penetrate. Use a pipe wrench to carefully twist and remove the spigot.
- Spray rust remover on the spigot
- Wait for the remover to work
- Use a pipe wrench to remove the spigot

Credit: www.familyhandyman.com
Installing The New Spigot
Replacing a garden hose spigot requires careful steps to ensure a tight fit and no leaks. Installing the new spigot involves preparing the pipe and securing the spigot firmly.
This guide will help you install a new spigot correctly and safely.
Preparing The Pipe
Start by cleaning the pipe threads. Remove any old tape or debris. This helps the new spigot fit tightly and prevents leaks.
- Turn off the water supply.
- Use a wire brush to clean the pipe threads.
- Wipe the threads with a cloth to remove dust.
- Wrap new plumber’s tape clockwise around the threads.
Securing The New Spigot
Attach the new spigot by turning it clockwise onto the prepared pipe threads. Tighten it by hand first, then use a wrench for a secure fit.
| Action | Tool Needed | Tip |
|---|---|---|
| Hand tighten spigot | Hands | Ensure it is straight on the pipe |
| Use wrench to tighten | Adjustable wrench | Do not over-tighten to avoid damage |
| Check for leaks | Visual inspection | Turn on water slowly and watch |
Testing For Leaks
After replacing a garden hose spigot, you must check for leaks. Leaks waste water and can cause damage. Testing helps you find problems early.
This guide covers two important steps: turning the water back on and checking connections. Follow these steps carefully to ensure a tight seal.
Turning Water Back On
Slowly open the main water supply to let water flow to the new spigot. Watch the spigot area closely as water pressure builds. Opening the valve slowly reduces stress on pipes.
- Open the main water valve slowly.
- Observe the spigot for any dripping or spraying.
- Listen for unusual sounds like hissing or dripping.
- Turn off the water immediately if a large leak appears.
- Prepare tools to tighten connections if needed.
Checking Connections
Inspect all fittings where the spigot connects to pipes and hoses. A tight connection stops leaks and keeps water flowing properly.
| Connection Point | What to Check | Signs of Leak |
| Spigot Base | Seal and threads | Water dripping or wetness around base |
| Hose Connector | Washer condition and tightness | Water spraying or dripping from connector |
| Pipe Threads | Thread tape or sealant | Moisture or water pooling near threads |
Maintenance Tips
Keeping your garden hose spigot in good shape saves water and money. Regular care helps avoid leaks and damage. Follow simple steps to maintain your spigot.
This guide covers how to prevent future leaks and care for your spigot during different seasons. Proper maintenance extends the life of your garden hose spigot.
Preventing Future Leaks
Leaks often happen due to worn washers or loose fittings. Check these parts regularly to keep your spigot tight and leak-free. Replace washers if you see cracks or wear.
- Tighten spigot connections with a wrench
- Replace rubber washers annually
- Apply plumber’s tape on threaded areas
- Inspect for cracks or corrosion on the spigot body
- Turn off the water supply when not in use
Seasonal Care
Seasonal changes affect your garden hose spigot. Cold weather can cause water inside to freeze and crack the spigot. Prepare your spigot for winter and summer to avoid damage.
| Season | Maintenance Tip |
| Winter | Turn off water supply and drain the spigot |
| Winter | Cover spigot with an insulated cover |
| Summer | Check for leaks and clean the spigot |
| Summer | Keep the spigot dry when not in use |
Frequently Asked Questions
How Do I Turn Off Water Before Changing A Spigot?
Always shut off the main water supply before replacing a garden hose spigot. This prevents leaks and water damage during the process.
What Tools Do I Need To Replace A Garden Hose Spigot?
You typically need an adjustable wrench, plumber’s tape, and a new spigot. These tools ensure a secure and leak-free installation.
How Can I Prevent Leaks After Installing A New Spigot?
Use plumber’s tape on the spigot threads before installation. Tighten the spigot securely but avoid overtightening to prevent damage.
How Long Does It Take To Change A Garden Hose Spigot?
Replacing a garden hose spigot usually takes 20 to 30 minutes. Time depends on your experience and the condition of plumbing.
Conclusion
Changing a garden hose spigot can save water and prevent leaks. Take your time and follow each step carefully. Use the right tools and check for tight connections. A good spigot keeps your garden healthy and watering easy. Now you can fix or replace your spigot without help.
Enjoy a reliable water flow every time you garden. Simple tasks like this make home care easier and cheaper. Give it a try and see the difference yourself.