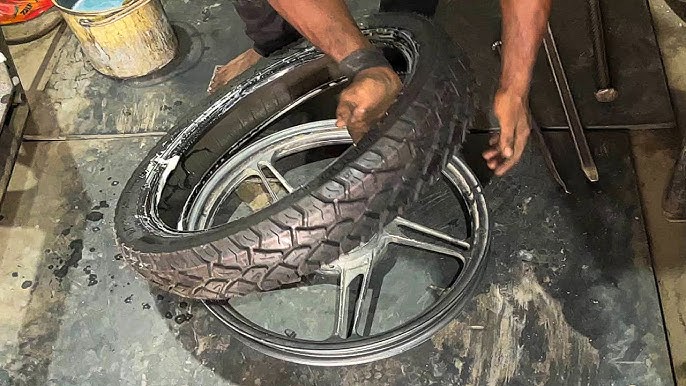
Changing your motorcycle tire might seem like a tough job, but it doesn’t have to be. Imagine saving time and money by doing it yourself, without waiting for a mechanic.
In this guide, you’ll learn simple steps to change your tire safely and quickly. Whether you’re a beginner or just want to brush up your skills, this article will give you the confidence to get the job done right. Ready to take control of your ride’s maintenance?
Let’s dive in!

Credit: www.dirtrider.com
Tools And Materials Needed
Changing a motorcycle tire requires some special tools and materials. Having the right items helps you do the job safely and correctly.
Here is a list of essential tools and materials you need before you start changing your motorcycle tire.
Tire Levers
Tire levers help you remove the old tire from the rim. They are thin and strong to pry the tire bead over the rim edge.
- Use at least two tire levers
- Plastic levers reduce rim damage
- Metal levers work for tough tires
Valve Core Remover
This small tool removes the valve core. Removing the core lets the air escape quickly from the tire.
- Fits inside the valve stem
- Simple twist design
- Usually included in tire repair kits
Bead Breaker
A bead breaker helps loosen the tire bead from the rim. It makes it easier to remove the tire without damage.
- Manual or hydraulic types available
- Use carefully to avoid rim dents
- Essential for tight-fitting tires
Air Compressor Or Pump
You need an air compressor or a strong pump to inflate the new tire. Proper pressure keeps the tire safe to ride.
- Check recommended tire pressure
- Use a pressure gauge for accuracy
- Some pumps fit motorcycle valves
Soapy Water Or Lubricant
Soapy water helps slide the tire bead over the rim. It makes mounting the new tire easier and faster.
- Mix mild soap with water
- Avoid harsh chemicals
- Apply around tire bead and rim edge
Wrenches And Sockets
Wrenches and sockets remove the wheel from the motorcycle. You need the right size for your bike’s axle nuts.
- Common sizes: 17mm, 19mm, 22mm
- Use a breaker bar for tight nuts
- Keep tools organized to avoid loss
Rags And Gloves
Rags clean dirt and grease from your hands and tools. Gloves protect your hands from cuts and dirt.
- Use clean rags to wipe parts
- Wear gloves for safety
- Keep rags handy during the job
New Tire
Choose a tire that fits your motorcycle rim size and riding style. Check the tire for defects before installing.
- Match tire size with old tire
- Check tire tread and sidewall
- Follow manufacturer guidelines

Credit: www.youtube.com
Preparing The Motorcycle
Changing a motorcycle tire starts with good preparation. This makes the process safer and easier.
Follow the steps below to get your motorcycle ready before you remove the tire.
Secure The Motorcycle
Park your motorcycle on a flat surface. Use a center stand or paddock stand if available. This stops the bike from moving while you work.
Gather Necessary Tools
Collect all tools needed for the tire change. Having everything ready saves time and avoids frustration.
- Tire irons or levers
- Wrench set
- Valve core remover
- Air pump or compressor
- Bead breaker (optional)
- Wheel balancer (optional)
- Gloves and safety glasses
Remove Brake Components
Before taking off the wheel, remove brake calipers or discs if they block wheel removal. This prevents damage.
| Brake Part | Action | Tools Needed |
|---|---|---|
| Front Brake Caliper | Unscrew bolts and set aside | Wrench set |
| Rear Brake Disc | Remove retaining bolts | Allen keys or socket set |
| Brake Pads | Check wear and clean | Brush or cloth |
Deflate The Tire
Use a valve core remover to let air out. Fully deflating the tire helps in removing it from the rim safely.
Removing The Wheel
Removing the motorcycle wheel is the first step to change the tire. It requires careful handling to avoid damage.
This guide explains how to loosen the axle nut, detach brake parts, and take off the wheel safely.
Loosening The Axle Nut
Start by placing the motorcycle on a stable stand. Use the correct size wrench or socket to loosen the axle nut.
- Locate the axle nut on the wheel hub.
- Hold the wheel steady to prevent it from turning.
- Turn the wrench counterclockwise to loosen the nut.
- Do not remove the nut completely yet; just loosen it enough.
Detaching Brake Components
Before removing the wheel, detach any brake parts connected to it. This step avoids brake damage and ensures free wheel removal.
- Brake caliper bolts
- Brake pads if needed
- Brake disc if it blocks wheel removal
Taking Off The Wheel
Once the axle nut is loose and brake parts detached, remove the wheel from the motorcycle frame carefully.
| Action | Tip |
| Slide out the axle bolt | Support the wheel to avoid dropping it |
| Lift the wheel away | Check for any stuck brake parts or cables |
| Place the wheel on a clean surface | Prevent dirt or damage to the tire and rim |

Credit: www.youtube.com
Removing The Old Tire
Removing the old tire from your motorcycle is the first step before installing a new one. This process requires care and the right tools to avoid damage.
The main tasks include deflating the tire, breaking the bead, and using tire levers to take off the tire from the rim.
Deflating The Tire
Before removing the tire, you must let out all the air inside it. This reduces pressure and makes it safe to work on.
To deflate the tire, locate the valve stem and press the valve core to release the air slowly.
Breaking The Bead
The bead is the edge of the tire that seals against the rim. Breaking the bead means separating it so you can remove the tire.
- Place the wheel on a flat surface.
- Use a bead breaker tool or a sturdy lever to press the tire sidewall away from the rim.
- Work around the tire, pushing the bead down on both sides.
- Make sure the bead is fully separated before moving on.
Using Tire Levers
Tire levers help pry the tire off the rim after the bead is broken. Use them carefully to avoid rim damage.
- Insert the first tire lever between the tire and rim.
- Hook it onto a spoke or hold it in place.
- Insert a second lever a few inches away.
- Lift the tire bead over the rim edge using the levers.
- Slide the levers around the rim to free one side of the tire.
- Repeat the process for the other side if needed.
Inspecting The Rim
Checking the rim is a key step before changing your motorcycle tire. The rim holds the tire in place and must be in good shape to ensure safety and performance.
Look closely for damage or dirt that can affect the tire fitting. A clean, undamaged rim helps the new tire seal properly and last longer.
Check For Physical Damage
Inspect the rim for dents, cracks, or bends. These issues can cause air leaks or tire failure. Use a flashlight if needed to see small cracks.
Clean The Rim Surface
Remove dirt, rust, and old tire residue from the rim. Use a wire brush or sandpaper to clean metal surfaces. This helps the tire bead seal tightly.
- Wipe the rim with a clean cloth
- Use a mild detergent for stubborn dirt
- Dry the rim completely before fitting the tire
Check Rim Dimensions
Confirm that the rim width and diameter match the new tire size. Using the wrong rim size can cause poor tire fit and handling problems.
| Rim Size | Compatible Tire Size |
| 17 x 3.50 inches | 90/90-17, 100/90-17 |
| 18 x 2.50 inches | 80/90-18, 90/90-18 |
| 19 x 2.75 inches | 90/90-19, 100/90-19 |
Inspect Valve Hole And Bead Seat
Check the valve hole for any damage or deformation. A damaged valve hole can cause air leaks.
Look at the bead seat area where the tire rests. It should be smooth and free of sharp edges.
Installing The New Tire
Installing a new motorcycle tire takes care and attention. You must prepare the tire and rim correctly for a safe fit.
Follow these steps to install your new tire properly. This guide covers lubricating the bead, mounting the tire, and seating the bead.
Lubricating The Bead
Lubricating the tire bead helps it slide onto the rim easily. Use a special tire lubricant or soapy water.
Apply the lubricant evenly around the bead area. This reduces friction and prevents damage during mounting.
- Use a soft brush or cloth to apply lubricant
- Cover the entire bead on both sides of the tire
- Do not use oil or grease as they can damage the tire
Mounting The Tire On The Rim
Place the rim on a stable surface. Start by fitting one side of the tire bead over the rim edge.
Work the tire bead around the rim using tire irons or your hands. Be careful not to pinch the tube if you use one.
- Begin at the valve stem to align the tire properly
- Push the bead over the rim edge gradually
- Use tire irons gently to avoid rim or tire damage
Seating The Bead
After mounting, the bead must seat tightly against the rim. Inflate the tire slowly to help the bead pop into place.
Listen for a popping sound. This means the bead is seated evenly all around the rim.
- Check tire pressure and inflate to the recommended level
- Inspect the tire edge to confirm the bead is flush
- If bead does not seat, deflate and reposition the tire
Inflating The Tire
Inflating a motorcycle tire correctly is important for safety. Proper air pressure improves handling and tire life.
Use the right tools and check the recommended pressure before inflating. This helps prevent over or under-inflation.
Check The Recommended Pressure
Find the correct tire pressure in your motorcycle’s manual or on the tire sidewall. This number shows the ideal air pressure.
Use this pressure as a guide. Different tires and motorcycles need different pressures for best performance.
Prepare Your Equipment
Gather a tire pressure gauge and an air pump. A digital gauge gives the most accurate reading.
Make sure the pump fits your valve stem type. Most motorcycles use Schrader or Presta valves.
Remove The Valve Cap
Unscrew the small cap on the tire valve. Keep it safe so you can replace it later.
Removing the cap lets you connect the pump or gauge to the valve easily.
Attach The Pump And Inflate
Push the pump nozzle firmly onto the valve stem. Make sure it fits tightly to avoid air leaks.
Start pumping air in. Stop often to check the pressure with the gauge.
- Inflate slowly to avoid overfilling
- Check pressure every few pumps
- Stop when reaching recommended pressure
Check And Adjust The Pressure
Use the pressure gauge to see the tire pressure. If too high, press the valve to let air out.
If too low, add more air. Repeat until the pressure matches the recommended level.
Replace The Valve Cap
Screw the valve cap back on to protect the valve from dirt and moisture. This keeps the tire seal safe.
Make sure the cap is tight but do not overtighten it.
Reinstalling The Wheel
Reinstalling a motorcycle wheel is a key part of changing the tire. It keeps the bike safe and smooth to ride. You must do it carefully and follow each step.
This guide covers aligning the wheel, tightening the axle nut, and reattaching brake parts. Each step ensures the wheel fits correctly and works well.
Aligning The Wheel
Align the wheel straight between the forks or swingarm. Proper alignment stops wobbling and uneven tire wear. Check the chain tension too.
- Lift the wheel into place carefully.
- Make sure the axle slides through smoothly.
- Adjust the wheel so it sits centered.
- Check the marks on the swingarm for alignment.
- Ensure the chain is tight but not too tight.
Tightening The Axle Nut
Secure the axle nut firmly to hold the wheel. Tightening the nut properly keeps the wheel stable and safe while riding.
| Tool | Purpose | Torque Range |
| Torque Wrench | Apply correct tightness | 40-60 Nm |
| Socket Wrench | Loosen or tighten nut | Not for final torque |
| Spanner | Hold axle in place | N/A |
Use a torque wrench to tighten the nut to the bike maker’s specs. Do not overtighten, or you could damage parts.
Reattaching Brake Components
After the wheel is in place, reconnect the brake parts you removed. This keeps your brakes working right and your rides safe.
- Attach the brake caliper to the mount.
- Secure the bolts to the correct tightness.
- Reconnect brake pads if removed.
- Check the brake rotor fits between pads.
- Test the brake lever for good pressure.
Final Checks
After changing a motorcycle tire, it is important to do final checks. These checks make sure your bike is safe and ready to ride.
Take your time to inspect key areas. This will help you avoid problems on the road.
Checking Tire Pressure
Tire pressure affects how your motorcycle handles and stops. Use a tire pressure gauge to check the pressure.
Compare the reading with the pressure suggested in your motorcycle manual. Add or release air to reach the correct pressure.
- Check pressure when tires are cold
- Use a reliable tire pressure gauge
- Adjust pressure to the recommended level
Testing Wheel Alignment
Proper wheel alignment keeps your motorcycle stable. Look at the wheel from the front and back to see if it is straight.
If the wheel looks off-center, it may cause uneven tire wear or handling issues. Fix alignment before riding.
- Check wheel alignment visually
- Spin the wheel to listen for unusual sounds
- Ensure the wheel spins freely without wobbling
Ensuring Brake Functionality
Brakes must work perfectly after changing a tire. Test both front and rear brakes carefully before riding.
Check brake pads for wear and make sure brake fluid is at the right level. Press the brake levers and feel for firm resistance.
- Inspect brake pads for damage or wear
- Check brake fluid levels in the reservoir
- Test brake levers for firm, steady pressure
- Make sure wheels stop quickly when brakes apply
Safety Tips And Maintenance
Changing a motorcycle tire needs care and attention. Safety is the top priority during the process.
Proper maintenance helps your motorcycle run smoothly and keeps you safe on the road.
Prepare Your Workspace
Choose a flat, clean, and well-lit area to work on your motorcycle. Use a sturdy stand to keep the bike steady.
Safety Gear And Tools
Wear gloves and eye protection to avoid injuries. Make sure you have the right tools ready before starting.
- Tire irons or levers
- Air pump or compressor
- Wrenches and sockets
- Valve core remover
- Bead breaker tool
- Lubricant for tire beads
Remove The Old Tire
Deflate the tire completely before removing it. Break the tire bead from the rim carefully to avoid damage.
Inspect And Clean The Rim
Check the rim for cracks or dents. Clean the rim surface to ensure the new tire seals properly.
Install The New Tire
Apply lubricant to the tire beads for easier installation. Fit one side of the tire onto the rim first.
Use tire irons to place the other side carefully without pinching the tube (if present).
Inflate And Check
Inflate the tire slowly to the recommended pressure. Check for leaks and bead seating all around the rim.
| Task | Safety Tip |
| Deflate Old Tire | Wear gloves to protect hands from sharp objects |
| Break Bead | Use proper tools to avoid rim damage |
| Install New Tire | Lubricate beads for smooth fitting |
| Inflate Tire | Check pressure with reliable gauge |
| Final Check | Ensure tire is evenly seated before riding |
Frequently Asked Questions
How Do I Know When To Change My Motorcycle Tire?
Check tire tread depth and look for cracks or bulges. Replace tires if tread is below 1/32 inch or if damaged. Regularly inspect tires for safety and optimal performance.
What Tools Are Needed To Change A Motorcycle Tire?
You need tire irons, a valve core remover, bead breaker, rim protectors, and an air compressor. A tire balancing stand is also helpful for proper installation and safety.
How To Safely Remove A Motorcycle Tire From The Rim?
Deflate the tire completely, use bead breaker to loosen tire bead. Insert tire irons carefully to pry tire off the rim without damaging it. Work slowly to avoid rim scratches.
Can I Change A Motorcycle Tire At Home Without Professional Help?
Yes, with the right tools and instructions, you can change it yourself. Follow safety steps, use proper tools, and take your time to avoid mistakes.
Conclusion
Changing a motorcycle tire is easier than it seems. Follow the steps carefully and take your time. Use the right tools and stay safe during the process. Practice will help you get better and faster. Keeping your tires in good shape improves your ride and safety.
Don’t rush and check everything twice before you finish. Now, you have the skills to handle tire changes yourself. Ride with confidence and enjoy the road ahead.