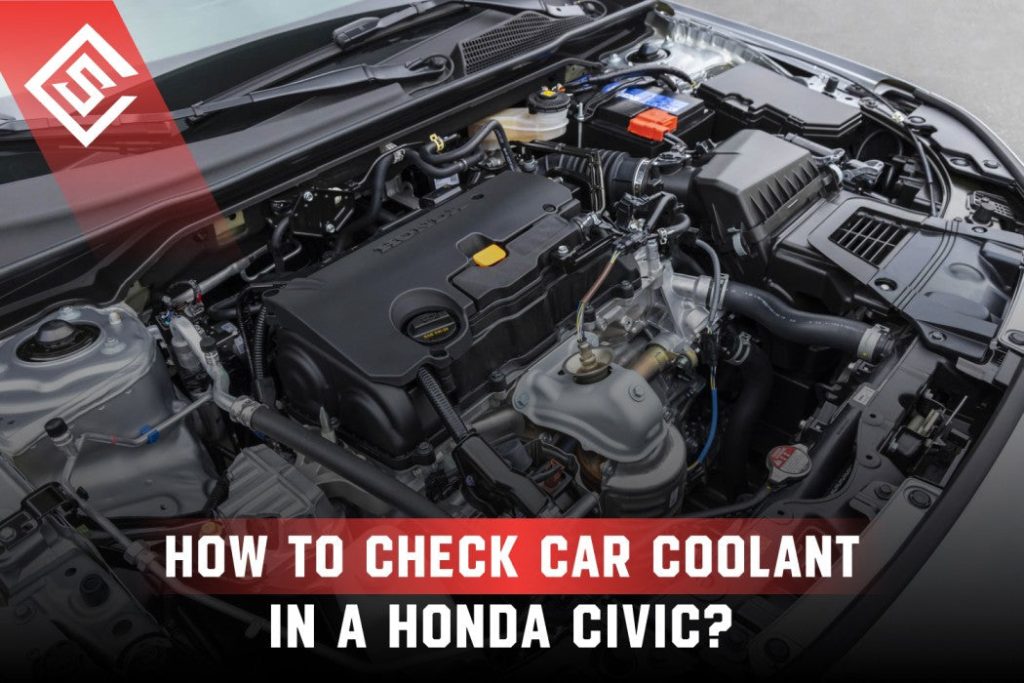
Keeping your Honda Civic running smoothly means paying attention to the little things—like the coolant level. You might not think about it often, but checking your coolant is key to preventing engine overheating and costly repairs.
Wondering how to quickly and easily check the coolant level in your Honda Civic? You’re in the right place. This guide will walk you through simple steps that anyone can follow, even if you’re not a car expert. Keep reading to learn how to protect your engine and avoid unexpected breakdowns.
Why Coolant Level Matters
Maintaining the right coolant level in your Honda Civic is vital. Coolant keeps the engine running smoothly and prevents damage. Ignoring coolant levels can lead to costly repairs and engine failure. Knowing why coolant matters helps you take better care of your car.
Role Of Coolant In Engine Health
Coolant controls the engine temperature. It absorbs heat and stops the engine from overheating. It also protects metal parts from rust and corrosion. Proper coolant flow keeps the engine working efficiently. Without enough coolant, the engine parts can wear out faster.
Risks Of Low Coolant Levels
Low coolant can cause the engine to overheat quickly. Overheating may lead to serious engine damage. It can cause the head gasket to fail, resulting in leaks. The engine might lose power or even stop running. Low coolant also raises the risk of breakdowns on the road.
Credit: www.honda.ae
Tools Needed For Checking Coolant
A flashlight helps to see inside the engine bay clearly. Gloves protect your hands from dirt and heat. A clean cloth is useful for wiping the coolant reservoir before checking.
Checking the coolant level in your Honda Civic is a straightforward task that can help maintain your car’s performance. To do this efficiently, you’ll need the right tools and safety gear. Having these on hand not only ensures a smooth process but also keeps you safe and your vehicle in great shape.Safety Gear
Before you begin, prioritize safety. Safety goggles are essential to protect your eyes from any splashes of coolant, which can be harmful. Consider wearing gloves as well; they provide a barrier against skin irritation from the chemicals in the coolant. Always work in a well-ventilated area to avoid inhaling any fumes.Essential Tools
The tools required are minimal but crucial. A funnel is helpful for adding coolant without spills. It ensures precision, which is particularly useful when dealing with small openings. Keep a clean rag or paper towel nearby to wipe up any drips or spills. This not only keeps your workspace tidy but also prevents the coolant from damaging your vehicle’s components. Have you ever spilled coolant on your engine and had to clean up the mess? A small flashlight can be incredibly useful for peering into the depths of the engine bay, especially if you’re checking the coolant level in low light. Lastly, a coolant tester can help you determine the quality and concentration of the coolant, ensuring it’s up to standard for optimal engine performance. By equipping yourself with these tools and safety gear, you can confidently check and maintain the coolant level in your Honda Civic. Are you ready to take charge of your car’s well-being with just a few simple tools?Preparing Your Honda Civic
Preparing your Honda Civic before checking the coolant level is important. It keeps you safe and prevents damage to the engine. Taking a few simple steps makes the process easier and more accurate.
Ensuring The Engine Is Cool
Never check the coolant when the engine is hot. Hot coolant can spray and cause burns. Wait at least 30 minutes after turning off the car. This lets the engine cool down safely. Checking when cool gives a true reading of the coolant level.
Locating The Coolant Reservoir
Open the hood of your Honda Civic carefully. Look for a translucent plastic tank near the engine. This is the coolant reservoir. It usually has a colored cap, often yellow or white. The reservoir is marked with “MIN” and “MAX” lines. These lines show the safe coolant level range.

Credit: www.youtube.com
Steps To Check Coolant Level
Checking the coolant level in your Honda Civic is a simple yet essential task that helps keep your engine running smoothly. Understanding how to properly check the coolant ensures your vehicle avoids overheating and potential engine damage. Let’s break down the steps so you can confidently monitor your coolant level anytime.
Visual Inspection
Start by locating the coolant reservoir under the hood. It’s usually a translucent plastic tank with a brightly colored cap.
Look for any obvious signs of leaks or cracks around the reservoir. These can affect coolant levels and should be addressed immediately.
Remember, the engine should be cool before you open the cap. Opening it while hot can cause hot coolant to spray out, which is dangerous.
Reading The Level Markings
On the side of the coolant reservoir, you’ll find markings labeled “Full” and “Low.” These indicate the acceptable range for coolant levels.
Check where the coolant sits relative to these marks. If the fluid is below the “Low” mark, it’s time to add coolant.
Ensure you’re viewing the reservoir at eye level for an accurate reading. Tilting your head or standing too far away can mislead you.
When To Add Coolant
If your coolant is low, top it off with the correct type recommended for your Honda Civic. Using the wrong coolant can harm your engine.
Never fill the reservoir above the “Full” mark. Overfilling can cause pressure buildup and damage the system.
Ask yourself: Have you noticed your engine temperature gauge rising or any warning lights? These signs often mean it’s time to check and add coolant right away.
Choosing The Right Coolant
Choosing the right coolant is important for your Honda Civic’s engine health. Coolant helps keep the engine at the right temperature. It prevents overheating and protects against corrosion. Using the wrong coolant can cause damage and reduce performance. Know what type fits your vehicle before topping up or changing the coolant.
Types Suitable For Honda Civic
Honda Civics usually use specific coolant types. Most models require Honda Long Life Antifreeze/Coolant Type 2. This coolant is pre-mixed and ready to use. It offers excellent protection against rust and freezing. Avoid using generic or unknown brands. They might not meet Honda’s standards.
Here are key points about suitable coolants:
- Use Honda Type 2 for best results.
- Do not mix different coolant types.
- Avoid using plain water alone.
- Check your owner’s manual for model-specific advice.
Mixing Coolant And Water
Mixing coolant and water properly is critical. The right mixture prevents freezing and boiling over. Honda’s recommended mix is 50% coolant and 50% distilled water. Tap water can cause mineral buildup inside the engine. Always use distilled or deionized water for the mix.
Follow these tips for mixing:
- Use clean containers to mix coolant and water.
- Never use pure coolant without water.
- Do not overfill the coolant reservoir.
- Check levels regularly and top up as needed.
Adding Coolant Safely
Adding coolant safely to your Honda Civic is crucial for maintaining your engine’s health and preventing overheating. Handling coolant with care avoids spills and protects you from harmful chemicals. Let’s dive into the best ways to open the reservoir and pour coolant properly, so you can keep your car running smoothly without any mess or risk.
How To Open The Reservoir
First, make sure your engine is completely cool. Opening the reservoir cap when the engine is hot can cause hot coolant to spray out, leading to burns.
Locate the coolant reservoir—it’s usually a translucent plastic tank near the radiator. The cap might be labeled “coolant” or have a warning symbol.
Turn the cap slowly to release any pressure before fully removing it. If you hear a hissing sound, pause and wait until it stops to avoid sudden sprays.
Pouring Coolant Properly
Use a funnel to pour coolant into the reservoir. This helps prevent spills and directs the liquid exactly where it needs to go.
Fill the reservoir to the “Full” or “Max” line marked on the side. Avoid overfilling, as coolant expands when heated and can spill out, causing damage.
After filling, securely tighten the cap. Double-check that it’s firmly closed to maintain the right pressure in the cooling system.
Have you ever spilled coolant while refilling? Using these simple steps can save you from that frustrating cleanup and keep your Honda Civic’s engine running safely.
Signs Of Coolant Problems
Coolant problems in your Honda Civic can cause serious engine damage. Early signs help prevent costly repairs and keep your car running smoothly. Watch out for visible and performance-related symptoms. Recognizing these signs quickly can save time and money.
Leaks And Stains
Check under your car for puddles or wet spots. Coolant is often bright green, orange, or pink. Stains around the radiator or engine area also indicate leaks. A sweet smell near the engine bay can signal coolant escaping. Small leaks can worsen and cause engine overheating.
Overheating Symptoms
The temperature gauge rising above normal is a clear sign. Steam coming from the hood means the engine is too hot. Your car might lose power or run rough during overheating. Warning lights on the dashboard often come on with overheating. Stop driving immediately to avoid severe engine damage.
Regular Maintenance Tips
Keeping your Honda Civic’s coolant level in check is crucial for preventing engine overheating and costly repairs. Regular maintenance not only extends the life of your vehicle but also ensures smooth performance every time you hit the road. Let’s look at some practical tips to help you stay on top of your coolant care.
Checking Coolant Periodically
Make it a habit to inspect your coolant level at least once a month. Open the hood only when the engine is cool to avoid burns. Locate the coolant reservoir—it’s usually a translucent tank with markings for minimum and maximum levels.
Check if the coolant is between these marks. If it’s low, add a mixture of 50% coolant and 50% distilled water. Avoid using plain water or other fluids, as they can damage your engine. Have you noticed any unusual temperature gauge readings lately? That’s a sign to check your coolant immediately.
When To Flush And Replace
Coolant doesn’t last forever. Over time, it loses its ability to protect your engine from corrosion and overheating. Honda recommends flushing and replacing coolant every 30,000 miles or every two to three years, whichever comes first.
Flushing involves draining the old coolant and refilling with fresh fluid to remove deposits and contaminants. If you drive in extreme temperatures or heavy traffic, consider doing this more often. Ignoring this can lead to clogged radiators or engine damage—something you definitely want to avoid.
Credit: www.civinfo.com
Frequently Asked Questions
How Do I Check Coolant Level On A Honda Civic?
Open the hood and locate the coolant reservoir. Check the level against the “Full” and “Low” marks. Ensure the engine is cool before checking.
When Should I Check The Coolant Level In Honda Civic?
Check coolant level monthly or before long trips. Always inspect when the engine is cold to avoid injury.
What Type Of Coolant Does A Honda Civic Need?
Honda Civics use Honda Type 2 coolant or equivalent antifreeze. Always check your owner’s manual for the exact specification.
Can Low Coolant Cause Engine Problems In Honda Civic?
Yes, low coolant can lead to overheating and engine damage. Regularly checking and maintaining coolant prevents costly repairs.
Conclusion
Checking the coolant level in your Honda Civic keeps the engine safe. Regular checks help prevent overheating and costly repairs. Open the hood carefully and find the coolant reservoir. Look at the marks for low and full levels. Always check when the engine is cool.
Keeping the coolant at the right level helps your car run smoothly. Small steps like this save time and money. Stay safe and keep your Civic in good shape. Simple and quick checks make a big difference.