If you own a Hoshizaki ice maker, you know how important it is to keep it clean. A dirty ice maker can affect the taste of your ice and even cause it to break down.
But cleaning it doesn’t have to be hard or time-consuming. You’ll discover simple and effective steps to clean your Hoshizaki ice maker quickly and safely. By following these tips, you’ll make sure your ice stays fresh, your machine runs smoothly, and you avoid costly repairs.
Ready to get started? Let’s dive in!
Credit: www.partsfe.co.uk
Why Clean Your Ice Maker
Keeping your Hoshizaki ice maker clean is more than just about hygiene; it directly impacts the quality of your ice and the efficiency of your machine. You might wonder why a routine cleaning is necessary if the ice looks clear and fresh. The truth is, even invisible buildup inside the machine can affect its performance and your health.
Benefits Of Regular Cleaning
Regular cleaning helps maintain the taste and clarity of the ice. You avoid unpleasant odors and strange tastes that develop from mineral deposits and bacteria. A clean machine runs more efficiently, reducing energy consumption and saving you money on repairs.
Think about how much water and electricity your ice maker uses. Keeping it clean ensures it doesn’t have to work harder than necessary. You’ll also extend the machine’s lifespan, protecting your investment and avoiding costly replacements.
Risks Of Neglecting Maintenance
Ignoring maintenance can lead to serious problems like clogged water lines and mold growth. These issues not only reduce ice quality but can pose health risks to you and anyone who consumes the ice. Have you ever noticed a strange smell from your ice? That’s a warning sign.
Neglect can cause the machine to break down unexpectedly, disrupting your daily routine or business operations. Repair bills can quickly add up, and in some cases, damage might be irreversible. Don’t wait for a problem to appear—cleaning prevents these risks before they start.

Credit: www.youtube.com
Tools And Supplies Needed
Before you start cleaning your Hoshizaki ice maker, gathering the right tools and supplies is crucial. Having everything ready saves time and ensures the job gets done thoroughly. Using the correct products and equipment also protects your machine from damage and keeps it running efficiently.
Cleaning Solutions
Choosing the right cleaning solutions is essential. You’ll need a food-safe ice machine cleaner designed specifically for Hoshizaki models or other commercial ice makers. These cleaners effectively remove mineral buildup, scale, and other deposits without harming the components.
Some people try homemade mixtures, but they often don’t clean deep enough or can cause corrosion. Using a cleaner recommended by Hoshizaki guarantees safety and performance. Don’t forget a sanitizer to disinfect the ice bin and water reservoir after cleaning.
Essential Equipment
Having the right equipment makes the cleaning process smoother and more efficient. You’ll need:
- Soft cloths or spongesto wipe surfaces without scratching.
- Brushes with soft to medium bristlesfor scrubbing hard-to-reach areas.
- A bucketto mix cleaning solution and rinse water.
- A measuring cupto get the right amount of cleaner and sanitizer.
- Glovesto protect your hands from chemicals.
Have you ever started cleaning only to realize you’re missing a key tool? Preparing these items in advance helps avoid interruptions. It also means you can focus on getting your ice maker spotless and ready to produce clean, fresh ice.
Preparing The Ice Maker
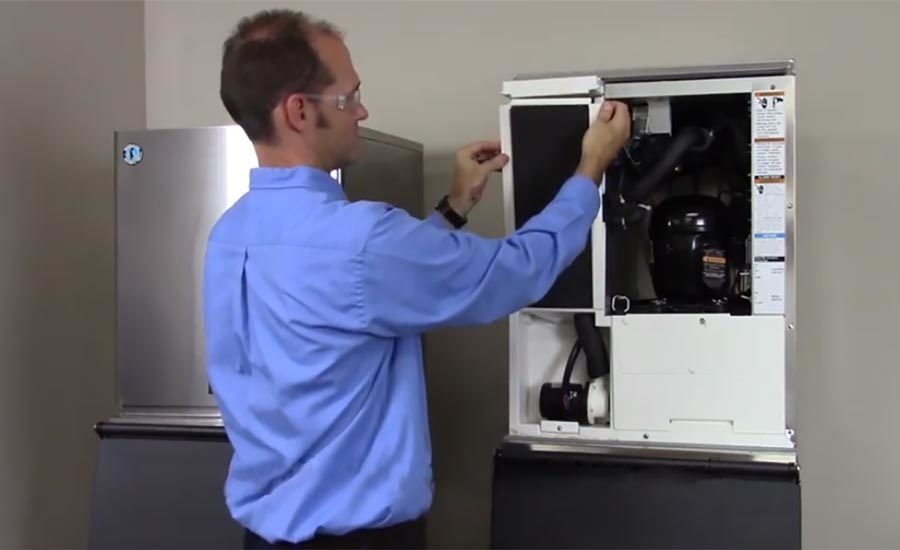
Preparing your Hoshizaki ice maker for cleaning is essential to maintain its performance and extend its lifespan. Before diving into the cleaning process, taking a few careful steps can make the job smoother and safer. These preparatory actions prevent damage and ensure you reach all the spots that need attention.
Turning Off The Machine
Start by turning off your ice maker completely. This step is crucial to avoid electrical hazards and to stop the machine from producing ice during cleaning. Locate the power switch, usually found on the control panel or near the power cord, and switch it off.
If you’re unsure where the main power switch is, check your user manual or the label on the unit. Disconnecting the power plug from the outlet is an extra safety measure that many professionals recommend. Have you ever tried cleaning a machine that suddenly turned on? Avoid that risk by double-checking the power is fully off.
Removing Ice And Water
Next, clear out all the ice from the ice bin. Leaving ice inside can interfere with the cleaning solutions and prevent thorough cleaning. Use a scoop or your hands to remove the ice, and transfer it to a clean container if you want to save it temporarily.
After the ice is removed, drain any remaining water from the reservoir. Most Hoshizaki models have a drain plug or hose at the back or bottom. Make sure you place a bucket or tray underneath to catch the water, avoiding spills on your floor.
Removing all ice and water helps you access internal parts easily and ensures the cleaning agents work effectively. Have you noticed how leftover water sometimes smells stale? Getting rid of it before cleaning saves you from dealing with unpleasant odors later.
Credit: www.achrnews.com
Step-by-step Cleaning Process
Cleaning a Hoshizaki ice maker ensures your machine runs efficiently. A thorough cleaning prevents mold and bacteria build-up. Follow this step-by-step process to keep your ice maker in top condition.
Cleaning The Ice Bin
Start by turning off the ice maker and unplugging it. Remove any remaining ice from the bin. Use a soft cloth and warm water to wipe down the interior. Add a mild detergent for stubborn stains. Rinse thoroughly to remove soap residue.
Washing The Water Reservoir
Remove the water reservoir for cleaning. Use warm water and vinegar to scrub its interior. This mix helps eliminate mineral build-up. Rinse it well with clean water. Ensure all cleaning agents are completely washed away.
Scrubbing The Interior Components
Take out removable parts like trays and filters. Soak them in warm soapy water. Use a soft brush to scrub off any deposits. Rinse each component thoroughly. Dry them with a soft towel before reassembling.
Rinsing And Drying
Rinse the entire interior with clean water. Use a damp cloth for hard-to-reach areas. Ensure no cleaning solution remains. Dry all parts thoroughly with a clean towel. Reassemble the ice maker and plug it back in. Your ice maker is now clean and ready to use.
Sanitizing The Machine
Sanitizing your Hoshizaki ice maker is essential to keep the ice clean and safe. Regular sanitization stops bacteria and mold from growing inside the machine. This process protects your health and improves the taste of the ice. Proper sanitizing also extends the life of the ice maker and keeps it running smoothly.
Choosing The Right Sanitizer
Select a sanitizer designed for ice machines. Avoid harsh chemicals that can damage the unit. Look for food-safe sanitizers approved by health authorities. Common options include:
- Quaternary ammonium compounds
- Chlorine-based sanitizers
- Hydrogen peroxide solutions
Check the product label for instructions and dilution rates. Using the correct sanitizer ensures effective cleaning without harming the machine.
Application Techniques
Start by turning off and unplugging the ice maker. Remove all ice and empty the water reservoir. Mix the sanitizer with water according to the label. Use a soft cloth or sponge to apply the solution inside.
- Wipe all surfaces that touch water and ice
- Clean the ice storage bin and water lines carefully
- Let the sanitizer sit for the recommended time
Rinse all parts thoroughly with clean water to remove sanitizer residue. Dry the machine before turning it back on. Regularly sanitizing keeps your ice fresh and the machine in top condition.
Reassembling And Restarting
Reassembling and restarting your Hoshizaki ice maker after cleaning is a crucial stage. It ensures your machine runs smoothly and produces clean, quality ice. Taking the time to carefully put everything back and run a test can save you from future headaches.
Putting Parts Back
Start by carefully placing each part back in its original position. Make sure the water filter, ice bin, and any removable panels are securely attached. Check the seals and gaskets for proper alignment to prevent leaks.
Pay special attention to the water lines and electrical connections. Loose fittings here can cause malfunctions or water damage. If any parts seem worn or damaged during reassembly, consider replacing them now to avoid bigger problems later.
Running A Test Cycle
Once everything is reassembled, power on your ice maker and initiate a test cycle. Watch closely for any unusual noises or leaks. This is your chance to catch issues before regular use.
Check the ice production rate and the clarity of the ice cubes. If the ice looks cloudy or the machine is slow, you might need to re-clean or adjust some components. What signs do you look for that tell you your ice maker needs attention?
Tips For Maintaining Sparkling Ice
Maintaining sparkling ice from your Hoshizaki ice maker keeps drinks fresh and tasty. Clean ice machines work better and last longer. Simple care prevents bad odors and germs. Follow easy tips to keep your ice clear and pure.
Routine Cleaning Schedule
Set a regular cleaning plan for your ice maker. Clean the machine at least every six months. In busy places, clean every three months. Wipe surfaces and wash removable parts often. This stops dirt and bacteria from building up.
- Turn off and unplug the machine before cleaning.
- Use a soft cloth and mild detergent on surfaces.
- Clean the ice bin and water reservoir.
- Rinse parts well to remove detergent.
- Dry all parts before reassembling.
Preventing Scale Build-up
Hard water causes scale inside ice machines. Scale affects ice quality and machine function. Use a descaling solution to remove mineral deposits. Check water filters regularly and replace them on time. Soft water reduces scale and extends machine life.
- Use manufacturer-approved descaling products.
- Run the descaling cycle as instructed.
- Flush the system with clean water after descaling.
- Inspect water lines for blockages or damage.
- Maintain water filter changes every 6 months or as needed.
Frequently Asked Questions
How Often Should I Clean My Hoshizaki Ice Maker?
You should clean your Hoshizaki ice maker every 3 to 6 months. Regular cleaning prevents buildup and ensures ice quality. Frequent use may require more frequent cleaning to maintain optimal performance and hygiene.
What Cleaning Solutions Are Safe For Hoshizaki Ice Makers?
Use manufacturer-approved cleaning solutions specifically made for ice machines. Avoid harsh chemicals like bleach or ammonia. Proper cleaners effectively remove scale and bacteria without damaging the machine’s components.
Can I Clean The Ice Maker Without Shutting It Down?
No, always turn off and unplug the ice maker before cleaning. This ensures safety and prevents damage. Follow the manufacturer’s instructions for proper shutdown and restart procedures.
How Do I Remove Mineral Scale From The Ice Maker?
Use a descaling solution recommended by Hoshizaki. Apply it to affected areas, let it sit as directed, then rinse thoroughly. Regular descaling prevents mineral buildup and improves ice production.
Conclusion
Cleaning your Hoshizaki ice maker keeps it working well. Regular care stops dirt and mold from building up. Use the right tools and safe cleaners each time. Rinse parts fully to avoid leftover chemicals. Check the machine often for signs of trouble.
A clean ice maker means better ice and longer life. Simple steps make a big difference in performance. Stay consistent with cleaning for the best results. Your ice maker will thank you with pure, fresh ice.