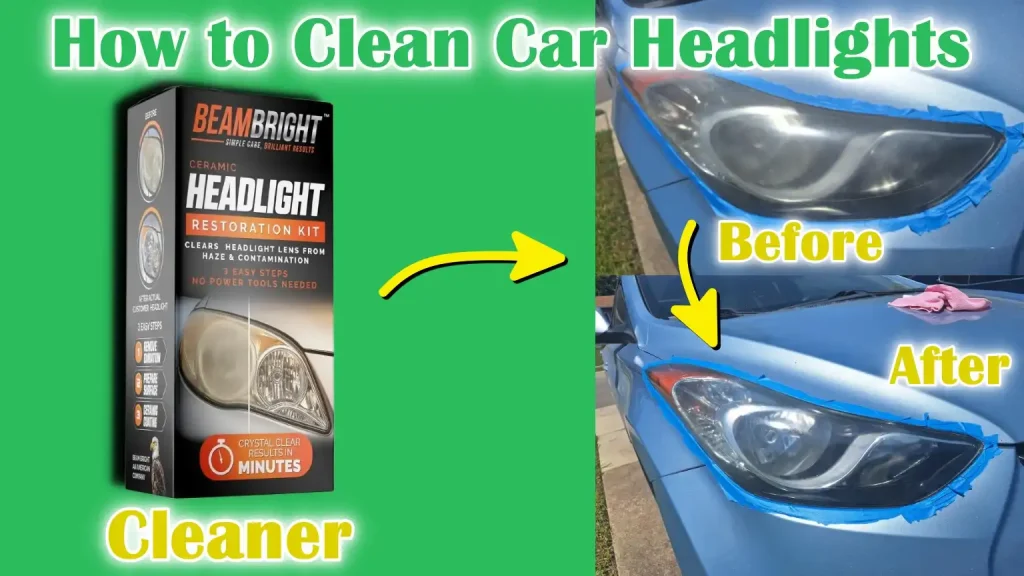
Are your car headlights looking dull or foggy? This not only makes your car look older but also reduces your visibility at night, putting you at risk.
You might think cleaning them is difficult or expensive, but it doesn’t have to be. In this guide, you’ll learn simple and effective ways to restore your headlight lenses to their clear, bright best. Keep reading, and you’ll save money while driving safer and looking great on the road.

Credit: www.youtube.com
Why Headlight Cleaning Matters
Clean headlights help you see the road clearly at night. Dirty lenses block light and reduce visibility.
Cleaning headlights improves your safety and the safety of others on the road.
Improves Nighttime Visibility
Clear headlights shine brighter and show the road better. This helps you spot obstacles and signs.
Dirty or foggy lenses make light dim and blurry. This makes it harder to drive safely at night.
Increases Driving Safety
Bright headlights help other drivers see your car. This lowers the chance of accidents.
Clean lenses reduce glare and improve your reaction time on the road.
Prevents Headlight Damage
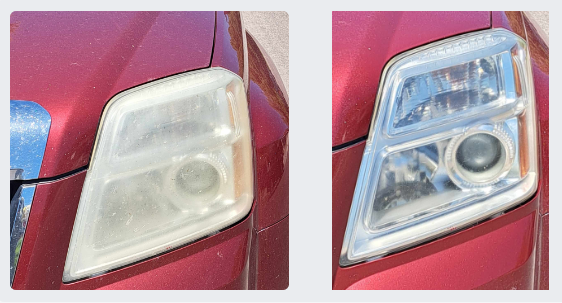
Cleaning removes dirt and debris that can cause scratches. Scratches make lenses cloudy over time.
Regular cleaning keeps headlights in good shape and extends their life.
Saves Money On Repairs
Well-maintained headlights last longer and need fewer replacements. This saves you money.
Ignoring dirty lenses can lead to costly repairs or new headlight purchases.

Credit: www.meguiars.com
Signs Your Headlights Need Cleaning
Car headlights can get dirty over time. Dust, grime, and weather damage make them less clear.
Dirty headlights reduce your night vision and can be unsafe. Knowing the signs helps you clean them on time.
Yellow Or Cloudy Appearance
Headlight lenses turn yellow or cloudy due to sun exposure and oxidation. This reduces the light that passes through.
Dim Or Weak Light Output
If your headlights seem dim even when bulbs are new, dirt or oxidation may block light. This makes driving at night harder.
Visible Dirt And Grime
- Dust buildup from driving on dirt roads
- Bug splatters and road salt residue
- Water spots after rain or washing
These particles stick to the lens and reduce clarity. Cleaning removes them and restores brightness.
Uneven Light Beam
| Cause | Effect on Headlight |
| Scratches on lens | Scatters light, causing uneven beams |
| Cloudiness | Blocks light, creates dark spots |
| Dirt patches | Reduces light output in affected areas |
Uneven light beams can confuse other drivers and lower your visibility. Check your headlights if beams look strange.
Tools And Materials Needed
Cleaning car headlight lenses can improve your visibility and car appearance. You need some simple tools and materials for the job.
Gathering all items before you start will make the process faster and easier. Below are the common tools and materials you will need.
Cleaning Solutions
You need a cleaning solution to remove dirt and grime from the headlights. Common options include mild soap, vinegar, or specialized headlight cleaners.
Cleaning Tools
- Microfiber cloths to avoid scratches
- Soft sponge for gentle scrubbing
- Toothbrush for hard-to-reach areas
Sanding And Polishing Materials
| Material | Purpose |
| Fine-grit sandpaper | Remove oxidation and scratches |
| Polishing compound | Restore clarity and shine |
| Car wax or sealant | Protect the lens after cleaning |
Protective Gear
Wear gloves to protect your hands and safety glasses to shield your eyes from dust or chemicals.
Additional Items
Consider having a spray bottle filled with water for rinsing and masking tape to protect areas around the headlights.
Step-by-step Cleaning Process
Cleaning car headlight lenses improves visibility and safety. Dirt and grime can make headlights dim and less effective.
This guide shows how to clean headlights with simple tools at home. Follow each step carefully for best results.
Prepare The Area And Gather Supplies
Start by parking your car in a shaded, dry place. This prevents cleaning products from drying too fast on the headlights.
- Soap and water
- Microfiber cloths
- Masking tape
- Sandpaper (various grits)
- Headlight cleaning solution or toothpaste
- Polishing compound
- Spray bottle with water
Wash The Headlights
Use soap and water to wash off loose dirt and bugs from the headlights. Rinse thoroughly to remove all soap.
Apply Cleaning Solution
Apply the cleaning solution evenly on the headlight lens. You can use commercial cleaner or toothpaste as a mild abrasive.
| Cleaning Option | How to Apply | Notes |
|---|---|---|
| Commercial Headlight Cleaner | Use a soft cloth to rub in circular motions | Follow package instructions |
| Toothpaste | Apply with damp cloth, rub gently | Contains mild abrasives, safe for plastic |
Scrub And Polish The Lenses
Use fine sandpaper for heavy cloudiness. Then polish with a cloth and polishing compound to restore shine.
- Wet the sandpaper before use.
- Sand the headlight gently in horizontal strokes.
- Repeat sanding with finer grit paper.
- Apply polishing compound with a clean cloth.
- Buff the lens until clear and smooth.
Rinse And Dry
Rinse the headlights with clean water to remove residue. Dry with a microfiber cloth to avoid streaks and spots.
Tips For Long-lasting Clarity
Clear car headlight lenses improve night driving safety. Dirt and UV rays can make lenses cloudy over time.
Regular cleaning and care keep headlights bright and lasting longer. Use simple methods to protect them.
Clean Headlights Regularly
Wash headlights with soap and water every two weeks. Remove dirt and grime before it builds up.
Use Uv Protection
UV rays cause yellowing and cloudiness. Apply a UV-resistant sealant after cleaning to protect the lens.
Avoid Harsh Chemicals
Strong chemicals can damage the lens surface. Use mild cleaners or products made for headlights.
Store Your Car In Shade
Parking in shade reduces sun damage. It helps keep headlights clear and reduces the need for frequent cleaning.
Use A Soft Cloth For Cleaning
- Use microfiber cloths to avoid scratches
- Apply gentle pressure while wiping
- Do not use abrasive pads or brushes
Credit: www.wd40.com
Common Mistakes To Avoid
Cleaning car headlight lenses can improve visibility and safety. Many people try to do it themselves but make errors that harm the lenses. Avoid these mistakes to keep your headlights clear and effective.
Some cleaning methods may seem easy but cause more damage. Learning what not to do helps protect your car and saves money on repairs.
Using Abrasive Materials
Many try to clean headlights with rough cloths or brushes. These can scratch the lens surface and reduce light output. Always use soft, non-abrasive materials for cleaning.
Skipping Proper Cleaning Products
Household cleaners may seem handy but can damage the plastic lens. Avoid harsh chemicals like ammonia or bleach. Use cleaners made for automotive headlights or mild soap and water.
Ignoring Surface Preparation
Cleaning without removing dirt and debris first causes scratches. Always rinse the lens with water and wipe gently before applying cleaning solutions.
Over-sanding Or Using Incorrect Grit
Sanding is part of some restoration methods but overdoing it can damage lenses. Use the right grit sandpaper and follow instructions carefully to avoid deep scratches.
Not Sealing The Headlights After Cleaning
Cleaning removes grime but leaves the lens unprotected. Without a sealant, UV rays and dirt return quickly. Always apply a protective coating after cleaning to keep headlights clear longer.
- Use a UV sealant designed for headlights
- Apply evenly and let dry fully
- Reapply every few months for best results
Rushing The Cleaning Process
Cleaning headlights takes time and care. Rushing leads to missed spots and poor results. Take your time and follow each step carefully for the best outcome.
| Mistake | Effect | How to Avoid |
| Using Abrasive Materials | Scratches on lens | Use soft cloths only |
| Harsh Cleaners | Plastic damage | Choose mild or headlight cleaners |
| Skipping Dirt Removal | Surface scratches | Rinse and wipe before cleaning |
| Over-Sanding | Deep lens scratches | Use correct sandpaper grit |
| Not Sealing | Quick re-yellowing | Apply UV sealant after cleaning |
| Rushing | Poor cleaning results | Take time and follow steps |
When To Seek Professional Help
Cleaning car headlight lenses can be simple. Many times, you can do it yourself with basic tools. Some situations need expert care to avoid damage.
Knowing when to get professional help saves time and money. It also keeps your headlights safe and working well.
Severe Yellowing Or Cloudiness
Light yellow or cloudy lenses can often be cleaned at home. Deep yellowing or thick cloudiness may need professional restoration. Experts use special tools and chemicals to fix tough cases.
Trying to fix severe damage yourself might cause scratches or cracks. Professionals can restore clarity without harming the lens.
Cracks Or Physical Damage
Cracked or broken headlight lenses should be checked by a professional. Damage affects light output and can let moisture inside. This may cause fogging or electrical problems.
Experts can replace or repair lenses safely. Fixing cracks yourself might lead to bigger issues or unsafe driving conditions.
Persistent Moisture Inside The Headlight
If water or fog stays inside the headlight after cleaning, get professional help. Moisture can harm bulbs and wiring. It also reduces visibility at night.
Professionals can find the source of leaks and seal the headlight properly. They have tools to dry and protect the inside parts.
Faded Or Damaged Clear Coat
Most headlights have a clear protective coating. If this coating peels, cracks, or fades, cleaning alone will not help. The lens may quickly become cloudy again.
Professionals can remove the old coating and apply a new one. This helps protect the lens and keeps it clear for longer.
Lack Of Proper Tools And Products
Some cleaning jobs need special tools or chemicals. If you do not have the right items, you might damage the lenses. Experts use safe, high-quality products for the best results.
Choosing professional help ensures the job is done safely and correctly. This protects your headlights and your car.
Frequently Asked Questions
How Often Should Car Headlight Lenses Be Cleaned?
Car headlight lenses should be cleaned every 3 to 6 months. Regular cleaning improves visibility and safety while driving at night. Dust, grime, and oxidation build up over time, reducing light output. Frequent cleaning maintains lens clarity and ensures optimal headlight performance.
What Household Items Can Clean Car Headlights Effectively?
You can use toothpaste or baking soda as effective household cleaners. These mild abrasives gently remove grime and oxidation from the lenses. Apply with a soft cloth in circular motions, then rinse with water. These items are affordable and safe for regular headlight maintenance.
Can I Prevent Headlight Lenses From Yellowing?
Yes, applying a UV protective sealant after cleaning helps prevent yellowing. UV rays cause lenses to oxidize and turn cloudy. Regular cleaning combined with sealant application prolongs lens clarity and improves light output. Consider using a commercial headlight protectant for best results.
Is Professional Headlight Restoration Necessary?
Professional restoration is recommended for severely oxidized or damaged lenses. They use specialized tools and compounds for deep cleaning and polishing. This service restores clarity and improves safety when DIY methods fail. It is a worthwhile investment for older or heavily worn headlights.
Conclusion
Cleaning car headlight lenses improves visibility and safety. A simple task. Regular maintenance helps prevent yellowing and fogging. Use the right materials for the best results. Soap, water, and a soft cloth work wonders. Don’t forget to dry completely to avoid streaks.
Consider using a protective sealant for longer-lasting clarity. Keep headlights in good condition. It makes night driving safer and more comfortable. Invest a little time in upkeep. Enjoy clearer roads and peace of mind. Happy driving!