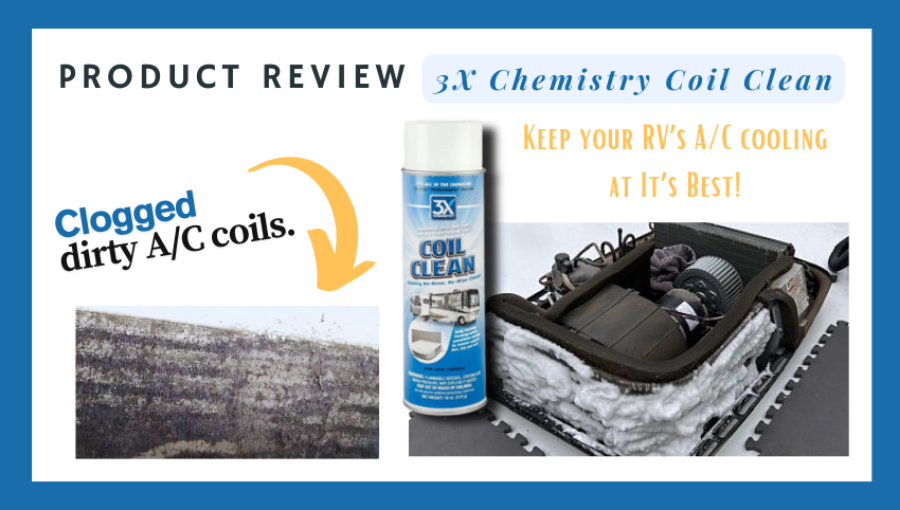
Your RV air conditioner keeps you cool and comfortable on every trip. But when the coils get dirty, your AC won’t work as well.
You might notice less cool air or higher energy bills. Cleaning your RV air conditioner coils is easier than you think—and it can save you money and frustration. In this guide, you’ll learn simple, step-by-step tips to clean those coils quickly and safely.
Keep reading to make sure your RV stays refreshingly cool no matter where the road takes you.
Signs Of Dirty Ac Coils
Dirty air conditioner coils can reduce your RV’s cooling power. You might not notice the problem at first.
Look for signs that show your AC coils need cleaning. This helps keep your system working well.
Reduced Cooling Efficiency
When coils are dirty, the AC cannot cool the air properly. Your RV may feel warmer than usual.
- Longer cooling time
- Air feels less cold
- Rooms don’t reach set temperature
Unusual Noises
Dirty coils can cause the AC to work harder. This may lead to strange sounds from the unit.
| Noise Type | Possible Cause |
| Buzzing | Debris on coils |
| Rattling | Loose parts from dirt buildup |
| Hissing | Airflow blockages |
Increased Energy Consumption
Your RV’s AC uses more power if coils are dirty. This raises your energy bills.
- Clean coils regularly
- Check and replace filters
- Keep vents clear
Tools And Materials Needed
Cleaning RV air conditioner coils needs the right tools. Using proper materials helps the job go smoothly.
This guide lists the basic supplies, specialized cleaners, and safety gear you should have.
Basic Cleaning Supplies
Start with simple cleaning tools that you likely already have at home. These help remove dust and dirt.
- Soft-bristled brush to loosen debris
- Vacuum cleaner with a brush attachment
- Garden hose or spray bottle for rinsing
- Clean cloths or rags for wiping
- Mild dish soap mixed with water
Specialized Coil Cleaners
Use cleaners made for AC coils to remove buildup and grime. They protect the metal fins and improve cooling.
| Type | Use | Notes |
| Foaming coil cleaner | Penetrates dirt and lifts it off | Safe for aluminum coils |
| Non-acidic coil cleaner | Gentle on surfaces | Good for frequent cleaning |
| Eco-friendly cleaner | Biodegradable, less toxic | Best for sensitive environments |
Safety Gear
Protect yourself while cleaning. Wear safety gear to avoid injuries and irritation.
- Gloves to protect hands from chemicals
- Safety goggles to shield eyes
- Dust mask to prevent breathing dust and fumes
- Old clothes or a protective apron
Preparing The Rv Air Conditioner
Cleaning the coils of your RV air conditioner helps it run better and last longer. Before you start, you need to get the unit ready safely. This guide shows how to prepare your RV air conditioner for cleaning.
Taking the right steps before cleaning protects you and your RV. It also makes the cleaning process easier and more effective.
Power Off And Disconnect
Always turn off the power before working on the air conditioner. This stops any risk of electric shock or damage. Disconnect the RV from shore power or unplug the unit completely.
- Switch off the air conditioner using the control panel.
- Unplug the RV from the external power source.
- Remove the air conditioner’s fuse or turn off its circuit breaker.
- Wait a few minutes to ensure all power is off.
Confirm the unit is off by trying to turn it on. It should not start. This ensures your safety before cleaning.
Accessing The Coils
To clean the coils, you must first reach them. Usually, coils are inside the air conditioner cover or panel. Removing this cover carefully will give you access.
- Locate the air conditioner’s outer cover on the roof or inside the RV.
- Use a screwdriver to remove screws holding the cover or panel.
- Lift the cover gently to avoid damaging wires or parts.
- Find the evaporator and condenser coils inside the unit.
| Coil Type | Location | Cleaning Tip |
|---|---|---|
| Evaporator Coil | Inside the air handler unit | Clean with soft brush or coil cleaner spray |
| Condenser Coil | Outside, near the fan | Remove debris and wash gently with water |
Cleaning The Evaporator Coils
Cleaning the evaporator coils in your RV air conditioner keeps it running well. Dirty coils reduce cooling power and waste energy.
Regular cleaning helps prevent costly repairs. This guide shows how to clean the coils safely and easily.
Removing Dust And Debris
Start by turning off the RV air conditioner and unplugging it. This keeps you safe during cleaning.
Use a soft brush or vacuum with a brush attachment to remove dust and dirt from the coils. Be gentle to avoid bending the fins.
- Wear gloves and a mask to avoid dust inhalation
- Brush in the direction of the fins
- Vacuum loose debris carefully
Applying Coil Cleaner
Choose a coil cleaner made for evaporator coils. Spray it evenly on the coil surface to break down grime.
Let the cleaner sit for 5 to 10 minutes. This time helps dissolve dirt and grease without harming the coil.
- Wear eye protection during application
- Do not over-saturate the coils
- Follow the cleaner’s instructions carefully
Rinsing And Drying
Rinse the coils with water using a spray bottle or gentle hose stream. Avoid high pressure that can damage fins.
Allow the coils to air dry completely before turning the air conditioner back on. Dry coils prevent mold and improve cooling.
- Use a towel to soak excess water if needed
- Do not use heat to speed drying
- Check coils for any missed dirt after drying
Cleaning The Condenser Coils
Cleaning the condenser coils is important to keep your RV air conditioner working well. Dirt and debris can block airflow and reduce cooling power.
Regular cleaning helps your air conditioner run efficiently and lasts longer. Use simple tools and take your time for the best results.
Clearing Surrounding Debris
Start by removing leaves, dirt, and other debris around the condenser coils. This clears space and stops blockages. Use your hands or a soft brush for this task.
- Turn off the air conditioner and power source.
- Remove the outer cover carefully.
- Pick out leaves and twigs by hand.
- Brush away dust and dirt gently.
- Check the area around the unit for more debris.
Using Compressed Air Or Water
To clean the coils deeply, use compressed air or water. Compressed air blows dirt out, while water rinses it away. Always be gentle to avoid damage.
- Choose a low-pressure air compressor or hose setting.
- Hold the nozzle about 12 inches from the coils.
- Blow air or spray water from the inside out.
- Do not use high pressure to avoid bending the fins.
- Let the coils dry completely before reassembly.
Checking For Damage
After cleaning, check the coils for damage. Bent fins or corrosion can reduce cooling and need fixing or replacement.
| Type of Damage | What to Look For | Possible Solution |
| Bent Fins | Fins that are pushed in or out of line | Use a fin comb to straighten gently |
| Corrosion | Rust or discoloration on metal parts | Clean with a mild solution or replace parts |
| Leaks | Moisture or oily spots on coils | Have a professional repair the leak |

Credit: www.rvacunit.com
Post-cleaning Checks
After cleaning the RV air conditioner coils, it is important to check the unit carefully. These checks make sure the unit works well and stays safe.
Completing the post-cleaning checks helps avoid damage and keeps the AC running smoothly during your trips.
Reassembling The Unit
Put all parts back carefully in the order you removed them. Make sure the coils are dry before closing the unit. Wet parts can cause damage or mold.
Check that all screws and clips are tight. Loose parts can cause noise or poor performance. Do not force parts to fit if they do not align easily.
- Dry coils completely before reassembly
- Align panels and filters correctly
- Tighten screws and fasteners securely
- Handle delicate parts gently
Testing The Ac Performance
Turn on the air conditioner after reassembling. Listen for unusual sounds or vibrations. These signs may mean something is loose or damaged.
Check if the air blows cold and steady. If the AC does not cool well, the coils might need cleaning again or other parts may need inspection.
- Run the unit for 10 to 15 minutes
- Listen for smooth, quiet operation
- Feel for consistent cold air flow
- Watch for water leaks or drips
Maintenance Tips For Long-lasting Coils
Keeping your RV air conditioner coils clean is key to good performance. Dirt and debris reduce cooling power and increase energy use.
Regular care helps your AC run longer and saves you money on repairs. Follow these simple tips to keep your coils in top shape.
Regular Cleaning Schedule
Set a cleaning routine based on how often you use your RV and the environment. More dusty or humid places need more frequent cleaning.
- Turn off the power to the air conditioner before cleaning.
- Remove the outer cover carefully to access the coils.
- Use a soft brush or vacuum to remove loose dirt and dust.
- Spray coil cleaner or mild soap solution on the coils.
- Rinse gently with water and let coils dry completely.
- Replace the cover and restore power to the unit.
Avoiding Common Coil Issues
Dirty or damaged coils cause poor cooling and higher energy use. Check for these common problems to avoid costly repairs.
| Issue | Cause | Solution |
| Clogged Coils | Dust and debris buildup | Clean coils regularly |
| Corrosion | Moisture and rust | Dry coils and use protective spray |
| Bent Fins | Physical damage | Straighten fins with a fin comb |
| Leaking Refrigerant | Coil cracks or holes | Call a professional for repair |

Credit: www.rvacunit.com

Credit: www.rvacunit.com
Frequently Asked Questions
How Often Should Rv Ac Coils Be Cleaned?
RV air conditioner coils should be cleaned every six months. Regular cleaning ensures efficient operation and prolongs the unit’s lifespan. If you frequently travel or park in dusty areas, consider cleaning them more often. Regular maintenance helps prevent build-up that can restrict airflow and reduce cooling efficiency.
What Tools Do I Need To Clean Ac Coils?
To clean RV AC coils, you’ll need a soft brush, coil cleaner, and a vacuum cleaner with a brush attachment. A screwdriver may be necessary to access the coils. These tools help you remove dirt and debris without damaging the coils, ensuring proper cleaning and maintenance.
Can I Use Water To Clean Rv Ac Coils?
Yes, you can use water to rinse RV AC coils, but use it sparingly. First, apply a coil cleaner, then gently rinse with water. Avoid using high-pressure water to prevent damage. Ensure the unit is powered off and dry the coils thoroughly before turning the AC back on.
What Are Signs Of Dirty Ac Coils?
Signs of dirty AC coils include reduced cooling efficiency, increased energy consumption, and unusual noises. You may also notice the AC unit cycling frequently or struggling to maintain the desired temperature. Regular coil cleaning can help prevent these issues and keep your RV’s AC running smoothly.
Conclusion
Cleaning RV air conditioner coils keeps your AC running cool and smooth. Dirt and dust block airflow and reduce efficiency. Regular cleaning saves energy and lowers repair costs. Use gentle brushes and mild cleaners for best results. Take your time and be careful around delicate parts.
Clean coils help your RV stay comfortable during hot trips. Start this simple task today for a fresher, cooler RV experience. Easy to do, big benefits to enjoy.