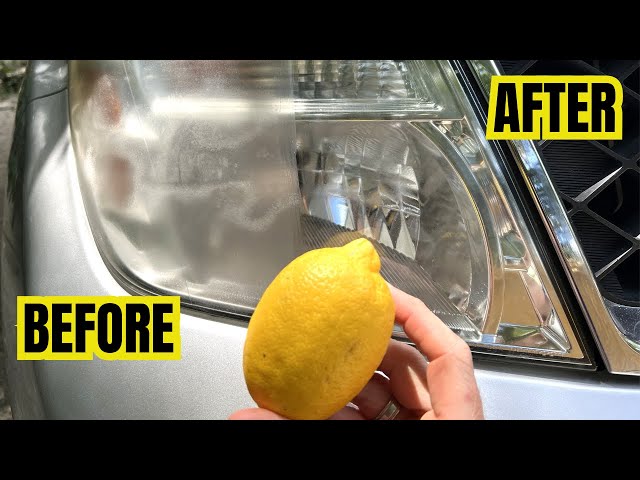
Your car headlights are more than just lights—they’re your eyes on the road when it’s dark or foggy. But over time, they get cloudy, yellowed, or dirty, making it harder for you to see clearly.
This can be dangerous and even lead to accidents. The good news? Cleaning your headlights is easier than you think, and you can do it yourself without spending a fortune. Keep reading to discover simple, effective steps that will restore your headlights to their original shine—and improve your safety every time you drive.
Why Clean Headlights Matter
Clean headlights help you see better while driving. Dirt and grime can block the light.
Keeping headlights clean improves safety for you and others on the road.
Impact On Night Driving
Dirty headlights reduce how far you can see at night. This can make driving harder and more dangerous.
Clear headlights shine brighter. They help you spot obstacles and signs sooner.
- Better light helps avoid animals and pedestrians
- Improves reaction time in dark conditions
- Reduces eye strain from poor lighting
Safety And Visibility
Clean headlights make your car more visible to others. This lowers the chance of accidents.
Bright headlights alert other drivers and pedestrians to your presence.
- Improves visibility in rain and fog
- Helps other drivers judge your distance
- Keeps you safer on busy roads
Common Causes Of Headlight Dullness
Car headlights can lose their shine over time. This happens because of several common reasons. Understanding these causes helps you keep your headlights clear and bright.
Below are some main reasons why headlights become dull and cloudy. Each one affects the plastic lens differently.
Uv Damage
Sunlight contains ultraviolet (UV) rays that harm plastic headlight covers. UV rays break down the plastic surface and cause it to become yellow and cloudy. This damage reduces the light’s brightness and affects how well you see at night.
Road Debris And Dirt
Small stones, dirt, and dust hit your headlights while driving. These particles scratch and wear down the surface. Over time, the lens looks dull and rough. Dirt buildup also blocks the light, making it weaker.
- Gravel and small stones cause scratches
- Dust and dirt create a film on the lens
- Insects and road grime stick to the surface
- Frequent washing without care can add fine scratches
Oxidation Effects
Oxidation is a chemical reaction between the plastic and oxygen in the air. It forms a cloudy layer on the headlights. This layer dulls the lens and lowers light output. Oxidation often happens faster in areas with strong sun and pollution.
| Effect | Description |
| Yellowing | Plastic turns yellow from UV exposure |
| Cloudiness | Oxidation creates a hazy surface |
| Scratches | Road debris causes small surface marks |
| Reduced Light | Dull lens lowers brightness and clarity |
Gathering Cleaning Supplies
Cleaning car headlights can improve your night driving safety. Before you start, gather all the supplies you need. This helps you work fast and get good results.
You can clean headlights using common household items or special kits made for this job. Both options work well if you have the right tools.
Household Items That Work
Many household products can clean headlights. These items are easy to find and cost little. Use them carefully to avoid scratching the lens.
- Dish soap and warm water
- Baking soda
- White vinegar
- Toothpaste (non-gel, plain)
- Microfiber cloths
- Masking tape to protect paint
- Old toothbrush for scrubbing
Specialized Cleaning Kits
Specialized kits include everything you need. They usually have cleaner, sandpaper, and polish. Kits can save time and give a better finish.
| Kit Component | Purpose | How to Use |
| Cleaner solution | Removes dirt and grime | Apply with cloth and wipe |
| Sanding pads | Remove oxidation and scratches | Wet sand in circular motions |
| Polish | Restore shine and smoothness | Buff with soft cloth |
| Protective gloves | Protect hands from chemicals | Wear during cleaning |

Credit: www.carsales.com.au
Step-by-step Cleaning Process
Car headlights get dirty over time. Dirt and grime make them look dull. Cleaning headlights helps improve visibility and car appearance.
This guide shows how to clean headlights in four clear steps. Follow each step carefully for best results.
Preparing The Headlight Surface
Start by washing the headlights with soap and water. Remove loose dirt and dust from the surface.
Dry the headlights with a clean cloth. Cover the area around the lights with tape to protect the car paint.
Applying The Cleaning Solution
Use a headlight cleaning product or a mix of baking soda and water. Apply the solution evenly over the headlight surface.
Make sure to cover all cloudy or yellowed areas. Let the solution sit for a few minutes before scrubbing.
Scrubbing Techniques
Use a soft sponge or cloth to scrub the headlights gently. Move in small circles to remove grime and oxidation.
Do not press too hard to avoid scratching the plastic. Repeat scrubbing if needed for very dirty spots.
- Use light, circular motions
- Focus on cloudy areas
- Do not use abrasive materials
Rinsing And Drying
Rinse the headlights with clean water to remove all cleaning solution. Check if the surface looks clear and smooth.
Dry the headlights with a soft, dry cloth. Remove the tape from around the headlights carefully.
Polishing For Extra Shine
Polishing car headlights helps bring back their clear, bright look. It removes small scratches and dullness.
Using the right polish and technique can make headlights shine like new. This improves safety and appearance.
Choosing The Right Polish
Select a polish made for plastic headlights. These polishes are gentle but effective at cleaning and shining.
Look for polishes that remove haze and small scratches. Avoid harsh chemicals that can damage the headlight surface.
- Use plastic-safe polishing compounds
- Avoid abrasive or acidic cleaners
- Choose polishes with UV protection
Applying And Buffing
Apply polish with a soft cloth or foam applicator pad. Use small, circular motions to cover the entire lens.
Buff the polish off gently with a clean microfiber cloth. This removes residue and reveals a clear shine.
- Work in shaded areas to avoid quick drying
- Use light pressure to avoid damage
- Repeat application if needed for better shine

Credit: www.youtube.com
Protecting Headlights After Cleaning
Cleaning your car headlights makes them clearer and safer. After cleaning, protecting them helps keep that shine longer.
Protection stops dirt and sun damage from making headlights cloudy again. Use simple ways to keep them bright.
Using Sealants
Sealants form a protective layer on headlights. This layer stops dust, water, and UV rays from hurting the plastic.
Apply sealants after cleaning and drying the headlights fully. This makes the protection last longer and keeps headlights clear.
- Choose a sealant made for car headlights
- Use a clean cloth to apply a thin layer
- Let it dry as the product instructions say
- Reapply every few months for best results
Regular Maintenance Tips
Keep headlights clean by washing them often. Dirt and grime build-up can damage the surface over time.
Check headlights for cracks or chips. Fix small problems early to avoid bigger damage.
- Wash headlights with mild soap and water weekly
- Dry headlights with a soft cloth to prevent water spots
- Park in shade to reduce sun damage
- Inspect headlights monthly for damage or cloudiness
Diy Vs Professional Cleaning
Car headlights get dirty and cloudy over time. Cleaning them improves visibility and car looks.
You can clean headlights yourself or hire a professional. Each way has pros and cons.
Cost Comparison
DIY cleaning costs less. You only need some basic supplies. These include toothpaste, baking soda, or a headlight cleaning kit.
Professional cleaning is more expensive. It covers labor and better tools. Prices vary by location and service quality.
- DIY cleaning costs $5 to $20 for materials
- Professional cleaning costs $50 to $150
- DIY may need more frequent cleaning
- Professional cleaning lasts longer
When To Seek Professional Help
Choose a professional if headlights are very cloudy or scratched. They can restore clarity better than DIY methods.
Professional help is good if you want fast, reliable results. It also avoids damage to headlights.
- Headlights have deep yellowing or cracks
- DIY cleaning does not improve clarity
- You want long-lasting results
- You lack time or tools for cleaning

Credit: parade.com
Frequently Asked Questions
How Often Should I Clean My Car Headlights?
Clean your headlights every 3 to 6 months. Frequent cleaning ensures clear visibility and improves night driving safety. Regular maintenance prevents dirt buildup and yellowing caused by UV exposure.
What Household Items Can Clean Car Headlights Effectively?
Use baking soda and vinegar or toothpaste for cleaning. These common items remove grime and restore headlight clarity. They are affordable, safe, and easy to find in most homes.
Can I Use Commercial Products To Clean Headlights?
Yes, commercial headlight restoration kits work well. They contain special compounds to remove oxidation and haze. Follow the product instructions carefully for best results and long-lasting clarity.
Is It Safe To Clean Headlights With Toothpaste?
Yes, toothpaste can safely polish headlights. Its mild abrasives help remove dirt and light oxidation. Use a soft cloth, apply gently, and rinse thoroughly afterward.
Conclusion
Cleaning car headlights is simple and rewarding. Clear headlights improve safety. Regular maintenance keeps them shining bright. Start with basic supplies. Soap, water, and a soft cloth. For tougher stains, use vinegar or baking soda. Rinse thoroughly for best results.
Consider using a protective sealant. This prevents future yellowing. Consistent care extends headlight life. Your car will look newer. And safer on the road. Enjoy the benefits of clear vision. It’s worth the effort. Keep your headlights clean, and drive safely.