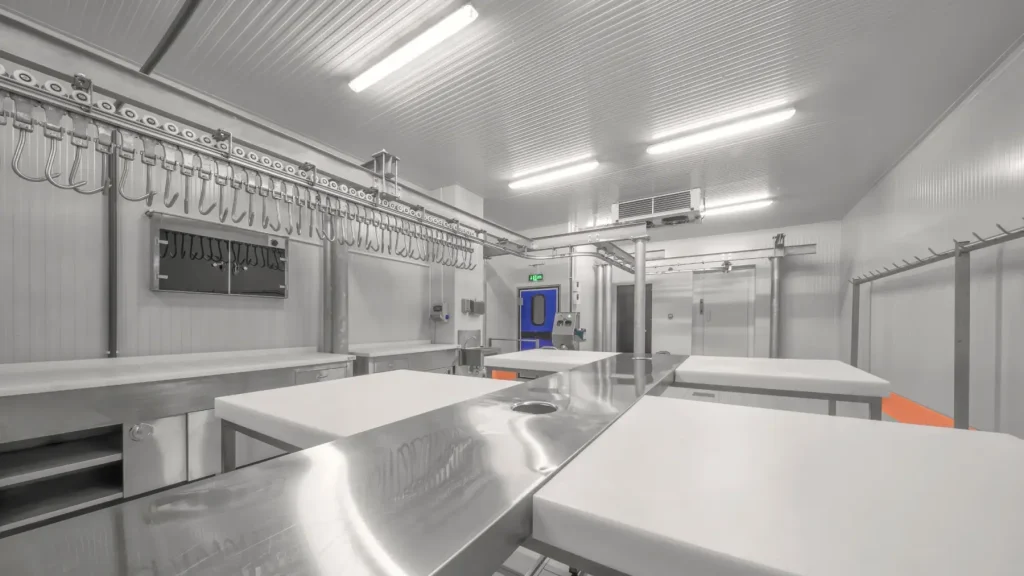
Keeping the floor of your walk-in freezer clean is crucial for both safety and efficiency. Imagine slipping on a slick surface or dealing with foul odors while trying to store food.
Not ideal, right? That’s why understanding how to properly clean your freezer floor is essential. In this guide, you’ll discover simple and effective steps to maintain a spotless and safe environment. You’ll find cleaning techniques that save time and effort, ensuring your freezer runs smoothly and lasts longer.
Ready to make your freezer floor shine? Let’s dive in!

Credit: www.youtube.com
Prepare The Freezer
Preparing your walk-in freezer before cleaning the floor is crucial for safety and efficiency. Taking the right steps ensures you avoid damage to the unit and create a safe environment to work in. Let’s look at how to get your freezer ready for a thorough clean.
Turn Off And Unplug
Always start by turning off the freezer’s power and unplugging it from the outlet. This prevents any electrical hazards while you clean and protects the freezer’s compressor from overworking. It might be tempting to skip this step, but safety should always come first.
Remove Items And Shelves
Clear out all food items and any removable shelves or racks. This makes it easier to access the floor and prevents your products from getting contaminated or damaged. Consider placing perishable items in a temporary cooler so they stay fresh during the cleaning process.
Ventilate The Area
Open the freezer door and, if possible, use fans to improve airflow. Ventilation helps reduce the buildup of cleaning fumes and moisture, making the space safer and more comfortable to work in. Have you noticed how a stuffy freezer can make cleaning feel like a tough chore? Good ventilation changes that entirely.

Credit: www.youtube.com
Gather Cleaning Supplies
Before you start scrubbing the floor of your walk-in freezer, gathering the right cleaning supplies is essential. Having everything at hand will save you time and prevent unnecessary trips back and forth. Plus, using the correct materials keeps the freezer floor safe and clean without causing damage.
Choose Safe Cleaning Agents
Not all cleaning products work well in cold environments like a walk-in freezer. You want agents that won’t freeze or leave harmful residues. Mild detergents or specially formulated freezer-safe cleaners work best.
Avoid bleach or ammonia-based products since they can damage the floor surface or cause slippery conditions. Think about how the chemicals might react at low temperatures. Have you ever noticed how some cleaners become less effective when cold?
Look for non-toxic, biodegradable options if you’re concerned about environmental impact. These also minimize the risk of chemical odors lingering in your food storage area. Remember, the goal is to clean thoroughly without compromising safety.
Select Appropriate Tools
Choosing the right tools can make the cleaning process easier and more efficient. A sturdy mop with a long handle helps you reach every corner without bending too much. Soft-bristle brushes are great for scrubbing stubborn spots without scratching the floor.
Consider using a wet-dry vacuum if your freezer floor tends to accumulate water or ice melt. This tool quickly removes liquid, reducing slip hazards. Rubber gloves are a must to protect your hands from cold and cleaning agents.
Think about the size and layout of your freezer when selecting tools. Would a handheld scrubber work better in tight spaces? Matching your supplies to your specific cleaning needs makes the job smoother and safer.
Remove Ice And Debris
Removing ice and debris from the floor of your walk-in freezer is essential for maintaining a safe and efficient workspace. Ice buildup can create slippery surfaces, while debris can harbor bacteria or block drainage. Tackling these issues early makes cleaning easier and helps extend the life of your freezer.
Defrost The Freezer
Start by turning off the freezer and allowing the ice to melt naturally or use a controlled heat source if available. Avoid sharp tools or excessive force to prevent damaging the floor or walls. Patience during defrosting saves you from costly repairs later.
Scrape Off Ice Buildup
Once the ice softens, use a plastic or wooden scraper to gently remove chunks from the floor. Metal scrapers might seem faster but can scratch or weaken the surface over time. Notice how removing ice in smaller sections helps manage the mess and keeps the process safer.
Sweep Loose Debris
After the ice is cleared, sweep away any loose dirt, crumbs, or packaging remnants with a broom. Don’t forget to check corners and under shelving where debris often hides. Keeping this area clean reduces the risk of contamination and keeps your freezer running smoothly.

Credit: www.sfreedman.com
Clean The Floor Surface
Cleaning the floor surface of a walk-in freezer is essential for safety and hygiene. The cold environment can cause spills to freeze quickly, making the floor slippery. Dirt and stains can build up fast. Regular cleaning keeps the floor safe and extends its life. Follow simple steps to clean effectively without damaging the surface.
Apply Cleaning Solution
Choose a cleaning solution suitable for cold, wet floors. Use a mild detergent mixed with warm water. Avoid harsh chemicals that can damage the floor. Apply the solution evenly with a mop or sponge. Let it sit for a few minutes to loosen dirt and grime.
Scrub Stains And Spots
Use a soft-bristle brush or scrub pad to remove tough stains. Focus on sticky spots or areas with built-up dirt. Apply gentle pressure to avoid scratching the floor. Work in small sections for better control. Rinse the brush often to remove debris.
Rinse With Clean Water
Rinse the floor thoroughly with clean water after scrubbing. Use a mop or hose to remove all soap and residue. Standing water can freeze, so dry the floor quickly if possible. Ensure no cleaning solution remains to prevent slippery surfaces.
Dry And Sanitize
After cleaning the floor of your walk-in freezer, the next crucial phase is to dry and sanitize thoroughly. This step ensures that no moisture remains to encourage bacteria growth, keeping your freezer safe and hygienic. Proper drying and sanitizing also extend the lifespan of the floor by preventing damage caused by lingering water or chemicals.
Remove Excess Water
Start by removing all standing water using a mop or a wet vacuum. Don’t rush this step—any leftover moisture can freeze or cause slippery spots, creating safety hazards. I once overlooked this and ended up with a slick floor that was tough to manage until fully dried.
Make sure to wring out your mop frequently to avoid spreading water around. Check corners and edges where water tends to pool, as these areas are easy to miss but critical to dry.
Use Sanitizing Spray
Apply a food-safe sanitizing spray designed for cold environments to kill bacteria and mold spores. Pay special attention to high-traffic zones and places where spills are common. Your goal is to disinfect without damaging the floor material or leaving harmful residues.
Spray evenly and cover the entire surface. If you’re unsure which product works best, try a few options on a small, hidden spot first to avoid discoloration or damage.
Allow Thorough Drying
After sanitizing, let the floor air dry completely before using the freezer again. It might take longer in a cold environment, so be patient and ensure no dampness remains. This prevents mold growth and keeps the floor safe for walking.
Consider using fans or dehumidifiers to speed up the drying process if your freezer allows it. Have you noticed how a well-dried floor feels more secure and clean? That’s the difference proper drying makes.
Restore The Freezer
Restoring the walk-in freezer after cleaning is crucial to keep it running smoothly. Proper restoration ensures safety and maintains food quality. Follow these steps carefully to bring your freezer back to full operation.
Replace Shelves And Items
Start by putting the shelves back in their original places. Make sure they are stable and secure. Return all items carefully, checking each for damage or spoilage. Organize items to allow good air flow around them.
Plug In And Turn On
Plug the freezer back into the power source. Turn on the unit and listen for the compressor to start running. Check that all lights and controls are working correctly. This step wakes the freezer up after cleaning.
Monitor Temperature
Use a thermometer to check the freezer’s temperature. The ideal range is usually between -18°C and -22°C (0°F to -8°F). Keep monitoring the temperature regularly until it stabilizes. This keeps food safe and the freezer efficient.
Tips For Maintenance
Maintaining a clean floor in a walk-in freezer is essential for safety and hygiene. Proper care helps prevent slips and keeps the space sanitary. Simple habits can extend the life of your flooring and improve overall cleanliness.
Follow these tips to keep your walk-in freezer floor in good shape and avoid common problems.
Regular Cleaning Schedule
Set a cleaning routine to keep the floor spotless. Clean spills immediately to avoid stains and odors. Use warm water and a mild detergent for daily cleaning. Avoid harsh chemicals that can damage the floor surface. Mop the floor thoroughly and dry it to prevent slipping hazards.
Prevent Ice Buildup
Ice buildup creates slippery and dangerous floors. Remove ice as soon as it forms using a plastic scraper. Avoid metal tools that can scratch the floor. Use a de-icing agent safe for freezer floors. Keep the door closed to minimize moisture entering the freezer.
Use Floor Mats
Place non-slip mats near the entrance to catch dirt and moisture. Mats reduce wear and tear on the floor surface. Choose mats that are easy to clean and designed for cold environments. Replace mats regularly to maintain their effectiveness and cleanliness.
Frequently Asked Questions
How Often Should I Clean A Walk-in Freezer Floor?
Clean the floor at least once a week to prevent ice buildup and bacteria growth. Frequent cleaning ensures safety and hygiene.
What Cleaning Agents Are Safe For Freezer Floors?
Use mild detergents or specialized freezer-safe cleaners. Avoid harsh chemicals that can damage flooring or leave harmful residues.
How Do I Remove Ice Buildup On Freezer Floors?
Use a plastic scraper or de-icer sprays designed for freezer use. Avoid metal tools that can damage the floor surface.
Can I Use Hot Water To Clean Freezer Floors?
No, hot water can damage flooring and cause temperature fluctuations. Use lukewarm or cold water instead.
Conclusion
Cleaning the floor of a walk-in freezer keeps it safe and hygienic. Regular cleaning stops dirt and ice from building up. Use the right tools and gentle cleaners to protect the floor. Always dry the floor well to avoid slips and falls.
A clean freezer floor helps keep food fresh and workers safe. Small steps make a big difference in maintaining your freezer. Keep up with cleaning to save time and money later. Simple care extends the life of your walk-in freezer.