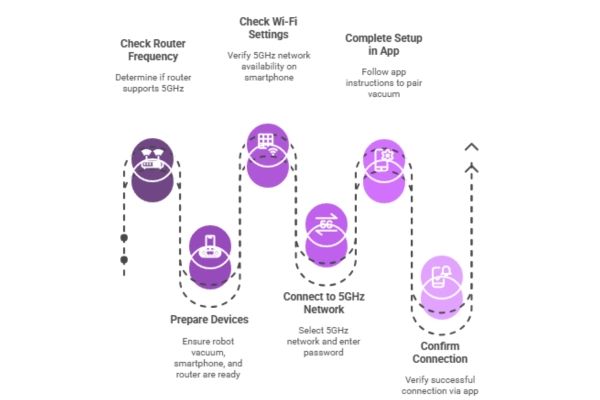
Imagine a spotless home without lifting a finger. Sounds amazing, right?
Your robot vacuum can make this a reality, but first, it needs to connect to your WiFi. This connection is the secret sauce that enables you to control it from anywhere, schedule cleanings, and even get notifications on your smartphone.
Without WiFi, your robot vacuum is just a regular vacuum cleaner. If you’re feeling overwhelmed by the techy stuff, don’t worry. You’ve come to the right place. This guide will walk you through the simple steps to connect your robot vacuum to WiFi, turning it into your personal cleaning assistant. Ready to make cleaning effortless and efficient? Let’s dive in!
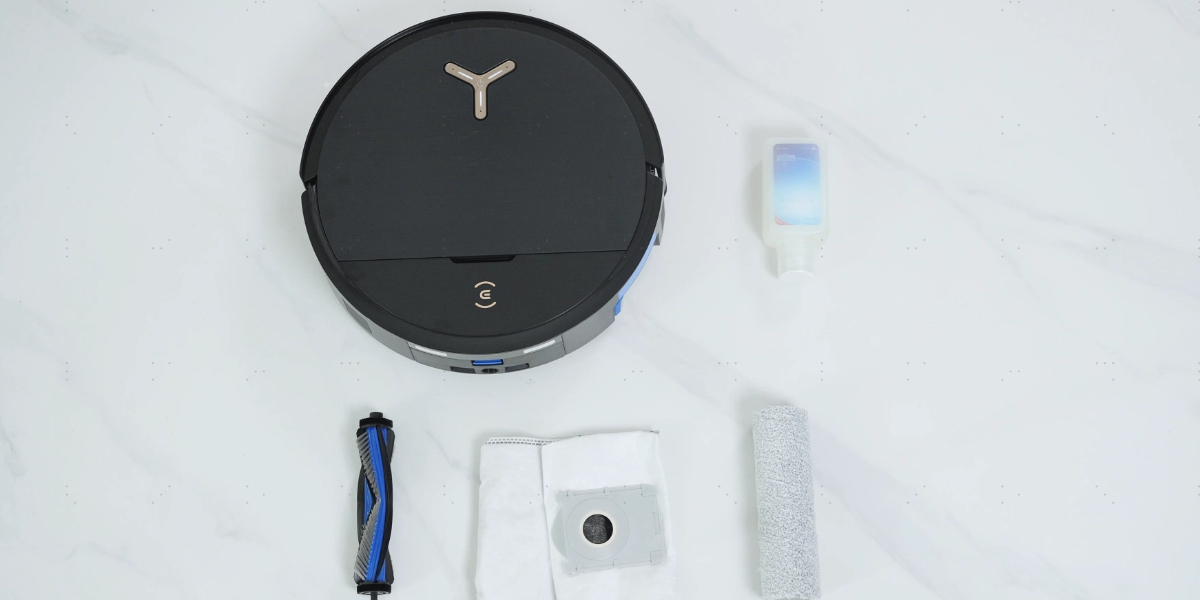
Credit: www.ecovacs.com
Check Vacuum Compatibility
Checking your robot vacuum’s compatibility with WiFi is essential before starting the connection process. Not all vacuums support wireless features. Ensuring compatibility saves time and prevents frustration. Some models may require specific apps or network types. Understanding these details helps you prepare correctly.
Identify Your Vacuum Model
Look at the label or packaging of your vacuum. The model number is usually printed on the bottom or back. Note this number carefully. It helps you find the correct information online. You can also check the user manual for the model details.
Check Manufacturer Specifications
Visit the official website of your vacuum’s brand. Search for your model and read the specifications. Look for mentions of WiFi or wireless connectivity. Some vacuums only connect to 2.4 GHz networks. Others may support both 2.4 GHz and 5 GHz bands.
Confirm Supported Network Types
Not all WiFi networks work with robot vacuums. Most vacuums connect only to 2.4 GHz frequency. Check your home WiFi router to see if it supports this frequency. Dual-band routers offer both 2.4 GHz and 5 GHz. Your vacuum may not connect to 5 GHz networks.
Verify Required Apps And Software
Many robot vacuums require a specific app to connect to WiFi. Download the official app recommended by the manufacturer. Check if your smartphone supports the app. Some apps need newer operating systems. This step ensures smooth setup and control.
Review Firmware And Software Updates
Check if your vacuum needs a firmware update for WiFi features. Updates often fix bugs and add new functions. Use the manufacturer’s app or website to find update instructions. Keeping software current improves connection stability.
Prepare Your Wifi Network
Getting your robot vacuum online starts with prepping your WiFi network properly. This ensures a smooth connection and prevents frustrating interruptions during cleaning. Taking a few moments to optimize your network can save you time and hassle later.
Verify Network Frequency
Most robot vacuums only connect to 2.4 GHz WiFi networks, not 5 GHz. Check your router settings to confirm your 2.4 GHz band is active and visible. If your router combines both frequencies under one name, consider separating them to avoid confusion during setup.
Ensure Strong Signal Strength
Your vacuum needs a strong WiFi signal to communicate effectively. Place your router centrally or close to the areas your vacuum will clean most often. Walls, metal objects, and microwaves can weaken the signal, so moving your router or vacuum dock might be necessary.
Disable Guest Networks
Guest networks often have restrictions that block devices from connecting properly. Turn off guest access or switch to your main network during setup. This step helped me avoid connection errors and get my vacuum running faster than expected.
Download The Robot Vacuum App
Downloading the robot vacuum app is the essential first step to connect your device to WiFi. The app acts as the bridge between your smartphone and the vacuum, allowing you to control cleaning schedules, set no-go zones, and receive maintenance alerts. Without the app, you lose out on the full smart experience your vacuum promises.
Find The Official App
Start by locating the official app designed for your robot vacuum model. This ensures compatibility and access to all features. You can usually find the app name in your vacuum’s user manual or on the manufacturer’s website.
Check your phone’s app store—Google Play for Android or the App Store for iOS. Look for the exact brand name to avoid third-party apps that might not work properly or could compromise your device’s security.
Have you ever downloaded an app only to find it was the wrong one? Avoid that frustration by verifying the developer’s name matches the vacuum brand.
Create An Account
Once you have the app, open it and sign up for a new account. This step is crucial because your cleaning preferences and device settings are saved in the cloud. It also allows you to control your vacuum remotely.
The sign-up process usually asks for your email, a password, and sometimes your phone number. Make sure to use an email you check often, as the app might send important alerts or updates there.
Think about this: How often do you check your email? Using one you rarely access means you could miss notifications about firmware updates or scheduled cleaning reminders.

Credit: www.youtube.com
Power On And Reset The Vacuum
Powering on and resetting your robot vacuum are crucial first steps before connecting it to WiFi. These actions ensure your device is ready to communicate with your network and clear of any previous settings that might cause issues.
Turn On The Device
Locate the power button on your robot vacuum—it’s usually on the top or side of the device. Press and hold the button for a couple of seconds until you see lights or hear a startup sound. This confirms the vacuum is active and ready for the next steps.
Make sure the vacuum is fully charged or connected to its charging dock before powering it on. A low battery can interrupt the connection process or cause the vacuum to shut down unexpectedly. Have you checked the battery level lately?
Perform A Factory Reset If Needed
If your vacuum doesn’t connect to WiFi or behaves oddly, a factory reset can clear previous network settings. This wipes out saved data and restores the device to its original state.
To reset, find the reset button or combination of buttons as described in your vacuum’s manual. Usually, you press and hold the button for 10-15 seconds until the indicator light blinks or the device restarts. This simple step can solve many connection headaches.
Remember, after a reset, you’ll need to set up your vacuum again from scratch. Does your vacuum have a reset option? It’s worth knowing before troubleshooting.
Connect Vacuum To Wifi
Connecting your robot vacuum to WiFi opens up a new level of convenience. It lets you control the vacuum from anywhere, schedule cleanings, and receive updates. The process is straightforward once you know the steps to follow.
Enable Wifi Mode On Vacuum
First, you need to activate the WiFi mode on your robot vacuum. Usually, this involves pressing a specific button or combination of buttons on the device. Check your vacuum’s manual if you’re unsure which button to press.
Once enabled, the vacuum will broadcast a WiFi signal or enter pairing mode. This makes it discoverable by your smartphone or tablet, ready for the next step.
Use The App To Scan For Networks
Next, open the robot vacuum’s companion app on your phone. The app will guide you through the connection process, starting with scanning for available WiFi networks. It’s important to be near your router to get a strong signal during this step.
If your network doesn’t appear, try refreshing the list or moving closer to the router. Some vacuums only support 2.4 GHz WiFi, so check if your network matches that frequency.
Enter Wifi Credentials
Once you see your home WiFi network in the app, select it and enter the password. Make sure to type it correctly—WiFi passwords are case-sensitive. Double-check for any spaces or special characters that might cause errors.
After submitting your credentials, the vacuum will attempt to connect. You’ll get a notification in the app once the connection is successful, allowing you to start controlling your robot remotely.
Troubleshoot Connection Issues
Sometimes, connecting your robot vacuum to WiFi can hit a snag. Troubleshooting connection issues is essential to get your device running smoothly again. Identifying the root cause quickly saves you frustration and ensures your vacuum cleans without interruption.
Check Password Accuracy
Double-check the WiFi password you entered. Even one wrong character can stop your robot vacuum from connecting. Remember, passwords are case-sensitive—capital letters matter.
If you’re unsure, try logging into your WiFi network from another device using the same password. This simple test can confirm whether the password is correct or needs updating.
Restart Router And Vacuum
Restarting your router and robot vacuum often fixes connection glitches. Power off both devices, wait 30 seconds, and turn them back on. This process refreshes the network and clears temporary issues.
Have you noticed your internet slowing down or other devices struggling to connect? Restarting can resolve many hidden network conflicts affecting your robot vacuum.
Update Firmware
Outdated firmware can cause compatibility problems with your WiFi network. Check the robot vacuum’s app or manufacturer’s website for the latest updates.
Updating firmware not only improves connection stability but also enhances performance and adds new features. Don’t skip this step—your vacuum’s software needs to be as current as your router’s.
Test And Customize Settings
After successfully connecting your robot vacuum to WiFi, it’s time to test and customize its settings. This step ensures your device works smoothly and fits your cleaning needs perfectly. Fine-tuning these settings can save you time and keep your home spotless without extra effort.
Run A Cleaning Cycle
Start by running a full cleaning cycle to see how your robot vacuum performs. Observe its movement and check if it covers all areas evenly. Pay attention to spots it might miss or obstacles it struggles with.
During the cycle, you can identify if the vacuum needs a stronger suction setting or if the brushes require adjustment. This hands-on test helps you spot any immediate issues before setting up regular cleaning schedules.
Set Schedules And Preferences
Customize the cleaning schedule based on your daily routine. You can set the vacuum to clean during work hours or while you’re out running errands. This way, your floors stay clean without interrupting your day.
Adjust preferences like cleaning modes, suction power, and boundary settings. Some models let you select specific rooms or zones to focus on, which is perfect if certain areas get dirtier faster.
- Set cleaning times that match your lifestyle
- Choose quieter modes for evenings or weekends
- Mark no-go zones to protect delicate items
Have you noticed areas in your home that always need extra attention? Use these settings to make your robot vacuum work smarter, not harder.

Credit: www.youtube.com
Frequently Asked Questions
How Do I Connect My Robot Vacuum To Wifi?
To connect your robot vacuum to WiFi, power it on and open the app. Follow the in-app instructions to link your home WiFi network. Make sure your router supports 2. 4 GHz, as most vacuums don’t support 5 GHz networks.
Why Won’t My Robot Vacuum Connect To Wifi?
Check if your WiFi network is 2. 4 GHz, as most vacuums don’t support 5 GHz. Ensure your password is correct, and your vacuum is close to the router during setup. Restart both devices if connection issues persist.
Can I Control My Robot Vacuum Remotely?
Yes, once connected to WiFi, you can control your robot vacuum via its mobile app. This allows scheduling, remote start, and status monitoring from anywhere with internet access.
What If My Robot Vacuum Loses Wifi Connection?
If your robot vacuum loses WiFi, restart the vacuum and router. Reconnect via the app if needed. Ensure the vacuum is within range of the WiFi signal for stable connection.
Conclusion
Connecting your robot vacuum to WiFi is easier than it seems. Follow the steps carefully and take your time. A stable WiFi helps your vacuum work smoothly. You can control cleaning with your phone anytime. No more manual work or extra effort.
Enjoy the convenience of smart cleaning at home. Stay patient if it does not connect right away. Reset and try again if needed. Soon, your robot will clean without any hassle. Simple steps lead to a cleaner, smarter home.