Cutting an angle on a board might seem tricky at first, but with the right approach, you can do it quickly and accurately. Whether you’re working on a DIY project or a professional job, getting that perfect angle is key to making your work look sharp and clean.
In this guide, you’ll discover simple steps and useful tips that will help you cut angles like a pro. Ready to boost your skills and tackle your next project with confidence? Keep reading—you’re just a few steps away from mastering this essential woodworking technique.

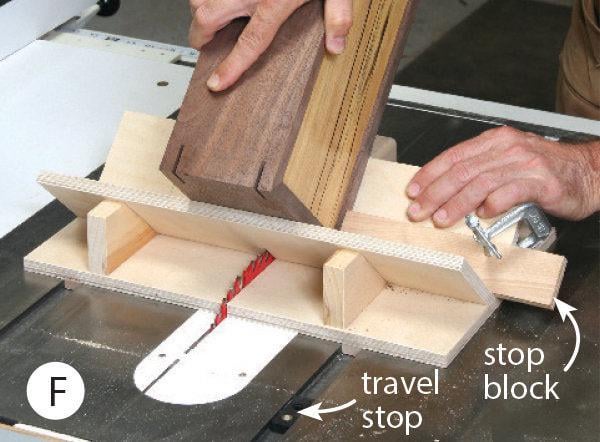
Credit: www.wikihow.com
Tools Needed
Cutting an angle on a board requires the right tools. Using proper tools helps make clean and accurate cuts.
This guide covers the main tools needed for cutting angles on wood boards safely and precisely.
Types Of Saws
Saws are the main tools to cut angles on boards. Different saws give different results and ease of use.
Choose a saw based on the angle and type of cut you want to make.
- Miter Saw: Best for precise angle cuts; it has a rotating base.
- Circular Saw: Portable and good for straight and angled cuts with a guide.
- Hand Saw: Simple and cheap, but needs more effort and skill.
- Table Saw: Great for repeatable angle cuts with a fence and miter gauge.
Measuring Tools
Accurate measuring tools help you mark the correct angle before cutting. This reduces mistakes.
Use tools that can measure angles and straight lines easily and clearly.
- Protractor: Measures exact angles on your board.
- Speed Square: Helps mark common angles like 45 and 90 degrees.
- Tape Measure: Measures length before marking the cut line.
- Pencil or Marking Knife: Marks the angle line clearly on the wood.
Safety Gear
Safety gear protects you from accidents and injuries while cutting wood at angles.
Always wear safety equipment to stay safe and avoid harm.
- Safety Glasses: Protect your eyes from dust and wood chips.
- Ear Protection: Reduce noise from power saws that can harm hearing.
- Dust Mask: Prevents breathing in sawdust and particles.
- Work Gloves: Protect your hands from splinters and cuts.
Choosing The Right Angle
Cutting an angle on a board is a common task in woodworking. Picking the correct angle helps your project fit together well.
Understanding the angle you need before cutting makes your work easier and more accurate.
Common Angles For Cuts
Some angles are used more often than others in woodworking. Knowing these helps you prepare your tools.
- 45 degrees: often used for miter joints and frames
- 90 degrees: standard straight cut
- 30 degrees: used in decorative trim and angled edges
- 60 degrees: helps create hexagonal shapes
Using A Protractor
A protractor measures angles accurately on your board. It is a simple tool to find and mark the cut angle.
Place the protractor flat on the board edge. Align the baseline and mark the angle needed.
- Hold the protractor steady
- Read the angle number on the scale
- Mark a small dot or line at the angle point
Marking The Board
Clear markings guide your saw for a precise cut. Use a pencil and ruler for sharp lines.
Draw the angle line from the edge to the mark you made. Double-check the angle before cutting.
- Use a straight edge to connect points
- Make lines visible but thin
- Check measurements twice to avoid mistakes
Preparing The Board
Cutting an angle on a board starts with good preparation. Proper setup ensures a clean, accurate cut.
Focus on securing the board and aligning the cut line before you begin cutting.
Securing The Board
Keep the board steady to prevent movement during cutting. Use clamps or a workbench to hold it firmly.
- Place the board on a flat surface.
- Use clamps to secure the board at both ends.
- Check that the board does not wobble.
- Make sure clamps do not block the cut line.
Aligning The Cut Line
Mark the angle clearly on the board. Double-check the angle to avoid mistakes.
| Tool | Use | Tip |
|---|---|---|
| Protractor | Measure the angle accurately | Place flat on the board edge |
| Pencil | Mark the cut line | Use a sharp pencil for thin lines |
| Square | Check line is straight | Align with board edges |

Credit: www.familyhandyman.com
Cutting Techniques
Cutting an angle on a board needs careful technique. It helps to get a clean and precise cut.
Different tools work well for angle cuts. Choosing the right one depends on your project and skill.
Using A Miter Saw
A miter saw is great for cutting angles quickly and accurately. Set the saw to the correct angle before cutting.
Hold the board firmly against the fence. Lower the blade slowly to make a clean cut through the wood.
- Adjust the saw angle using the miter gauge
- Secure the board with clamps or your hand
- Cut slowly to avoid splintering
Using A Handsaw
A handsaw works well for small cuts or when you have no power tools. Mark the angle clearly on the board.
Start the cut slowly to guide the saw. Use smooth, even strokes to keep the cut straight and clean.
- Draw the angle line with a protractor or angle finder
- Hold the saw at the correct angle
- Use steady back-and-forth motions
Tips For Smooth Cuts
Sharp tools give cleaner cuts. Always check your blade before starting your work.
Support the board well to avoid movement. Use painter’s tape on the cut line to reduce splinters.
- Keep blades sharp and clean
- Clamp or hold the board firmly
- Cut slowly and steadily
- Use painter’s tape on the cut line
Checking The Cut
After cutting an angle on a board, it is important to check the cut. This ensures the angle is correct and fits well. Taking time to check saves mistakes later.
Simple tools and careful inspection help you verify the cut’s accuracy. This step improves your woodworking results.
Using A Square
A square is a common tool to check angles on boards. Place the square against the cut edge to see if it matches the angle needed. It works best with 90-degree and simple angles.
Check both sides of the cut to confirm the angle is even. If the square does not fit flush, the cut may need adjustment.
- Place the square’s inside edge along the cut
- Look for gaps between the square and board
- Check for even contact along the entire edge
Adjusting For Accuracy
If the cut angle is not correct, make small adjustments. Mark the areas that need trimming. Use a saw or sanding tool carefully to fix the angle.
Recheck the cut after each adjustment. Repeat this process until the angle fits perfectly. Patience and small changes lead to better results.
- Mark the high spots on the cut edge
- Trim or sand the marked spots slowly
- Use the square to check after each change
- Stop when the angle matches your requirement
Finishing Touches
Cutting an angle on a board is not complete without proper finishing. Finishing touches help the wood look neat and last longer.
These steps make your project look professional and safe to handle. Focus on smoothing and cleaning the cut edges.
Sanding The Edges
Sanding smooths out rough parts after cutting. Use sandpaper or a sanding block to work on the edges.
Start with coarse sandpaper to remove big splinters. Then switch to finer grit for a smooth finish.
- Hold the board steady while sanding
- Sand along the angle, not against it
- Check edges for smoothness by touch
- Wear a mask to avoid dust inhalation
Cleaning Up
Cleaning removes dust and debris left from cutting and sanding. A clean board looks better and is safer to use.
Use a brush or cloth to wipe away dust. You can also use a vacuum for faster cleaning.
- Brush off all loose sawdust
- Wipe board with a damp cloth
- Let the wood dry before finishing
- Keep your workspace tidy for safety

Credit: www.reddit.com
Frequently Asked Questions
How Do You Measure Angles On A Board?
To measure angles on a board, use a protractor or a digital angle finder. Place the tool at the angle’s vertex and read the measurement. Ensure the tool is properly aligned for accuracy. These tools are essential for precise angle cuts.
What Tools Are Needed To Cut An Angle?
To cut an angle, you need a miter saw or a circular saw. A protractor or angle finder helps measure accurately. These tools ensure clean and precise cuts. Additionally, clamps can stabilize the board while cutting.
How Do You Cut A 45-degree Angle?
To cut a 45-degree angle, set your miter saw to 45 degrees. Align the board against the saw’s fence. Secure it with clamps. Make the cut slowly and smoothly for precision. Check with a protractor to ensure accuracy.
Can You Cut Angles Without A Saw?
Yes, you can cut angles without a saw using a hand saw or a jigsaw. First, mark the angle accurately using a protractor. Then, carefully follow the marked line with your chosen tool. Ensure steady hands for a precise cut.
Conclusion
Cutting an angle on a board is easier than it seems. Use the right tools and measure carefully. Take your time and follow each step closely. Practice a few cuts on scrap wood first. This helps build your confidence and skill.
Soon, you will make clean, accurate angled cuts. Keep safety in mind and work patiently. With each cut, your woodworking will improve. Enjoy the process and the results you create.