Are you struggling to cut boards at the perfect angle? Whether you’re building a shelf, crafting furniture, or working on a DIY project, getting that precise cut can make all the difference.
You’ll learn simple, step-by-step techniques to cut boards at any angle with confidence and accuracy. By the time you finish reading, you’ll feel ready to tackle your project like a pro—and avoid costly mistakes that waste time and materials. Let’s dive in and get your cuts just right!

Credit: www.familyhandyman.com
Choosing The Right Tools
Cutting boards at an angle needs the right tools. Picking the right equipment makes your work easier and safer.
This guide covers types of saws, miter boxes, and safety gear you should use.
Types Of Saws For Angled Cuts
Several saws can help you cut boards at an angle. Choose one based on your project size and skill.
- Miter Saw:Designed for precise angled cuts. It swings to cut at different angles.
- Handsaw:A simple saw for small projects. Use with a miter box for better angles.
- Circular Saw:Good for long cuts. Use guides to keep your angle straight.
- Jigsaw:Best for curves but can do some angled cuts carefully.
Using A Miter Box
A miter box helps guide your saw for accurate angled cuts. It holds the board steady and shows common angles.
| Feature | Benefit |
| Pre-set angle slots | Cuts at 45°, 90°, or 22.5° without guesswork |
| Board clamp | Keeps wood from moving while cutting |
| Portable design | Easy to use on job sites or at home |
Safety Gear Essentials
Safety gear protects you while making angled cuts. Always wear the right equipment before starting.
- Safety glasses to protect your eyes from wood chips
- Ear protection if using noisy power saws
- Dust mask to avoid breathing sawdust
- Work gloves for better grip and hand protection

Credit: www.reddit.com
Measuring And Marking Angles
Cutting boards at an angle requires careful measurement and marking. Accurate marks help you make clean and precise cuts.
Using the right tools and techniques ensures your angled cuts fit perfectly in your project.
Selecting The Correct Angle
Decide the angle you need before cutting. Common angles are 45 degrees and 90 degrees for many projects.
Check your project plans or measurements to find the exact angle needed for your board.
Using A Protractor And Speed Square
A protractor helps measure angles precisely. Place it on the board to read the angle you want to cut.
A speed square is a quick tool to mark common angles like 45 and 90 degrees. It is easy to use and very accurate.
- Align the speed square with the edge of the board
- Mark the angle line along the square’s edge
- Use a protractor for angles that are not standard
Marking Clear Cut Lines
Use a sharp pencil to draw your cut lines. Clear lines guide your saw and reduce mistakes.
Mark the board on the face that will show after the cut. Double-check your lines before cutting.
- Draw a straight line using a ruler or straight edge
- Make the line dark enough to see clearly
- Label the lines if needed to avoid confusion
Setting Up The Workpiece
Cutting boards at an angle needs careful preparation. Setting up the workpiece right helps you get precise cuts. Safety and accuracy start with how you position your board.
Follow clear steps to secure, align, and clamp the board. These steps keep the wood steady and ensure the angle is exactly what you want.
Securing The Board
Place the board on a stable surface before cutting. Make sure the surface can support the board without wobbling. This stops the wood from moving during the cut.
- Use a flat workbench or table.
- Keep the area clean to avoid slipping.
- Check that the board lies flat without gaps.
- Position the board so the cut line is easy to reach.
Aligning For Accuracy
Mark the angle on the board clearly. Use a protractor or angle guide for exact lines. Align the blade with the mark before starting the cut.
- Double-check your angle measurement.
- Use a square tool to verify straight lines.
- Adjust the saw’s angle to match your mark.
- Look from above to confirm the blade lines up well.
Clamping Techniques
Use clamps to hold the board firmly. Good clamping stops the wood from shifting or vibrating. This makes the cut cleaner and safer.
| Clamp Type | Best Use |
| C-Bar Clamp | Securing edges on small boards |
| Quick-Release Clamp | Fast adjustments and repositioning |
| Spring Clamp | Holding thin or delicate pieces |
| Pipe Clamp | Long boards or wide surfaces |

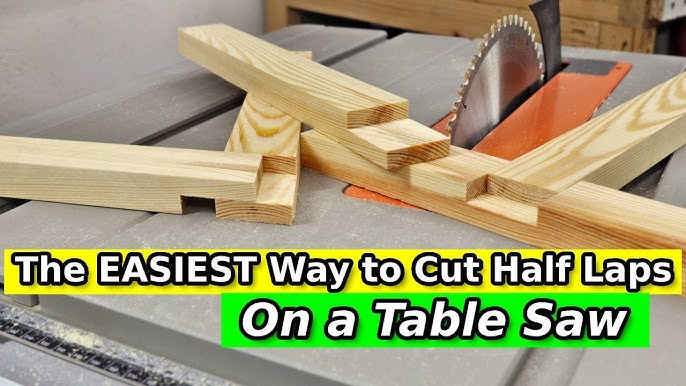
Credit: www.youtube.com
Cutting Techniques For Precision
Cutting boards at an angle requires care and focus. Precision ensures the pieces fit well in your project.
This guide covers key techniques to help you cut smooth, accurate angled edges on wood boards.
Starting The Cut Smoothly
Begin your cut with a light touch. This helps to guide the saw and prevents slips.
- Mark the angle clearly with a pencil and ruler.
- Use clamps to hold the board steady on a workbench.
- Start the saw blade at the edge of the mark gently.
- Keep the saw steady and follow the line slowly.
Maintaining A Steady Hand
A steady hand is key to clean cuts. Avoid rushing and keep your body balanced.
| Tip | How to Do It |
| Grip | Hold the saw handle firmly but not too tight. |
| Posture | Stand with feet shoulder-width apart for balance. |
| Movement | Use smooth, even strokes without forcing the saw. |
| Focus | Keep your eyes on the cut line at all times. |
Adjusting For Different Materials
Different woods and materials need different saw settings and care.
Here are key adjustments to consider:
- Softwood:Use a saw with fewer teeth for faster cuts.
- Hardwood:Use a finer-tooth blade to avoid splintering.
- Plywood:Place masking tape over the cut line to reduce chipping.
- MDF:Cut slowly to prevent burning the edges.
Finishing Touches
Cutting boards at an angle is not complete without proper finishing steps. These steps help make your cut look smooth and precise.
Paying attention to the edges and angles ensures your project looks professional and fits well.
Sanding The Cut Edge
Sanding removes rough spots and sharp edges from your cut board. Use fine-grit sandpaper for a smooth finish.
Sand along the angle, not against it. This keeps the edge even and clean.
- Start with 120-grit sandpaper to smooth big rough spots
- Use 220-grit sandpaper to finish for a soft edge
- Wipe away dust with a cloth after sanding
Checking The Angle Accuracy
Check your cut angle to make sure it matches your project’s needs. Use a protractor or angle finder tool for best results.
Place the tool on the cut edge to measure the angle. If it is off, mark and trim the board again.
- Use a digital angle finder for quick readings
- Compare the cut angle to your planned angle
- Make small adjustments with a saw if needed
Common Mistakes To Avoid
Many beginners rush and skip key steps when cutting boards at an angle. This can cause poor fits or rough edges.
Watch out for these common errors to improve your cuts.
- Cutting without measuring angles carefully
- Forgetting to secure the board before cutting
- Using dull blades that cause splintering
- Skipping sanding and leaving rough edges
- Not checking the angle after the cut
Tips For Complex Angle Cuts
Cutting boards at an angle can be tricky, especially with complex angles. You need the right tools and techniques to get clean cuts.
Understanding how to measure and cut angles carefully helps you avoid mistakes and waste.
Compound Miter Cuts
Compound miter cuts combine two angles: a bevel and a miter. These cuts are common in crown molding and trim work.
Set your saw to the correct bevel and miter angles. Take your time to measure each angle precisely before cutting.
- Check the angle with a protractor or angle gauge
- Adjust the saw for both bevel and miter settings
- Make a test cut on scrap wood first
- Hold the board firmly to avoid movement
Using Digital Angle Finders
Digital angle finders give accurate angle measurements. They are easy to use and reduce guesswork.
Place the finder on the board edge. Read the digital display for the angle. Use this angle to set your saw.
- Turn on the digital angle finder
- Place it flat on the board or surface
- Read the angle shown on the display
- Adjust your saw to match this angle
- Double-check before cutting
Practice Projects To Improve Skills
Practice makes cutting complex angles easier. Start with simple projects that use angled cuts.
Try building small frames or boxes with angled joints. This helps you learn how to measure and cut accurately.
- Cut scrap wood at different angles
- Assemble simple shapes like triangles or hexagons
- Practice adjusting saw angles for compound cuts
- Check your cuts against plans or templates
- Learn from mistakes and improve each time
Frequently Asked Questions
How Do You Measure Angles For Cutting Boards?
To measure angles for cutting boards, use a protractor or angle finder tool. Mark the desired angle on the board. Ensure accuracy by double-checking the measurements. This helps in achieving precise cuts, making your woodworking project more professional and well-finished.
What Tools Cut Boards At An Angle?
Common tools for cutting boards at an angle include a miter saw, circular saw, or jigsaw. Miter saws are ideal for precise angle cuts. Circular saws offer versatility, while jigsaws are suitable for curved cuts. Choose the tool based on your project’s requirements and your skill level.
Can Beginners Cut Boards At An Angle Easily?
Yes, beginners can cut boards at an angle with practice and proper tools. Start with simple angles and gradually progress to more complex cuts. Use guides or clamps for stability. Watching tutorials can also enhance your skills and confidence in cutting boards at various angles.
Why Is Cutting Boards At An Angle Important?
Cutting boards at an angle allows for precise joints and aesthetic designs. It enhances the structural integrity of projects like frames or furniture. Angled cuts can also add visual interest to a piece, making it more appealing and unique.
Conclusion
Cutting boards at an angle takes practice and patience. Use the right tools and measure carefully each time. Mark your angle clearly before starting the cut. Take your time to keep the line straight and smooth. Safety matters—always wear protective gear and work slowly.
With these steps, your angled cuts will look clean and fit well. Keep practicing to improve your skills every day. Simple techniques lead to better results in woodworking projects.