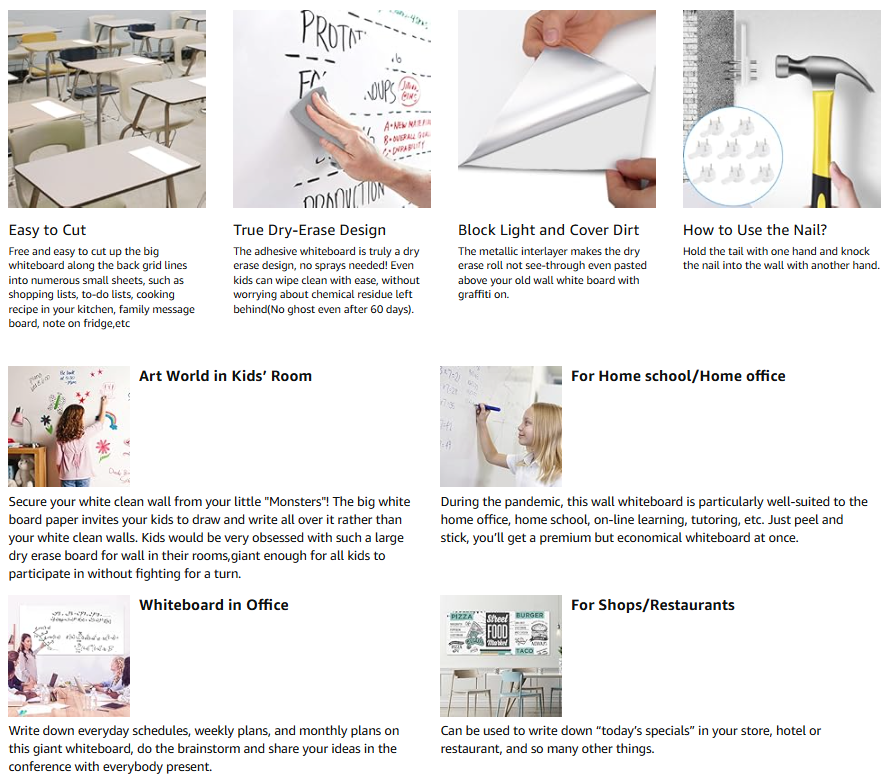
Are you looking to customize your dry erase board but don’t know where to start? Cutting a dry erase board to the perfect size can seem tricky, but with the right steps, you can do it yourself quickly and safely.
Imagine having a board that fits exactly where you want it, making your space more organized and your notes clearer. In this guide, you’ll discover simple tips and tools to cut your dry erase board like a pro—no special skills needed.
Keep reading, and you’ll be ready to transform your workspace in no time.

Credit: afmat.com
Tools Needed
Cutting a dry erase board requires the right tools to ensure clean and accurate cuts. Using proper equipment helps avoid damage to the board.
Below are the main tools and safety gear you need to prepare before cutting your dry erase board.
Essential Cutting Tools
Having the correct cutting tools is important. These tools help you make straight and smooth cuts on your dry erase board.
- A fine-toothed handsaw or a jigsaw with a fine blade
- A straight edge or ruler for guiding cuts
- A pencil or marker for marking cut lines
- Clamps to hold the board steady while cutting
- Sandpaper for smoothing rough edges after the cut
Safety Equipment
Safety is very important when cutting a dry erase board. Protective gear prevents injuries from tools and dust.
| Safety Gear | Purpose |
| Safety glasses | Protect eyes from dust and debris |
| Dust mask | Prevent inhalation of dust particles |
| Gloves | Protect hands from sharp edges and tools |
| Hearing protection | Reduce noise from power tools |
Preparing The Board
Cutting a dry erase board needs good preparation to get clean edges. Start by setting up your workspace and tools.
Careful measuring and protecting the surface will help you make a smooth cut without damage.
Measuring And Marking
Use a tape measure to find the exact size you want for your dry erase board. Mark the cut line with a pencil or fine-tip marker.
- Measure twice to avoid mistakes
- Draw straight lines using a ruler or straight edge
- Mark lightly so marks can be erased later
- Check measurements on both sides of the board
Surface Protection
Protect the surface under your board to prevent scratches or damage. Use a soft but firm surface to support the board during cutting.
| Material | Purpose |
| Cardboard | Protects table from scratches |
| Foam Pad | Absorbs pressure and prevents slipping |
| Old Blanket | Soft base for delicate surfaces |
| Cutting Mat | Ideal for repeated cuts |
Cutting Techniques
Cutting a dry erase board needs care and the right tools. Using the correct technique helps you get a clean edge. It also prevents damage to the board.
This guide covers three ways to cut a dry erase board. You can use a utility knife, a saw, or try the scoring and snap method. Each way suits different needs.
Using A Utility Knife
A utility knife works well for thin dry erase boards. It gives you control and a smooth cut. Make sure to use a sharp blade to avoid rough edges.
- Place the board on a flat, stable surface.
- Mark the cutting line with a pencil and ruler.
- Score along the line with the utility knife, pressing firmly.
- Repeat scoring until you cut through the board.
- Carefully separate the board along the scored line.
Using A Jigsaw Or Circular Saw
Use a jigsaw or circular saw for thicker boards or large cuts. These tools make fast, straight cuts. Always wear safety gear and clamp the board firmly.
| Tool | Best For | Tip |
| Jigsaw | Curved or detailed cuts | Use a fine-tooth blade |
| Circular Saw | Straight, long cuts | Use a guide for accuracy |
Scoring And Snap Method
This method works well for thin boards. You score the surface several times and then snap the board along the line. It is simple and needs only a utility knife and straight edge.
- Use a metal ruler to guide your scoring.
- Score the board multiple times for a clean break.
- Place the board edge on a table corner before snapping.
- Wear gloves to protect your hands during snapping.
Finishing Touches
Cutting a dry erase board is just the first step. Finishing touches make it safe and usable.
Smoothing edges and cleaning residue help the board look neat and last longer.
Smoothing Edges
Cut edges can be sharp or rough. Smoothing them prevents cuts and damage.
Use fine sandpaper or a sanding block to gently smooth all edges.
- Sand in one direction for a clean finish
- Check edges by running your hand slowly over them
- Remove dust with a soft cloth after sanding
Cleaning Residue
Cutting leaves dust and small debris on the board surface. Cleaning removes this residue.
Use a damp cloth or mild cleaner safe for dry erase boards to wipe the surface.
- Avoid harsh chemicals that can damage the board
- Dry the board fully with a soft towel
- Check for leftover dust in corners and edges
Common Mistakes To Avoid
Cutting a dry erase board needs care and the right tools. Many people make simple mistakes that cause cracks or uneven edges. Avoid these errors to get a clean cut every time.
Knowing what to watch out for saves time and money. Here are the common mistakes and how to avoid them when cutting your dry erase board.
Using The Wrong Tools
Not all tools work well on dry erase boards. Using dull blades or the wrong saw can damage the surface or cause rough edges.
Always use a fine-toothed saw or a utility knife made for cutting plastic or laminate. Sharp blades make cleaner cuts and reduce chipping.
Skipping Measurement And Marking
Failing to measure and mark the cut line carefully leads to uneven or too short cuts. This mistake often ruins the whole board.
- Use a ruler or tape measure for exact length and width.
- Mark the cut line with a pencil or fine marker.
- Double-check measurements before cutting.
Applying Too Much Pressure
Pushing too hard when cutting can crack or chip the board. Let the tool do the work at a steady pace.
Slow and steady cuts reduce damage and give better control.
Not Securing The Board
Cutting a loose board causes mistakes and safety risks. The board may slip and cause uneven cuts or injury.
Use clamps or a sturdy surface to hold the board firmly. This keeps the board still and your hands safe.
Ignoring Edge Finishing
After cutting, rough edges can be sharp or look bad. Many skip sanding or smoothing the edges.
| Edge Problem | Fix |
| Rough or sharp edges | Light sanding with fine-grit sandpaper |
| Chipped corners | Use a file to smooth out chips |
| Uneven edges | Trim carefully with a utility knife |

Credit: www.doityourself.com
Tips For Better Results
Cutting a dry erase board takes care and patience. Following some simple tips helps you get clean edges and avoid damage.
This guide covers how to work slowly and carefully and how to pick the best workspace for your project.
Working Slowly And Carefully
Rushing can cause rough edges or cracks on the dry erase board. Take your time to make accurate cuts. Use a steady hand and avoid forcing the blade.
- Score the board lightly several times instead of cutting deep at once.
- Use a sharp utility knife or blade for smoother cuts.
- Hold the board firmly to prevent slipping or wobbling.
- Wear safety gloves to protect your hands during cutting.
- Check your progress often to adjust your technique.
Choosing The Right Workspace
Select a clean, flat surface to work on. This keeps the board steady and makes cutting easier. Make sure you have enough light and space.
| Workspace Feature | Reason |
| Flat Surface | Prevents uneven cuts and board damage |
| Good Lighting | Helps see cutting lines clearly |
| Spacious Area | Allows comfortable movement and tool handling |
| Protective Cover | Prevents scratches on the board and table |
Credit: www.mysuburbankitchen.com
Frequently Asked Questions
How Do You Safely Cut A Dry Erase Board?
To safely cut a dry erase board, use a straightedge and a utility knife. Score the board along your marked line. Apply gentle pressure to snap the board along the scored line. Always wear safety goggles and gloves for protection.
What Tools Are Needed To Cut A Dry Erase Board?
You’ll need a utility knife, straightedge, and safety gear to cut a dry erase board. A ruler helps in marking precise lines. Always ensure your tools are sharp and in good condition for a clean cut.
Can I Use A Saw To Cut A Dry Erase Board?
Yes, you can use a fine-tooth saw to cut a dry erase board. Ensure the board is secured to prevent movement. A saw can provide a cleaner cut, especially for thicker boards.
How To Measure A Dry Erase Board Before Cutting?
Use a measuring tape to accurately measure the dimensions needed. Mark the measurements clearly with a pencil or marker. Double-check your measurements to ensure accuracy before making any cuts.
Conclusion
Cutting a dry erase board can be simple with the right tools and steps. Measure carefully and mark the board before cutting. Use a straight edge to guide your saw or cutter. Take your time to avoid mistakes or damage.
After cutting, sand the edges for a smooth finish. This helps prevent scratches and keeps the board looking good. Now, your dry erase board fits perfectly in your space. Enjoy creating, planning, or teaching with your custom-sized board. Small changes can make a big difference in your workspace.