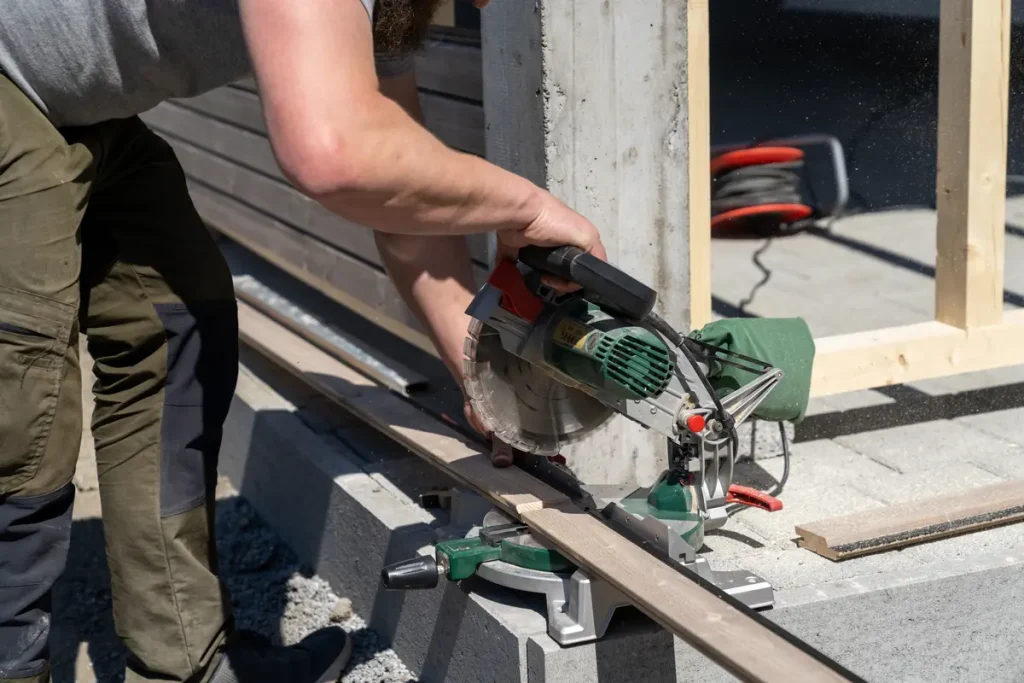
If you’re tackling a tiling project, cutting Hardie Backer Board is a skill you need to master. It might seem tricky at first, but with the right tools and techniques, you can make clean, precise cuts every time.
Imagine saving time, avoiding frustration, and getting a professional-looking finish on your walls or floors. In this guide, you’ll discover simple steps that make cutting Hardie Backer Board easier than you think. Keep reading, and you’ll gain the confidence to handle your project like a pro.

Credit: veteranscontractingllc.com
Essential Tools And Materials
Cutting Hardie Backer Board requires the right tools and materials. Using proper equipment makes the job easier and safer.
This guide covers the essential items you need before starting your project.
Measuring Tape
A measuring tape helps you mark accurate cuts on the Hardie Backer Board. Precise measurements prevent waste and mistakes.
Choose a tape that is at least 25 feet long and easy to read.
Pencil Or Marker
Use a pencil or marker to draw cutting lines on the board. A sharp pencil works best for clear lines.
Make sure the marks are visible but not too thick to affect cutting accuracy.
Carbide-tipped Scoring Knife
This knife scores the Hardie Backer Board before snapping it. The carbide tip lasts longer and cuts smoothly.
Score along the marked line firmly but without cutting through the board completely.
Circular Saw With Diamond Blade
A circular saw equipped with a diamond-tipped blade cuts through the board cleanly. It handles straight and curved cuts well.
Adjust the saw depth to just cut through the board to avoid damage beneath.
Safety Gear
Wear safety glasses and a dust mask when cutting Hardie Backer Board. The dust can irritate eyes and lungs.
- Safety glasses protect your eyes
- Dust mask prevents inhaling fibers
- Gloves protect hands from sharp edges
Straight Edge Or T-square
A straight edge or T-square helps you draw straight cutting lines. It guides your knife or saw for accuracy.
Use a tool that is longer than the width of the board for best results.
Work Surface Or Sawhorses
Place the Hardie Backer Board on a stable work surface or sawhorses. This keeps the board steady during cutting.
Ensure the surface is clean and flat to avoid uneven cuts.
Safety Precautions
Cutting Hardie Backer Board requires careful attention to safety. The board contains fibers that can irritate your skin and lungs. Proper safety gear helps prevent injury and health risks.
Use the right tools and follow safety steps. Keep your work area clean and well-ventilated. Below are key safety precautions to follow before and during cutting.
Wear Protective Gear
Always wear personal protective equipment to reduce exposure to dust and sharp edges. This gear helps protect your eyes, lungs, and skin.
- Respirator mask rated for silica dust
- Safety goggles or glasses
- Long sleeves and gloves
- Hearing protection if using power tools
Prepare The Work Area
Set up a clean, open space to cut the board. Avoid indoor areas without ventilation. Use drop cloths to catch dust and debris.
| Tip | Reason |
| Work outside or in well-ventilated area | Reduces inhalation of dust |
| Use clamps to secure the board | Prevents slipping while cutting |
| Keep water nearby | Can help reduce dust if sprayed lightly |
| Clear the floor of tripping hazards | Maintains safe footing |
Use Proper Cutting Tools
Choose tools designed for cement board cutting. Use blades or discs that cut cleanly and reduce dust. Avoid tools that create excessive dust or rough edges.
- Score the board with a carbide-tipped scoring knife
- Snap the board along the score line
- Use a circular saw with a diamond blade for straight cuts
- Wear protective gear while using power tools
Measuring And Marking
Cutting Hardie Backer Board starts with careful measuring and marking. Accurate lines help ensure a clean and precise cut.
This guide covers key points for measuring and marking your board before cutting.
Accurate Measurements
Measure twice before marking to avoid mistakes. Use a tape measure that is easy to read and reliable.
- Place the board on a flat surface to get an even measurement.
- Extend the tape measure fully for long cuts.
- Mark the exact length needed, checking both ends.
- Re-measure the marked line to confirm accuracy.
Effective Marking Techniques
Use tools that create clear, visible lines on the Hardie Backer Board. This helps guide your cutting tool precisely.
| Tool | Use | Tip |
| Pencil | Light marking | Use a sharp pencil for thin lines |
| Chalk line | Long straight lines | Snap the line firmly for a crisp mark |
| Marker | Visible marks | Choose a fine-tip marker for accuracy |

Credit: insulationgo.co.uk
Cutting Techniques
Cutting Hardie Backer Board needs care and the right tools. This board is tough and can wear down blades quickly.
There are a few ways to cut it. Each way works best for different shapes and sizes.
Scoring And Snapping
Scoring and snapping is a simple way to cut straight lines. Use a utility knife to score the board deeply.
After scoring, bend the board along the score line. It will snap cleanly, making a smooth edge.
- Draw a straight line where you want to cut
- Score the line with a sharp utility knife several times
- Place the board on a flat surface, scored side up
- Press down to snap the board along the scored line
Using A Circular Saw
A circular saw works well for straight, long cuts. Use a carbide-tipped blade for best results.
Set the blade depth just a little deeper than the board thickness. Cut slowly to avoid chipping.
- Wear a dust mask and eye protection
- Mark your cut line clearly
- Clamp the board to keep it steady
- Guide the saw slowly along the line for a clean cut
Jigsaw For Curves
A jigsaw is best for curved or irregular cuts. Use a fine-toothed blade designed for cement board.
Take your time and follow the lines carefully. Support the board well to avoid breakage.
- Draw the curve on the board clearly
- Use a slow speed on the jigsaw
- Keep the blade vertical and steady
- Support the board close to the cut to prevent cracking
Handling Dust
Cutting Hardie Backer Board creates a lot of dust. This dust can be harmful if inhaled. Protecting yourself and your workspace is very important.
Using the right tools and safety gear helps reduce dust exposure. It also keeps your work area cleaner and safer.
Wear Protective Gear
Always wear a dust mask or respirator when cutting Hardie Backer Board. This prevents you from breathing in fine dust particles.
Use safety goggles to protect your eyes. Wear long sleeves and gloves to protect your skin from dust irritation.
- Dust mask or respirator rated for fine dust
- Safety goggles or glasses
- Long-sleeve shirts and gloves
Cut Outdoors Or In A Ventilated Area
Cutting outside reduces dust buildup in your home or workshop. If you must cut indoors, open windows and doors to increase airflow.
Use fans to blow dust away from you. Good ventilation helps keep dust levels low and improves air quality.
- Cut outside when possible
- Open windows and doors for airflow
- Use fans to move dust away
Use Dust-reducing Tools
Use a score-and-snap knife to cut Hardie Backer Board with less dust. This tool cuts without grinding or sawing.
If you use a saw, attach a vacuum dust collection system. This captures dust as you cut and keeps it from spreading.
- Score-and-snap knife for clean cuts
- Saw with dust collection attachment
- Vacuum to catch dust during cutting
Clean Up Carefully
After cutting, clean dust with a vacuum that has a HEPA filter. Avoid sweeping or blowing dust into the air.
Wipe surfaces with a damp cloth to pick up remaining dust. Proper cleanup prevents dust from spreading later.
- Use HEPA vacuum for dust cleanup
- Do not sweep or blow dust
- Wipe surfaces with a damp cloth
Smoothing Edges
Cutting Hardie Backer Board can leave rough edges. Smoothing these edges helps with tile adhesion. It also makes the surface safer to handle.
Smooth edges prevent chipping and improve the final look of your project. Let’s look at sanding tips and how to ensure clean cuts.
Sanding Tips
Use a sanding block or sanding sponge to smooth edges. Sand gently to avoid damaging the board. Focus on removing small chips and rough spots.
Wear a dust mask to protect yourself. Hardie Backer Board dust can irritate your lungs. Clean the area after sanding to remove dust.
- Use medium-grit sandpaper (80-120 grit)
- Sand in a circular motion for even edges
- Check edges often to avoid over-sanding
- Wear safety goggles and a dust mask
Ensuring Clean Cuts
Use a sharp scoring knife or utility knife for cutting. Score the board deeply before snapping it. A clean score line makes a smooth cut.
Support the board well when snapping. Use a straight edge to guide your cut. Avoid bending or twisting the board to prevent cracks.
- Mark your cut line clearly
- Score the board firmly along the line
- Snap the board on a flat, supported surface
- Use a rasp or sanding block to smooth edges
Installation Preparation
Cutting Hardie Backer Board needs careful preparation. Proper steps help the board fit well and last longer.
Gather the right tools and check your work area before you start cutting the board.
Gather Necessary Tools
You need specific tools to cut Hardie Backer Board safely and accurately. Prepare these before starting.
- Measuring tape
- Pencil or chalk for marking
- Carbide-tipped scoring knife or utility knife
- Jigsaw or circular saw with a diamond blade
- Safety glasses and dust mask
- Clamps to hold the board steady
Prepare The Work Area
Clear your workspace to avoid accidents. Make sure you have enough room to cut the board safely.
Lay down a drop cloth or plywood to protect the surface below the board.
- Work on a flat, stable surface
- Keep children and pets away
- Ensure good lighting to see cutting lines clearly
- Ventilate the area to reduce dust
Measure And Mark Accurately
Measure the board carefully before cutting. Mark the cut lines clearly with a pencil or chalk.
Double-check your measurements to avoid mistakes and wasted material.
- Use a straight edge to guide your marks
- Mark both sides of the board if possible
- Label the cut edges to keep track
Wear Safety Gear
Cutting Hardie Backer Board creates dust that can harm your lungs and eyes. Always wear protection.
- Wear safety glasses to protect your eyes
- Use a dust mask or respirator
- Wear gloves to protect your hands
- Consider ear protection if using power tools

Credit: www.youtube.com
Frequently Asked Questions
What Tools Do I Need To Cut Hardie Backer Board?
You need a carbide-tipped scoring knife, a straightedge, and safety gear. A power saw with a diamond blade works for faster cuts. Always wear a dust mask and eye protection to avoid inhaling silica dust.
How Do I Score And Snap Hardie Backer Board?
Use a carbide-tipped knife and straightedge to score deeply. Snap the board along the scored line by applying firm pressure. This method creates clean cuts without power tools, ideal for straight edges and small projects.
Can I Use A Circular Saw To Cut Hardie Backer Board?
Yes, use a circular saw with a diamond or carbide blade. Set the depth slightly deeper than the board thickness. Cut slowly to reduce dust and avoid chipping. Always use a dust mask and eye protection.
How Do I Minimize Dust When Cutting Hardie Board?
Score and snap the board to reduce dust. If using power tools, cut outdoors or in a well-ventilated area. Wear a respirator mask and goggles. Wetting the board slightly can help control dust during cutting.
Conclusion
Cutting Hardie Backer Board is simple with the right tools and steps. Use a straightedge and score the board before snapping it cleanly. Always wear safety gear to protect yourself from dust and sharp edges. Taking your time helps you make accurate cuts for a perfect fit.
Practice makes the process easier and faster. Keep these tips in mind for your next project. You’ll get strong, smooth results every time. Ready to tackle your tile or backsplash work? This skill will help you finish like a pro.