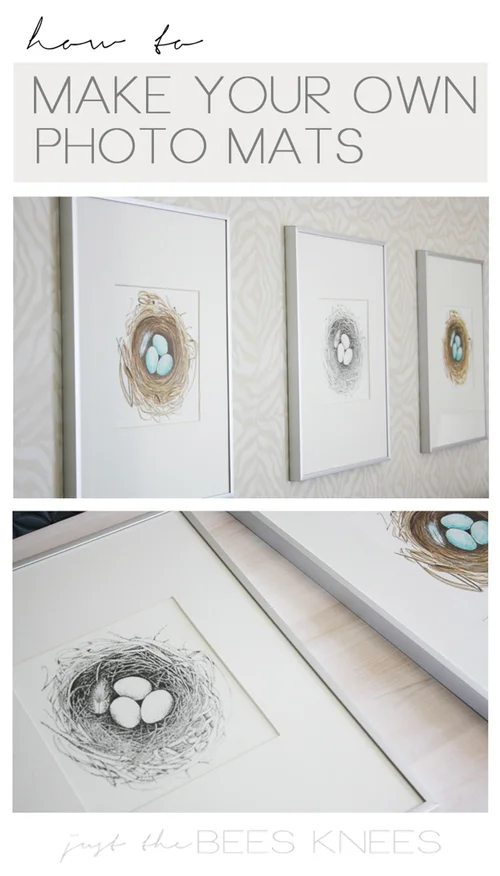
Are you ready to give your artwork or photos a professional touch? Knowing how to cut mat board for framing can make all the difference.
It might sound tricky, but with the right tips and tools, you can do it yourself—and save money too. Imagine your favorite picture perfectly framed, with clean edges and a neat finish that catches every eye. Keep reading, and you’ll learn simple steps to cut your mat board like a pro, even if you’ve never tried it before.
Your next framing project is about to get a whole lot easier.
Tools Needed
Cutting a mat board precisely is important for a nice frame. Using the right tools helps you get clean, straight edges. This guide lists the tools you need to start cutting your mat board.
Prepare your workspace with these tools before you begin. Each tool has a specific role in making the process easier and safer.
Essential Cutting Tools
You need sharp, accurate tools to cut mat boards well. A steady hand and the right equipment give the best results.
- Mat Cutter or Utility Knife: Use a sharp blade for clean cuts.
- Self-Healing Cutting Mat: Protects your table and blade.
- Straightedge or Metal Ruler: Guides your cuts for straight lines.
- Corner Cutter (optional): Shapes the inner edges perfectly.
Measuring And Marking Supplies
Marking your mat board correctly helps avoid mistakes. Use precise tools to measure and draw cutting lines.
| Tool | Purpose |
|---|---|
| Measuring Tape or Ruler | Measure dimensions of the mat board and opening. |
| Pencil or Fine-tip Marker | Mark cutting lines lightly for accuracy. |
| Square or T-Square | Ensure right angles for perfect corners. |
Safety Equipment
Cutting tools are sharp and can cause injury. Use safety gear to protect yourself while working.
- Cut-Resistant Gloves: Protect your hands from accidental cuts.
- Safety Glasses: Shield your eyes from debris.
- Work Surface with Clamp: Holds the mat board steady.
Selecting The Right Mat Board
Choosing the right mat board is important for framing your artwork or photo. It protects and enhances the image inside the frame.
There are different types, thicknesses, and colors of mat boards. Picking the best one helps your project look its best.
Types Of Mat Boards
Mat boards come in many materials. The main types are paper-based, cotton, and museum-quality boards.
- Paper-based boards are affordable and common.
- Cotton boards are stronger and acid-free.
- Museum-quality boards protect art for a long time.
Choosing Thickness And Color
Mat boards have different thicknesses. Thicker boards give a deeper look but need a bigger frame.
Color affects how your art stands out. Light colors brighten the image, dark colors add contrast.
- Use 2-4 mm thickness for most frames.
- Pick colors that match or complement the artwork.
- Neutral colors work well for many pictures.
Buying Quality Material
Good mat boards last longer and keep art safe. Look for acid-free or archival materials.
Quality boards resist yellowing and damage over time. Avoid cheap boards that can harm your artwork.
- Check for acid-free or archival labels.
- Choose boards with smooth, clean surfaces.
- Buy from trusted art supply stores.
Preparing The Workspace
Cutting a mat board for framing needs a neat and well-prepared workspace. This helps you work safely and get clean cuts.
Before you start, set up your area so you can focus on cutting without distractions or mess.
Setting Up A Clean Surface
Choose a flat surface like a large table or desk. Make sure it is sturdy and stable.
Clear the surface of dust, dirt, and clutter. A clean area keeps your mat board safe from scratches.
- Use a cutting mat to protect your table
- Remove any items that are not needed
- Wipe the surface with a soft cloth
Ensuring Proper Lighting
Good lighting helps you see the mat board edges clearly. This improves cutting accuracy.
Use bright, white light that covers the whole workspace. Natural light works well if available.
- Position your workspace near a window if possible
- Use a desk lamp to add focused light
- Avoid shadows on your cutting area
Organizing Tools And Materials
Keep all your tools and materials within easy reach. This saves time and keeps you organized.
Arrange your cutting tools, ruler, pencil, and mat board neatly on the table before starting.
- Use a tray or container for small tools
- Place the mat board flat and ready to cut
- Have extra blades handy for clean cuts
Credit: www.interiorsbysarahlangtry.com
Measuring And Marking The Mat
Cutting a mat board for framing needs careful measuring and marking. This ensures the artwork fits well and looks great.
Accurate measurements help avoid mistakes and save material. Marking the cut lines clearly makes the cutting process easier.
Measuring The Frame And Artwork
Start by measuring the inside edges of your frame. This tells you the exact size of the mat window.
Next, measure your artwork. Leave extra space around it for a border inside the mat window.
- Measure frame opening width and height in inches or centimeters
- Measure artwork width and height accurately
- Decide on border size (usually 1 to 3 inches)
- Calculate mat window size by adding border to artwork size
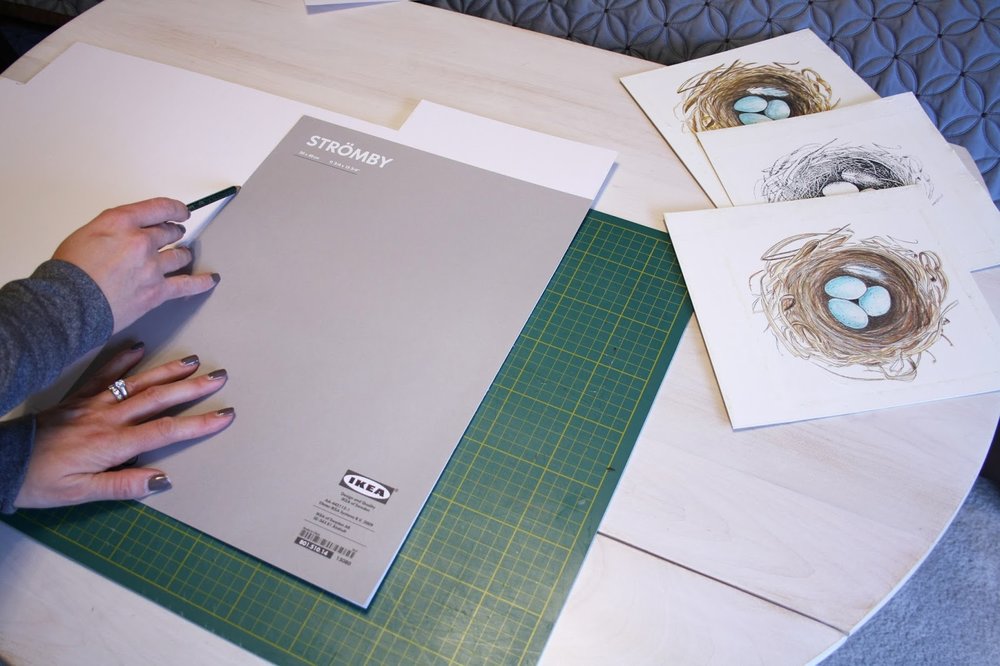
Marking Cut Lines Accurately
Use a ruler and pencil to mark the mat board. Draw light lines for the window to cut out.
Mark the outer edges of the mat board to know where to trim the board itself. Use a straightedge for clean lines.
- Place the mat board on a flat surface
- Use a ruler to measure and mark the window
- Mark corners first, then connect lines
- Use a sharp pencil for fine lines
- Double-check lines before cutting
Double Checking Measurements
Check all measurements twice before cutting. Mistakes are hard to fix once the mat board is cut.
Measure from multiple points and compare with your notes. Confirm the artwork fits the window size perfectly.
- Re-measure frame opening and artwork
- Compare measurements to marked lines
- Check border width consistency on all sides
- Ensure lines are straight and corners square
Cutting The Mat Board
Cutting a mat board is a key step in framing your artwork or photos. A clean cut helps the frame look neat and professional.
There are different tools and methods to cut mat boards. Choose the one that fits your skill and tools available.
Using A Mat Cutter
A mat cutter is a tool designed to cut smooth and precise openings in mat boards. It often has an adjustable guide and a sharp blade.
- Place the mat board flat on a cutting surface.
- Set the mat cutter’s guide to the size of the window needed.
- Hold the mat firmly and push the cutter along the guide slowly.
- Make sure to cut all four sides cleanly.
- Remove the cut piece carefully from the mat board.
Cutting With A Utility Knife
If you do not have a mat cutter, a sharp utility knife can work well. Use a ruler to guide your cuts for straight edges.
- Place the mat board on a hard, flat surface.
- Use a metal ruler to mark the cutting lines.
- Hold the ruler firmly to avoid slipping.
- Cut slowly with the utility knife along the ruler.
- Repeat the cut if the blade does not go through in one pass.
- Replace the knife blade often to keep cuts clean.
Tips For Smooth Edges
| Tip | Why It Helps |
|---|---|
| Use a fresh blade | Prevents ragged edges and tearing |
| Cut on a firm surface | Keeps the mat stable and straight |
| Apply steady pressure | Ensures clean, smooth cuts |
| Score before cutting deep | Controls the cut depth and accuracy |
| Practice on scrap pieces | Builds confidence and skill |

Credit: www.interiorsbysarahlangtry.com
Creating The Window Opening
Cutting the window opening in a mat board is a key step in framing artwork or photos. This opening lets the art show while protecting the edges. Careful measuring and cutting keep the presentation clean and professional.
Use the right tools and follow simple guides to make a perfect window. This section explains how to size, cut, and protect your mat board during the process.
Sizing The Opening
Measure your artwork carefully before cutting the window. The opening should be smaller than the art size to hold it in place. Usually, reduce the size by about 1/4 inch on each side.
- Measure the height and width of the artwork.
- Subtract 1/2 inch from both height and width.
- Mark the reduced dimensions on the back of the mat board.
- Use a ruler and pencil for straight, clear lines.
Cutting The Inner Window
Use a sharp utility knife and a metal ruler to cut the window. Cut slowly and firmly along the marked lines. It helps to cut in multiple light passes instead of one deep cut.
| Tool | Use |
| Utility knife | Make precise cuts |
| Metal ruler | Guide the knife for straight edges |
| Cutting mat | Protect surfaces and prevent blade dulling |
Preventing Board Damage
Protect the mat board from bending or tearing while cutting. Keep the board flat and use a cutting mat underneath. Avoid pressing too hard with the knife.
- Place weights on the board edges to keep it flat.
- Make light cuts and repeat if needed.
- Use a fresh blade for clean cuts.
- Work on a clean, stable surface.
Finishing Touches
Cutting a mat board for framing is almost done. Finishing touches help make your frame look clean and neat. This part ensures the mat fits well and looks professional.
Follow these simple tips to clean edges, check the fit, and make final adjustments. This will protect your artwork and enhance its display.
Cleaning Up Edges
After cutting, the edges of the mat board might be rough or uneven. Cleaning them up gives a smooth, polished look. Use a fine sanding block or a soft eraser to gently smooth any rough spots.
- Lightly sand edges with fine-grit sandpaper
- Remove dust using a soft brush or cloth
- Use a clean eraser to remove pencil marks
- Handle the mat board with clean hands or gloves
Testing Fit With Artwork And Frame
Check how the mat board fits with your artwork and frame before final assembly. Place the artwork inside the mat window and then fit everything into the frame. This step helps avoid surprises later.
| Item | What to Check |
| Mat Board | Window size and edge cleanliness |
| Artwork | Centered and not touching edges |
| Frame | Correct size and secure holding |
Adjusting If Necessary
If the mat board does not fit perfectly, make small adjustments. You may need to trim edges or widen the window slightly. Take care not to cut too much at once.
- Mark areas that need trimming
- Use a sharp blade for small cuts
- Test fit again after each cut
- Smooth edges after trimming
- Ensure artwork fits well without gaps
Credit: www.interiorsbysarahlangtry.com
Common Mistakes To Avoid
Cutting mat board for framing looks simple but needs care. Many people make errors that waste material or cause bad fits.
Knowing common mistakes helps you get clean and exact cuts every time. This guide highlights key errors to watch for.
Misaligned Cuts
Misaligned cuts happen when you do not measure or mark the mat board correctly. This leads to uneven edges and poor framing.
- Always use a ruler or straight edge when marking.
- Double-check measurements before cutting.
- Keep the mat board steady to avoid slips.
- Use a sharp blade for clean lines.
Using Dull Blades
Dull blades tear the mat board and cause rough edges. They also make cutting harder and less safe.
| Blade Condition | Cut Quality | Safety |
| Sharp | Clean and smooth | Safer and easier |
| Dull | Ragged and uneven | Risk of slipping |
Ignoring Safety Precautions
Cutting mat board with sharp tools can cause injuries if you are careless. Ignoring safety rules puts you at risk.
- Always cut away from your body.
- Use a cutting mat to protect surfaces.
- Wear safety gloves if needed.
- Keep fingers clear of the blade path.
Tips For Professional Results
Cutting a mat board with precision improves the look of your framed art. Using the right methods helps avoid mistakes and wasted material.
These tips will guide you to get clean, sharp edges every time you cut a mat board for framing.
Practicing On Scrap Material
Start by cutting scrap mat board before working on your final piece. This helps you get comfortable with the tools and technique.
- Use small pieces of leftover mat board.
- Try different cutting angles and pressures.
- Check how clean and straight your cuts are.
- Adjust your method based on the results.
Maintaining Tools Regularly
Sharp and clean tools make cutting easier and safer. Keep your blades and rulers in good condition.
| Tool | Maintenance Tips |
| Mat Cutter Blade | Replace when dull; clean after use |
| Ruler | Wipe clean; check for straight edges |
| Cutting Surface | Keep smooth and free of debris |
Using Guides And Rulers
Guides and rulers help you make straight and exact cuts. Use them to line up your mat board before cutting.
- Place a metal ruler along the cutting line.
- Hold the ruler firmly to prevent slipping.
- Use a straightedge guide for long cuts.
- Mark cut lines lightly with a pencil first.
Frequently Asked Questions
What Tools Are Needed To Cut Mat Board?
To cut mat board, you’ll need a sharp utility knife, a metal ruler, and a cutting mat. The ruler ensures straight cuts, while the mat protects surfaces. For precision, consider using a mat cutter. It’s specifically designed for cutting mat boards efficiently and accurately.
How Do You Measure Mat Board Accurately?
Begin by measuring the artwork and frame dimensions. Subtract the artwork size from the frame size to determine mat borders. Use a ruler for precision. Mark the measurements on the board lightly with a pencil. This ensures accurate cuts, aligning the artwork perfectly within the frame.
Can You Cut Mat Board Without A Mat Cutter?
Yes, you can cut mat board without a mat cutter. Use a sharp utility knife and a metal ruler instead. Ensure the blade is fresh for clean cuts. A cutting mat protects surfaces and offers a stable cutting base. This method requires patience and a steady hand.
What Is The Best Way To Cut Straight Lines?
For straight lines, use a metal ruler as a guide. Align it with your cutting marks. Hold the ruler firmly to prevent slipping. With a sharp utility knife, make steady, even cuts along the ruler. This technique ensures precision and clean edges, crucial for professional-looking mat boards.
Conclusion
Cutting a mat board for framing is simple with the right steps. Measure carefully and use sharp tools for clean cuts. Take your time to avoid mistakes and get smooth edges. Practice makes perfect, so don’t rush. A well-cut mat board makes your artwork look neat and professional.
Enjoy the process and show off your framed pieces with pride.