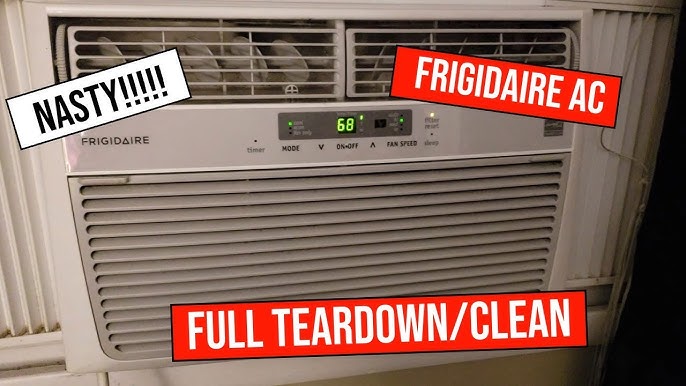
Are you looking to disassemble your air conditioner but don’t know where to start? Taking apart an AC unit might seem tricky, but with the right steps, you can do it safely and quickly.
Whether you want to clean it thoroughly, fix a problem, or replace parts, knowing how to disassemble your air conditioner can save you time and money. In this guide, you’ll find clear, simple instructions that anyone can follow. By the end, you’ll feel confident handling your AC like a pro.
Keep reading to learn exactly what to do!

Credit: www.youtube.com
Tools Needed
Disassembling an air conditioner requires specific tools. These tools help you work safely and efficiently.
Using the right tools prevents damage to the parts and makes the process easier.
Screwdrivers
Screwdrivers are essential for removing screws from the air conditioner casing and parts. You need different types and sizes.
- Flathead screwdriver for slotted screws
- Phillips screwdriver for crosshead screws
- Precision screwdriver for small screws
Wrenches
Wrenches help loosen and tighten nuts and bolts. Adjustable wrenches fit different sizes, making them handy.
- Adjustable wrench for various bolt sizes
- Socket wrench for tight spaces
Pliers
Pliers are useful for gripping and pulling wires or small parts. They also help cut wires if needed.
- Needle-nose pliers for tight spots
- Slip-joint pliers for gripping
Multimeter
A multimeter checks electrical connections and voltage. It helps ensure the air conditioner is safe to work on.
Gloves And Safety Gear
Wear gloves to protect your hands from sharp parts and dirt. Safety glasses protect your eyes from debris.
- Work gloves for hand protection
- Safety glasses for eye safety
Other Helpful Tools
Other tools can make the job easier and safer. Keep these handy during disassembly.
- Flashlight for better visibility
- Plastic containers to hold screws and small parts
- Soft cloth to clean parts
Safety Precautions
Disassembling an air conditioner requires care to avoid injury or damage. Follow safety rules to protect yourself and your equipment.
Before starting, make sure you have the right tools and understand the risks. Always work in a safe environment.
Disconnect Power Supply
Unplug the air conditioner from the power source. This prevents electric shocks and accidents while working on the unit.
Wear Protective Gear
Use gloves and safety goggles to protect your hands and eyes from sharp parts and dust. Wear long sleeves to avoid scratches.
Handle Refrigerant Carefully
The refrigerant inside the air conditioner can be harmful. Avoid releasing it into the air. Use proper tools to manage refrigerant safely.
- Do not puncture refrigerant lines
- Work in a well-ventilated area
- Use certified recovery equipment
- Wear a mask if refrigerant leaks
Keep Work Area Clean
Clear the area around the air conditioner. Remove obstacles to move safely and avoid tripping over tools or parts.
Use Proper Tools
Use the correct tools for screws, bolts, and electrical parts. This reduces damage and helps you work faster and safer.
| Tool | Purpose |
| Screwdriver | Remove screws |
| Wrench | Loosen bolts |
| Multimeter | Check electrical connections |
| Gloves | Protect hands |
Preparing The Unit
Before you start taking apart an air conditioner, you must prepare the unit safely. This helps protect you and the device.
Focus on turning off power and removing parts carefully. These steps make disassembly easier and safer.
Power Off And Unplug
Always switch off the air conditioner and unplug it from the power outlet. This prevents electric shock or damage.
- Find the power switch on the unit or wall.
- Turn off the air conditioner completely.
- Unplug the power cord from the socket.
- Double-check that no electricity flows to the unit.
Remove Outer Cover
Remove the outer cover to access the inside parts of the air conditioner. Use the right tools and be gentle.
| Tool | Purpose |
|---|---|
| Screwdriver | Remove screws holding the cover |
| Plastic pry tool | Carefully separate cover clips |
| Soft cloth | Protect cover from scratches |

Credit: www.youtube.com
Detaching The Front Panel
Removing the front panel of an air conditioner is the first step in disassembling it. This part covers the internal components and needs careful handling.
Follow simple steps to detach the front panel safely. You will need basic tools like a screwdriver and a clean workspace.
Gather Necessary Tools
Before you start, collect all tools required to remove the front panel. This helps avoid interruptions during the process.
- Phillips head screwdriver
- Flathead screwdriver
- Soft cloth or towel
- Container for screws
- Gloves for protection
Turn Off And Unplug The Air Conditioner
Always disconnect the air conditioner from power before removing any parts. This prevents electric shock and damage to the unit.
Locate And Remove Screws
Find the screws holding the front panel in place. They are usually along the top edge or sides of the panel.
| Location | Type of Screw | Tool Needed |
| Top edge | Phillips head | Phillips screwdriver |
| Sides | Flathead or Phillips | Flathead or Phillips screwdriver |
| Bottom edge (if any) | Phillips head | Phillips screwdriver |
Detach The Front Panel Carefully
After removing screws, gently pull the front panel towards you. Use a soft cloth to protect the surface from scratches.
Tip:If the panel feels stuck, check for hidden screws or clips before forcing it.
Removing The Filters And Louvers
Disassembling an air conditioner starts with removing the filters and louvers. These parts need regular cleaning or replacement.
This guide will help you remove these parts safely and easily.
Removing The Filters
Filters trap dust and dirt. They usually sit behind the front cover of the unit.
To remove the filters, gently open the front panel. Slide the filters out carefully to avoid damage.
- Turn off and unplug the air conditioner.
- Open the front panel by pulling it towards you.
- Locate the filters behind the panel.
- Slide the filters out slowly.
- Clean or replace the filters as needed.
Removing The Louvers
Louvers direct the airflow from the air conditioner. They are usually attached to the front panel.
To remove the louvers, check for clips or screws. Carefully unclip or unscrew them before pulling the louvers off.
- Make sure the unit is off and unplugged.
- Look for clips or screws holding the louvers.
- Use a screwdriver if screws are present.
- Gently unclip or unscrew the louvers.
- Pull the louvers away from the unit carefully.

Credit: www.reddit.com
Disconnecting Electrical Components
When disassembling an air conditioner, disconnecting electrical parts is important for safety. You need to handle wires and connectors carefully to avoid damage or injury.
Follow clear steps to find wiring and unplug connectors safely before removing any electrical parts.
Locate Wiring Connections
First, find where the wires connect to the air conditioner’s main board and other components. Look for wire bundles secured with clips or ties. Check the service panel or back cover for access.
- Turn off power supply before touching any wires.
- Remove screws or panels to see wiring clearly.
- Identify connectors by shape and color to avoid confusion.
- Use a flashlight for better visibility in tight spaces.
Unplug Connectors Safely
After locating the connectors, unplug them carefully. Do not pull the wires directly. Instead, hold the connector body to avoid damage.
| Connector Type | How to Disconnect |
| Clip Connector | Press the clip tab and pull gently. |
| Plug Connector | Grip the plug, twist slightly, then pull out. |
| Terminal Block | Use a screwdriver to loosen screws before removing wires. |
Detaching The Fan And Motor
Removing the fan and motor is an important part of disassembling an air conditioner. It requires care to avoid damage to the parts.
This guide will help you safely detach the fan and motor from your unit step-by-step.
Prepare The Air Conditioner
First, turn off the power to the air conditioner. Disconnect it from the electrical source to prevent accidents.
Remove the front cover or panel to access the fan and motor assembly inside.
Disconnect Electrical Connections
Locate the wires connected to the motor. Carefully unplug or unscrew these connections.
- Note the wire positions before unplugging.
- Use a screwdriver if needed to loosen terminals.
- Keep the wires away from moving parts.
Remove The Fan Blades
The fan blades attach to the motor shaft. Check for screws or clips holding them in place.
Loosen these fasteners and gently slide the fan blades off the shaft.
Detach The Motor
The motor is fixed with mounting screws or bolts. Unscrew them using the correct tools.
| Tool Needed | Purpose |
|---|---|
| Phillips screwdriver | Remove screws holding the motor |
| Wrench | Unscrew bolts securing motor mount |
| Pliers | Hold nuts in place while unscrewing |
After removing the screws, carefully lift the motor out. Avoid pulling on wires or bending parts.
Removing The Compressor
Removing the compressor from an air conditioner needs care and the right tools. The compressor is a key part of the system that moves refrigerant.
This guide explains how to safely remove the compressor without damage to other parts.
Prepare Your Workspace
Clear a clean, flat area to work on the air conditioner. Make sure you have enough light and space to move around.
Wear safety gloves and goggles to protect yourself from sharp edges and refrigerant.
Disconnect Power And Refrigerant
Unplug the air conditioner from the power source. This stops any electrical current that can cause harm.
Release refrigerant safely by following local laws or hire a professional. The refrigerant must be removed before you open the system.
Remove External Components
- Detach the outer panels of the air conditioner.
- Remove the fan and fan motor carefully.
- Disconnect wiring connected to the compressor.
- Take out any mounting bolts or screws holding the compressor.
Detach The Compressor
Use a wrench to loosen the bolts that hold the compressor in place. Keep the bolts safe for reassembly or disposal.
Carefully lift the compressor out. It can be heavy, so use both hands or ask for help.
Check And Store The Compressor
| Check Item | What to Look For |
| Physical Damage | Dents, cracks, or corrosion |
| Oil Leaks | Signs of oil around seals or joints |
| Mounting Parts | Missing or broken bolts and brackets |
| Electrical Connections | Frayed wires or loose terminals |
Store the compressor in a dry place if you plan to reuse it. Cover it to keep dust and moisture away.
Disassembling The Coil And Other Parts
Disassembling an air conditioner helps with cleaning and repair. It is important to handle the coil and other parts carefully.
Follow clear steps to take apart the coil and other components safely. Use the right tools for best results.
Removing The Front Panel
Start by unplugging the air conditioner for safety. Then, remove the screws that hold the front panel in place.
Gently pull the front panel off. This gives access to the coil and internal parts.
Disassembling The Coil
The coil is delicate and needs careful handling. First, disconnect any wires or tubes attached to the coil.
Use a wrench to loosen the bolts holding the coil. Remove the coil slowly to avoid bending or damage.
- Turn off power before starting
- Disconnect pipes and wires carefully
- Use proper tools to loosen bolts
- Handle the coil gently to prevent damage
Removing The Fan And Motor
After the coil is out, focus on the fan and motor. Remove screws or clips that hold the fan in place.
Pull the fan off the motor shaft carefully. Then, disconnect the motor wiring before taking it out.
Taking Out The Filter And Other Parts
Remove the air filter by sliding it out from its slot. Clean or replace the filter as needed.
Check for other removable parts like drain pans or covers. Unscrew or unclip them for cleaning or replacement.
- Slide out the air filter
- Unscrew drain pans carefully
- Remove covers and clips as needed
- Keep parts organized for reassembly
Cleaning And Storing Parts
Cleaning and storing air conditioner parts properly keeps them in good shape. It helps the unit last longer and work well.
Take time to clean each part carefully. Store parts in a dry, safe place to avoid damage.
Cleaning The Filters And Coils
Remove the filters and coils gently. Use a soft brush or cloth to remove dust and dirt. Wash filters with warm soapy water and rinse well.
Let all parts dry completely before putting them back or storing. Wet parts can cause mold and damage the air conditioner.
Cleaning The Fan And Blower
Wipe the fan blades and blower with a dry cloth. If there is stubborn dirt, use a damp cloth and mild detergent. Avoid getting water inside the motor.
Storing Small Parts And Screws
Keep screws and small parts in labeled containers. This prevents loss and makes reassembly easier.
- Use small bags or boxes
- Label each container with the part name
- Store in a dry area
- Keep away from direct sunlight
Organizing Larger Parts For Storage
Place larger parts like the casing and compressor in a clean, dry space. Cover them with a cloth to protect from dust.
| Part | Storage Tip |
| Filters | Dry completely, store in sealed bag |
| Coils | Keep dry, avoid bending fins |
| Fan Blades | Cover to avoid dust, store flat |
| Screws & Small Parts | Label and keep in containers |
| Casing | Store in dry area, cover with cloth |
Frequently Asked Questions
How Do I Safely Disconnect An Air Conditioner?
First, unplug the unit and turn off the power supply. Wear gloves and use proper tools to avoid injury. Handle electrical components with care to prevent shocks. Follow manufacturer guidelines for disassembly steps to ensure safety and avoid damage.
What Tools Are Needed To Disassemble An Air Conditioner?
Common tools include screwdrivers, pliers, a socket wrench, and a multimeter. Having a clean workspace and a container for screws is helpful. Specific tools may vary by model, so check the user manual before starting.
Can I Disassemble A Window Air Conditioner Myself?
Yes, you can if you follow safety precautions and instructions carefully. Take your time to avoid damaging parts. Refer to the manual and watch tutorials for guidance. If unsure, consult a professional technician.
How Do I Remove The Front Panel Of An Air Conditioner?
Locate and unscrew the screws securing the front panel. Gently lift or slide the panel off, depending on the model. Avoid forcing it to prevent breakage. This step grants access to filters and internal components.
Conclusion
Disassembling an air conditioner takes care and patience. Follow each step slowly and carefully. Keep your tools close and organized. Remember to unplug the unit before starting work. Take photos to help during reassembly. This process saves money and helps you learn more.
Always work in a clean, safe space. Don’t rush; safety comes first. With practice, the task becomes easier. Stay calm and focused throughout the job. Now you have the basics to try it yourself.