If you’re planning to replace or move your gas cooktop, knowing how to disconnect it safely is essential. Handling gas connections might feel intimidating, but with the right steps, you can do it confidently and without stress.
In this guide, you’ll learn clear, simple instructions to disconnect your gas cooktop the right way—protecting your home and giving you peace of mind. Keep reading to discover how easy and safe this process can be when you follow the right tips.
Safety Precautions
Safety is the top priority when disconnecting a gas cooktop. Taking the right precautions helps prevent accidents. Ignoring safety steps can lead to gas leaks or fires. Follow these essential safety measures before starting any work on your gas cooktop.
Turn Off Gas Supply
Locate the main gas valve near the cooktop. Turn the valve clockwise to close it completely. This stops the flow of gas to the appliance. Double-check that the gas is off by trying to light the burners. No flames or smell means the gas is safely off.
Ventilate The Area
Open windows and doors to allow fresh air inside. This helps remove any lingering gas fumes. Use fans if available to increase airflow. Good ventilation lowers the risk of gas buildup and reduces breathing hazards.
Wear Protective Gear
Put on safety gloves to protect your hands from sharp edges. Use safety goggles to shield your eyes from dust or debris. Wear long sleeves to avoid skin contact with gas or chemicals. Proper gear keeps you safe during the disconnection process.

Credit: www.familyhandyman.com
Gathering Necessary Tools
Gathering the right tools is crucial before disconnecting a gas cooktop. Using proper equipment ensures safety and efficiency. Prepare everything in advance to avoid interruptions during the process.
Wrench And Pliers
A wrench and pliers help loosen and tighten gas connections. Choose adjustable wrenches for versatility. Pliers provide a firm grip on small parts and fittings. Both tools prevent damage to pipes and connectors.
Pipe Sealant
Pipe sealant creates a tight seal on gas joints. It stops gas leaks after reconnection. Use sealant made for gas pipes only. Apply it carefully to avoid blockages inside the pipe.
Safety Gloves
Safety gloves protect your hands from sharp edges and heat. They provide a better grip on tools and pipes. Choose gloves that are thick yet flexible for easy movement. Always wear gloves to prevent injuries during the job.
Shutting Off The Gas Valve
Shutting off the gas valve is the most critical part of disconnecting your gas cooktop safely. Before you start any work, cutting off the gas supply prevents leaks and potential hazards. It might seem straightforward, but locating and turning off the valve correctly requires attention to detail and a bit of know-how.
Locating The Valve
The gas valve is usually near your cooktop, but it can sometimes be in unexpected places. Check under the cooktop, inside cabinets, or even behind the appliance. It often looks like a small knob or lever connected to a pipe.
Don’t rush this step. Take a moment to trace the gas line from your cooktop backward. If you can’t find the valve easily, look for a shut-off valve on the gas line coming into your kitchen or home. Sometimes, it’s near your gas meter outside.
Turning Off The Valve
Once you find the valve, you’ll usually turn it clockwise to shut it off. This stops the gas flow immediately, ensuring your safety. If it’s a lever, turning it perpendicular to the pipe generally means the gas is off.
After turning the valve off, double-check by trying to light the cooktop briefly or using a gas detector if you have one. If no gas flows, you’ve done it right. If you feel unsure, don’t hesitate to call a professional—it’s better to be safe than sorry.
Disconnecting Gas Line
Disconnecting the gas line from your cooktop is a critical task. It requires care and attention to safety. Before starting, ensure the gas supply is completely turned off. This prevents any leaks or accidents.
Use proper tools to avoid damaging the gas line or connector. Work slowly and carefully to maintain control throughout the process.
Loosening The Connector
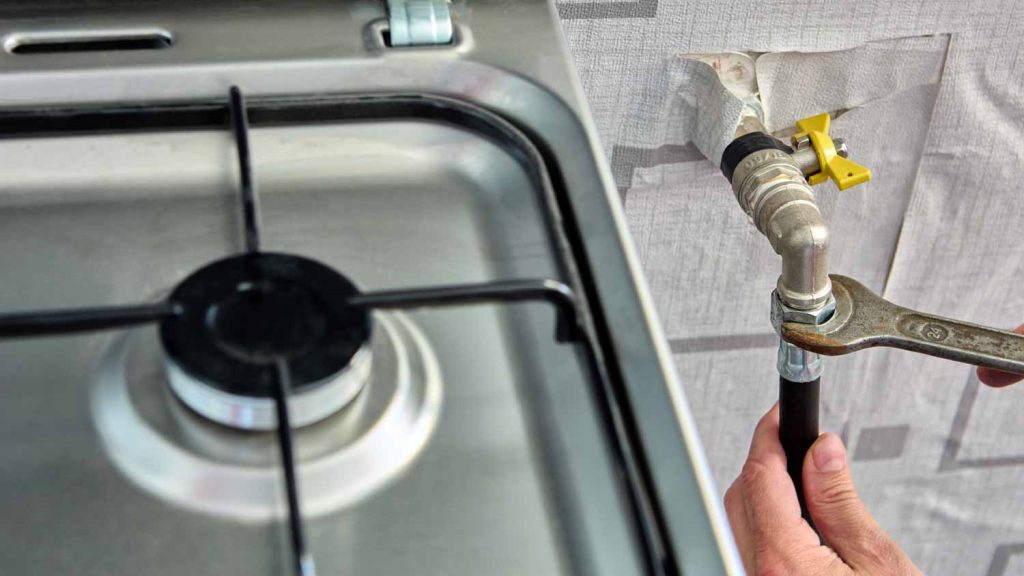
Locate the connector where the gas line attaches to the cooktop. Use an adjustable wrench to grip the connector firmly. Turn the wrench counterclockwise to loosen the fitting.
Keep your movements steady and avoid forcing the connector. If it resists, try applying a little penetrating oil and wait a few minutes before trying again.
Detaching The Gas Line
Once the connector is loose, gently pull the gas line away from the cooktop connection. Hold the line steady to avoid bending or damaging it.
Check the connection for any signs of wear or damage. If you notice cracks or rust, replace the gas line before reconnecting or installing a new cooktop.
Removing The Cooktop
Removing the cooktop is a key part of disconnecting your gas cooktop safely. Take your time to avoid damage and ensure safety. Always double-check that the gas supply is off before starting.
Unscrewing The Mounts
Locate the screws holding the cooktop in place. These are usually under the cooktop edges or inside the cabinet below. Use a screwdriver that fits the screw heads well to avoid stripping.
Turn each screw counterclockwise to loosen it. Keep the screws in a safe place for reinstallation. Some mounts may have clips or brackets; gently release them if needed.
Lifting The Cooktop
Once the mounts are removed, carefully lift the cooktop from the countertop. Use both hands to hold it steady and avoid dropping it. The cooktop may be heavy or awkward to handle.
Lift straight up to clear any edges or seals. If it feels stuck, check for any remaining mounts or connectors. Place the cooktop on a flat, protected surface to prevent scratches.
Sealing The Gas Line
Sealing the gas line is a crucial part of safely disconnecting your gas cooktop. It prevents gas leaks that can be dangerous and ensures your home stays secure. Taking the time to properly seal the connection will save you headaches later and keep your family safe.
Applying Pipe Sealant
Start by cleaning the threads of the gas pipe to remove any dirt or old sealant. Use a pipe sealant designed specifically for gas lines, such as a gas-rated thread compound or Teflon tape marked for gas use.
When applying, wrap the Teflon tape clockwise around the male threads 3 to 4 times, or spread a thin layer of compound evenly. Avoid over-applying, as excess sealant can enter the gas line and cause blockages.
Remember, the goal is a tight, leak-proof seal—not a messy one. Have you ever struggled with a sealant that just wouldn’t stick? Trying the right amount and method can make all the difference.
Checking For Leaks
After sealing and tightening the connection, it’s vital to check for leaks before restoring gas flow. Mix a solution of soap and water and apply it generously to the sealed area.
If you see bubbles forming, gas is escaping, and you need to tighten the connection or reapply the sealant. Never guess if you have a leak; even a small one can be dangerous.
Testing for leaks gives you peace of mind and confirms that your work is secure. What’s your approach to double-checking safety in projects like this?
Disposing Or Storing The Cooktop
After disconnecting your gas cooktop, deciding what to do next is important. You can either dispose of it safely or store it for future use. Both options require care to avoid damage or hazards. Proper handling helps protect the environment and keeps your space safe.
Recycling Options
Many parts of a gas cooktop can be recycled. Metal components like stainless steel and aluminum have good recycling value. Check with local recycling centers if they accept kitchen appliances. Some centers offer special programs for gas appliances.
Hazardous parts like gas valves and hoses need careful handling. Do not throw them in regular trash. Find a facility that handles hazardous waste. This prevents pollution and keeps communities safe.
Donating a working cooktop is another way to give it a second life. Local charities or community groups may accept it. Make sure it is clean and in good condition.
Proper Storage Methods
Store the cooktop in a dry, cool place away from direct sunlight. Moisture can cause rust and damage electronic parts. Cover the cooktop with a protective cloth or plastic sheet to keep dust off.
Keep the gas connections sealed to prevent leaks. Avoid stacking heavy items on top of the cooktop. This protects its surface and controls.
Label the stored cooktop clearly to avoid confusion later. Make sure the storage area has good ventilation to prevent gas buildup.

Credit: www.youtube.com
Post-removal Safety Checks
After disconnecting your gas cooktop, safety should be your top priority. The job isn’t done until you confirm that your kitchen is free from hazards. Performing thorough post-removal checks ensures peace of mind and protects your home from potential dangers.
Inspecting For Gas Leaks
Gas leaks can be subtle and dangerous. You should never rely solely on your sense of smell to detect leaks. Instead, apply a soapy water solution to the gas connection points and watch for bubbles, which indicate escaping gas.
Another tip is to listen carefully for any hissing sounds near the gas line. If you detect anything suspicious, avoid switching on electrical devices and ventilate the area immediately. Always consider calling a professional if you’re unsure about the safety of the connections.
Ensuring Area Is Clean
Cleaning the area after removing the cooktop prevents leftover debris from causing issues later on. Scrub away any grease or food residue that may have accumulated under or around the appliance. This helps avoid attracting pests and keeps your kitchen hygienic.
Also, check for any damage to the countertop or gas lines that might have occurred during removal. Fixing small problems early can save you time and money down the road. Have you noticed any cracks or stains that need attention?

Credit: www.youtube.com
Frequently Asked Questions
How Do I Safely Turn Off The Gas Supply To My Cooktop?
Locate the gas shutoff valve near your cooktop. Turn it clockwise to close. Ensure the gas smell disappears before proceeding. Always double-check the valve is fully closed to prevent leaks.
What Tools Are Needed To Disconnect A Gas Cooktop?
You typically need an adjustable wrench and a screwdriver. A pipe wrench may be required for tight fittings. Always use tools designed for gas appliances to avoid damage.
Can I Disconnect My Gas Cooktop Myself?
Yes, if you follow safety steps carefully. Turn off the gas supply and unplug the appliance. If unsure, consult a professional to avoid gas leaks or injuries.
How To Check For Gas Leaks After Disconnecting Cooktop?
Apply soapy water to gas connections. Look for bubbles indicating leaks. Never use an open flame. If bubbles appear, tighten connections or call a professional immediately.
Conclusion
Disconnecting a gas cooktop is simple when you follow the right steps. Always turn off the gas supply first. Use proper tools and work carefully to avoid leaks. Double-check connections before finishing the job. Safety is the top priority throughout the process.
Taking your time helps prevent accidents. Now, you can handle this task with confidence and ease.