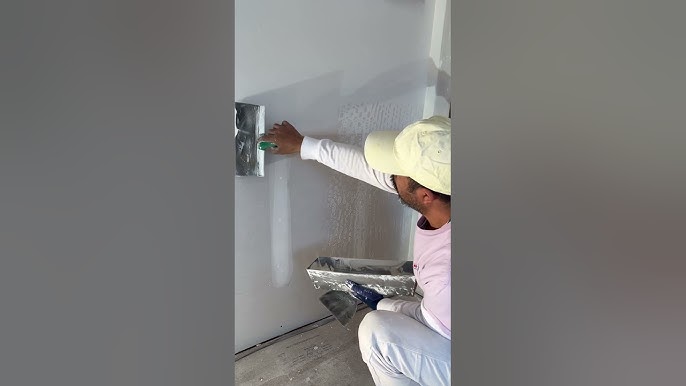
Are you looking to add a unique texture to your walls that stands out without breaking the bank? Learning how to do skip trowel can transform your space with a beautiful, rustic finish that’s easier to achieve than you might think.
Whether you’re a DIY enthusiast or tackling your first home project, this simple technique will give your walls character and depth. Keep reading, and you’ll discover step-by-step tips that make the process smooth and enjoyable—no fancy tools or professional skills needed.
Ready to bring new life to your walls? Let’s get started!

Credit: www.youtube.com
Tools And Materials Needed
Skip trowel is a popular wall texture that adds a subtle, rough finish. You need the right tools and materials for a good result.
This guide covers the essential tools, the best joint compound to use, and the supplies needed to prepare your surface.
Essential Tools
You need specific tools to apply and shape the skip trowel texture. These tools help create the unique pattern.
- Hawk or mud pan to hold joint compound
- 5 to 12-inch drywall trowel for applying compound
- Knockdown knife or wide putty knife for texture shaping
- Mixing paddle and bucket for mixing compound
- Sandpaper or sanding sponge for smoothing edges
- Protective gloves and safety glasses
Choosing The Right Joint Compound
Pick a joint compound that works well for skip trowel texture. Lightweight compounds are easy to spread.
A standard all-purpose or lightweight joint compound works best. Avoid fast-setting compounds as they dry too fast.
- Lightweight joint compound: easy to handle and spread
- All-purpose compound: good for most texture jobs
- Avoid quick-set compounds for better working time
- Pre-mixed compound saves mixing time
Surface Preparation Supplies
Preparing the wall surface is important for good texture adhesion. Use the right supplies to clean and fix walls.
Make sure the surface is clean, dry, and free of dust or loose paint before applying compound.
- Cleaning cloths or sponges for dust and dirt
- Painter’s tape to protect edges and trim
- Putty or spackle for filling holes and cracks
- Sandpaper for smoothing repairs
- Primer to seal the surface if needed
Preparing The Wall
Preparing the wall is the first step for a successful skip trowel finish. It ensures the wall is smooth and ready for the new texture.
Follow these steps to prepare your wall and achieve the best results with your skip trowel technique.
Cleaning The Surface
Cleaning the wall surface is essential to remove dust and debris. A clean surface allows the texture to adhere properly.
- Use a soft cloth or sponge to wipe the wall.
- Apply a mild detergent solution if needed.
- Rinse with clean water and let it dry completely.
Repairing Imperfections
Look for cracks and holes on the wall. Fixing these imperfections will create a smooth base for your texture application.
Use a putty knife to apply spackling paste into cracks and holes. Allow it to dry, then sand it smooth with fine sandpaper.
Priming The Wall
Priming the wall helps the skip trowel texture adhere better. It also prevents moisture from seeping through.
- Choose a quality primer suitable for your wall type.
- Use a roller to apply the primer evenly.
- Let the primer dry completely before applying the texture.
Mixing The Joint Compound
Mixing joint compound correctly is important for a smooth skip trowel finish. The right texture helps you apply the compound easily and get good results. Understanding how to adjust the mix will save time and effort.
Two key parts to focus on are achieving the right consistency and adding water or additives. These steps control how thick or thin the compound is for your project.
Achieving The Right Consistency
The joint compound must be smooth and creamy, not too thick or runny. If it is too thick, it will be hard to spread and create unwanted texture. If too thin, it will drip and not hold the skip trowel pattern well.
- Start with clean water and a clean mixing container.
- Use a mixing paddle or drill on low speed for best results.
- Add small amounts of joint compound powder to water or premixed compound.
- Mix slowly to avoid air bubbles and lumps.
- Check the texture often; it should flow easily but hold shape when applied.
Adding Water Or Additives
Water controls the thickness of the compound. Additives can improve workability or drying time. Be careful not to add too much water or additives, which can weaken the compound.
| Addition | Purpose | Tips |
|---|---|---|
| Water | Thin the compound for easier spreading | Add slowly, stir well, avoid over-thinning |
| Latex Additive | Improves flexibility and bonding | Use recommended amount, mix fully |
| Setting Agent | Speeds drying time | Follow product instructions carefully |
Applying The Skip Trowel Texture
Skip trowel is a popular wall texture that adds a unique, patterned look. It uses a trowel to create a rough, skip effect on the surface.
This texture works well on drywall and plaster. It gives walls a soft, raised pattern that looks natural and stylish.
Loading The Trowel
Start by loading your trowel with a thin layer of joint compound. Use a hawk or a flat surface to hold the compound.
Pick up a small amount of compound on the trowel. The amount should be enough to cover the blade lightly without dripping.
- Use a 12-inch drywall trowel for best results
- Keep the compound smooth and lump-free
- Reload the trowel often to maintain texture
Applying Thin Layers
Apply a thin coat of compound to the wall using the loaded trowel. Spread it gently in a sweeping motion.
Keep the layer thin to avoid heavy buildup. Thin layers dry faster and create better texture control.
- Hold the trowel at a slight angle
- Use light pressure to avoid thick patches
- Cover small sections at a time
Creating The Skip Effect
To create the skip effect, lightly drag the edge of the trowel across the wall. Let the compound skip over the surface.
This motion leaves some areas uncovered, making a rough, textured pattern. Change angles to vary the effect.
- Use quick, light strokes with the trowel
- Let some compound stay on the wall
- Work in small areas for consistency
Drying And Finishing
After applying skip trowel texture, the drying and finishing steps are important. Proper care ensures a smooth and durable surface.
This guide covers drying time, sanding, and painting tips to complete your skip trowel finish.
Drying Time Guidelines
Allow the skip trowel texture to dry fully before sanding or painting. Drying times depend on temperature and humidity.
- Wait at least 24 hours in dry, warm conditions.
- In humid or cold areas, drying can take up to 48 hours.
- Touch the surface gently to check for any damp spots.
- Do not rush sanding or painting before it is dry.
Sanding For Smoothness
Sanding smooths the skip trowel texture and removes any rough patches. Use fine-grit sandpaper for best results.
- Use 120 to 150 grit sandpaper for light sanding.
- Sand gently to avoid removing too much texture.
- Wear a dust mask to protect from dust particles.
- Clean the surface with a damp cloth after sanding.
Painting Over The Texture
Painting protects the skip trowel surface and enhances appearance. Use the right paint and technique for best coverage.
| Paint Type | Finish | Recommended Use |
|---|---|---|
| Latex Paint | Matte or Satin | Indoor walls with skip trowel texture |
| Acrylic Paint | Gloss or Semi-gloss | Outdoor or high-moisture areas |
| Primer | Flat | Applied before paint for better adhesion |

Credit: www.texturemaster.com
Common Mistakes To Avoid
Skip trowel is a popular wall finish that adds texture and style. Many people try it but make simple mistakes. Avoiding these errors helps you get a clean, professional look.
Here are common mistakes to watch out for during the skip trowel process. Fixing these will save time and improve your results.
Applying Too Much Compound
Using too much joint compound can ruin the skip trowel texture. It can cause uneven drying and cracking. The right amount gives a smooth, light texture without heavy buildup.
- Apply a thin, even layer of compound
- Use a clean trowel to spread the compound
- Remove excess compound before it dries
- Practice on a small test area first
Incorrect Trowel Angles
Holding the trowel at the wrong angle changes the texture and finish. Angles that are too steep or flat cause uneven skips and rough patches. A 30 to 45 degree angle works best.
| Angle | Effect |
| Too Steep (over 60°) | Removes too much compound, thin texture |
| Ideal (30° to 45°) | Even texture, consistent skips |
| Too Flat (under 20°) | Smears compound, loses skip effect |
Rushing The Drying Process
Letting the compound dry too fast or not long enough causes cracks and peeling. Drying times depend on room temperature and humidity. Patience ensures a durable finish.
Tips to avoid drying problems:
- Avoid direct sunlight on the wall
- Keep the room well-ventilated but not drafty
- Wait at least 24 hours before sanding or painting
- Use a fan to speed drying carefully
Tips For Best Results
Skip trowel is a popular texture for walls and ceilings. It adds a soft, rough look with simple tools. Getting good results takes some practice and care.
These tips help you create smooth, even skip trowel textures. Follow them for a better finish on your project.
Practice On Sample Boards
Start by practicing on sample boards before working on walls. This helps you get used to the trowel and texture style. You can try different amounts of mud and pressure.
Using sample boards lets you see how the skip trowel looks in different lighting. It also saves your walls from mistakes during practice.
Work In Small Sections
Apply the texture in small sections at a time. This keeps the mud wet and easy to work with. It also helps you keep control over the pattern.
Finishing small areas before moving on prevents hard edges and uneven texture. Plan your work so you can finish each section quickly.
Maintain Consistent Pressure
Hold the trowel firmly and use steady pressure as you apply the mud. Uneven pressure causes spots that are too thick or too thin.
Keep your arm relaxed but steady. Move the trowel smoothly and at the same speed to get a uniform texture across the surface.

Credit: www.youtube.com
Frequently Asked Questions
What Is Skip Trowel Texture Used For?
Skip trowel texture adds a decorative finish to walls and ceilings. It hides imperfections and creates a subtle, attractive pattern. This technique is popular in home renovations and new constructions for its unique, rustic look.
How Do You Prepare Walls For Skip Trowel?
Clean the wall surface thoroughly and repair any cracks or holes. Apply a primer coat to ensure better adhesion. Make sure the surface is dry before starting the skip trowel application.
What Materials Are Needed For Skip Trowel?
You need joint compound or drywall mud, a trowel or drywall knife, and a hawk. Optional tools include sandpaper and primer. These materials help create the characteristic skip trowel texture with ease.
How Long Does Skip Trowel Take To Dry?
Skip trowel texture typically dries within 24 hours. Drying time can vary based on humidity and temperature. Ensure it is fully dry before sanding, painting, or applying any finishes.
Conclusion
Skip trowel adds texture and style to your walls. Practice makes your work look smooth and even. Use the right tools and materials for best results. Take your time and follow each step carefully. Small mistakes can create a unique finish.
Enjoy the process and your improved space. This technique suits many rooms and designs. Try it yourself and see the difference.