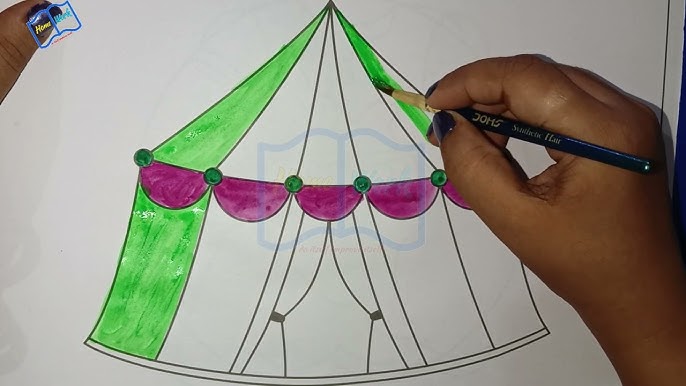
Have you ever wanted to create your very own circus scene, starting with the iconic tent? Drawing a circus tent might seem tricky, but with the right steps, you can easily bring this fun and colorful structure to life.
In this guide, you’ll discover simple techniques that make the process smooth and enjoyable. Whether you’re a beginner or just looking to improve your skills, you’ll find tips that help your drawing stand out. Ready to amaze yourself and others with your art?
Let’s dive in and start drawing your circus tent!
Materials Needed
Drawing a circus tent is fun and easy if you have the right materials. These tools help you create clean and colorful art.
Gather everything before you start to avoid interruptions. Use simple supplies to get the best results.
Paper
Choose smooth drawing paper. It lets your pencils and colors glide easily. Thick paper can hold paint or markers well.
- Drawing paper (preferably white)
- Sketch pad or loose sheets
- Heavyweight paper for markers or paint
Pencils
Use pencils to sketch your circus tent shape lightly. Soft pencils work well for smooth lines.
- HB or 2B pencil for sketching
- Eraser to fix mistakes
- Sharpener to keep your pencil tips fine
Markers Or Colored Pencils
Add color to your circus tent with markers or colored pencils. Choose bright colors like red, yellow, and blue.
- Bright colored markers or pencils
- Colors like red, white, yellow, and blue
- Black marker for outlines
Ruler
A ruler helps draw straight lines for the tent poles and stripes. It keeps your drawing neat and balanced.
- Standard 12-inch ruler
- Flexible ruler for curved lines (optional)
Sharpener And Eraser
Keep your pencils sharp for fine details. Use an eraser to clean up any mistakes and lighten sketch lines before coloring.
- Good quality pencil sharpener
- Soft eraser for gentle corrections
Basic Shapes To Start
Drawing a circus tent is easier if you begin with simple shapes. These shapes help you build the overall structure.
Start with basic forms and add details later. This makes your drawing clear and balanced.
Draw A Large Rectangle For The Base
Begin with a wide rectangle. This shape shows the tent’s floor and walls.
Make the rectangle wide to give the tent a big look. It sets the foundation for the rest.
Add A Triangle For The Roof
On top of the rectangle, draw a tall triangle. This forms the pointed roof of the tent.
The triangle should be centered and tall to show the classic circus tent shape.
Use Curved Lines For Tent Sides
Add curved lines from the top of the triangle down to the base. These show the tent’s fabric.
Curves make the tent look soft and flexible, not rigid like a box.
Include Small Circles For Flags Or Poles
Draw small circles or ovals at the top of the triangle. These represent flag poles or decorations.
These details add character and make your tent look festive.
Sketching The Tent Frame
Creating a circus tent drawing starts with the frame. This guides the tent’s shape and structure.
Begin by sketching the basic outline. This will help in placing details later.
Draw The Tent Base
The base is usually a wide oval or circle. It gives the tent its foundation.
Make sure the base is stable and symmetrical. This supports the entire structure.
Add The Tent Poles
Tent poles are important for height. Draw lines from the base upwards.
These lines should converge at the top. This creates a peak for the tent.
- Start with two main poles in the middle.
- Add additional poles around the base.
- Ensure all poles meet at the top.
Connect The Poles
Use curved lines to connect the tops of the poles. This shapes the tent’s dome.
These lines mimic the fabric draping over the poles. Keep them smooth and flowing.
| Base | Wide and stable |
| Poles | Tall and converging |
| Connections | Curved and smooth |
Adding Tent Details
Adding details to your circus tent drawing makes it look lively. Small touches bring the tent to life.
Focus on patterns and decorations to make your drawing more interesting.
Tent Stripes
Stripes give the circus tent its classic look. Draw long, curved stripes from the top to the bottom.
Use alternating colors to make the stripes stand out. Keep the stripes wide and even.
- Start stripes at the tent’s peak
- Draw stripes evenly around the tent
- Use bright colors like red, white, or yellow
- Make stripes curve with the tent shape
Entrance And Flags
The entrance shows where people go in. Draw a large flap or doorway in the tent’s front.
Add small flags on top of the tent peaks. Flags make the tent look festive and fun.
- Make the entrance wide and open
- Add lines to show the fabric folds
- Draw triangular flags on poles at the peaks
- Use bright colors for the flags
Outlining Your Drawing
Outlining is the first step to draw a circus tent. It helps you create the basic shape and structure.
Start with simple shapes and light lines. This makes it easy to change your drawing later.
Draw The Tent Base
Begin by drawing a wide oval shape. This will be the ground base of the circus tent.
Make sure the oval is horizontal and wide enough to fit the tent’s height.
Sketch The Tent Shape
Draw two straight lines going up from each side of the oval. These lines form the tent’s sides.
Connect the lines at the top with a curved or pointed line. This is the peak of the tent.
Add Tent Poles
Inside the tent shape, draw vertical lines for poles. These lines support the tent structure.
Space the poles evenly to keep the tent balanced and realistic.
Outline The Tent Flaps
Draw curved lines from the top peak to the base to show the tent’s fabric sections.
Sketch small flaps at the tent’s entrance to add detail and depth.

Credit: www.dreamstime.com
Coloring Tips
Coloring a circus tent makes your drawing lively and fun. Using the right colors can show the tent’s shape and style clearly.
Good coloring adds depth and makes your tent look real. Try these tips to make your circus tent bright and eye-catching.
Choosing Colors
Pick colors that are bright and cheerful. Circus tents often have red and white stripes, but you can use other colors too.
Use colors that contrast well so the stripes stand out. Limit your palette to two or three main colors for a clean look.
- Red and white for a classic look
- Blue and yellow for a fun style
- Green and white for a fresh feel
- Use bold colors to attract attention
Shading And Highlights
Add shading to give your tent a three-dimensional look. Shade the areas that would get less light, like under the roof edges.
Use highlights on the parts that catch the most light. This helps show the tent’s curves and makes it look more real.
- Use darker shades of your colors for shadows
- Add lighter colors or white for highlights
- Shade under the tent flaps and roof peaks
- Blend colors gently for smooth shading
Final Touches
Adding final details makes your circus tent drawing come alive. These touches bring depth and character to your artwork.
Focus on shading, colors, and small decorations. They help create a lively and festive feel.
Enhance The Colors
Use bright reds and whites to color the tent stripes. Add shadows with darker shades to show depth. Light areas make your tent look rounded and real.
Add Texture And Details
Draw small lines to show fabric folds. Add ropes and stakes around the tent base. These details make your drawing look more realistic and complete.
- Use short, curved lines for fabric creases
- Sketch ropes tied to stakes on the ground
- Draw small flags or banners on top
- Include shadows under the tent edges
Create A Festive Atmosphere
Surround your tent with extra elements like balloons, lights, or people. These add life and show the circus is ready for fun.
Tips for Festive Details:
- Draw string lights hanging from the tent poles
- Add colorful balloons tied to the tent ropes
- Sketch small figures of clowns or animals nearby
- Use bright colors to highlight decorations

Credit: www.dreamstime.com
Common Mistakes To Avoid
Drawing a circus tent can be fun, but some mistakes can make it look wrong. Avoiding these will help your art look better.
Here are common errors people make and how to avoid them for a clear, neat circus tent drawing.
Ignoring Tent Proportions
Many draw the tent parts out of size. The top should be narrower than the base. Wrong proportions make the tent look odd.
Keep the height and width balanced. Use light pencil marks to measure before dark lines.
Skipping Tent Pole Details
Some forget to add the poles or make them too thick or thin. Poles support the tent and give it shape.
Draw poles with clear lines and keep their size consistent. This adds realism to your tent drawing.
Forgetting Tent Fabric Folds
Ignoring fabric folds makes the tent look flat and lifeless. Folds show the tent’s shape and texture.
Add simple curved lines on the tent’s surface to suggest folds. This gives depth and interest.
Using Uneven Stripes
Stripes are key circus tent features. Uneven or crooked stripes look messy and distract from the drawing.
Measure stripes carefully and keep their width the same. Use a ruler or guide for straight lines.
Neglecting Background And Ground
Some draw the tent alone with no ground or background. This makes the tent float and feel incomplete.
Add simple ground lines and a few background shapes. This anchors the tent and improves the whole picture.

Credit: www.shutterstock.com
Frequently Asked Questions
What Materials Are Needed To Draw A Circus Tent?
You need paper, pencils, erasers, rulers, and coloring tools. These basics help create clear lines and vibrant colors for your tent drawing. Using quality materials improves your drawing’s overall appearance and makes the process easier and more enjoyable.
How Do I Start Drawing A Circus Tent?
Begin by sketching the tent’s base as a wide rectangle or trapezoid. Then, draw a tall triangle on top to form the tent’s peak. This simple framework guides your detailing and helps maintain correct proportions throughout your drawing.
How To Add Stripes To A Circus Tent Drawing?
Divide the tent’s surface into equal vertical sections. Shade or color alternating sections with bright colors like red and white. This pattern creates the classic circus tent look, making your drawing more recognizable and lively.
What Techniques Improve Circus Tent Shading?
Use light pencil strokes for shading tent folds and shadows. Apply gradual shading to show depth and dimension. Blending tools like a stump or finger soften shadows, giving your drawing a realistic, three-dimensional effect.
Conclusion
Drawing a circus tent can be fun and simple. Start with basic shapes and add details step by step. Practice helps improve your skills every time. Use bright colors to make your tent stand out. Keep your lines clear and neat for best results.
Enjoy the process and don’t rush. Soon, you will create colorful and lively circus tents. Keep drawing and have fun with your art!