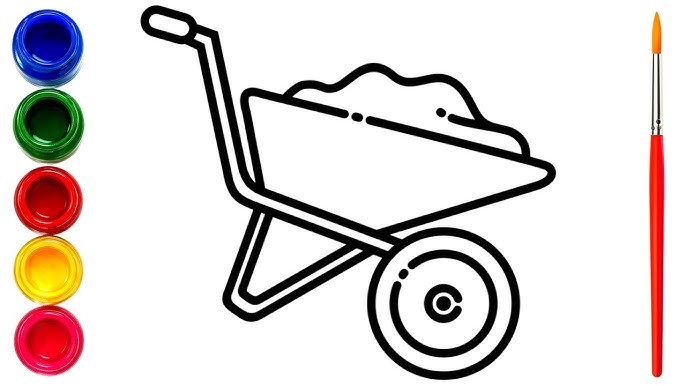
Have you ever wanted to draw a wheelbarrow but didn’t know where to start? You’re not alone.
Drawing something that looks just right can feel tricky, especially when it has parts like wheels, handles, and a sturdy frame. But what if you could break it down into simple steps that anyone can follow? Imagine creating your own detailed wheelbarrow drawing that you can be proud of.
In this guide, you’ll learn exactly how to do that—quickly and easily. Ready to unlock your drawing skills and surprise yourself? Let’s get started!
Materials Needed
Before you start drawing a wheelbarrow, gather all the materials. This helps you work smoothly and finish faster.
Having the right tools makes your drawing neat and clear. Here is a list of what you need.
Drawing Tools
- Pencil for sketching outlines
- Eraser to fix mistakes
- Sharpener to keep pencil points fine
- Ruler for straight lines
- Colored pencils or markers for coloring
Paper And Workspace
Choose a smooth, white paper to make your drawing look clean. A flat surface helps you draw without trouble.
| Item | Purpose |
| Drawing Paper | Base for your sketch |
| Flat Desk | Comfortable workspace |
| Good Lighting | See details clearly |
Reference Images
Use pictures of wheelbarrows to help you draw details correctly. You can find these images in books or online.
Some artists like to print reference photos and place them near their workspace. This method helps keep focus on shapes and parts.

Credit: www.teacherspayteachers.com
Basic Shapes To Start
Drawing a wheelbarrow begins with simple shapes. These shapes build the main parts of the wheelbarrow.
Start with easy forms to make the drawing process smooth. You can add details later.
Draw The Tray
The tray is the main container of a wheelbarrow. It holds the items you carry.
Use a wide rectangle or a trapezoid shape. This shape should be wider at the top and narrower at the bottom.
Add The Handles
Handles help to push and steer the wheelbarrow. They extend from the back of the tray.
Draw two long, thin rectangles or lines. They should angle slightly upward for easy holding.
Sketch The Wheel
The wheel supports the weight and helps move the wheelbarrow. It sits under the front of the tray.
Draw a circle for the wheel. Add a smaller circle inside for the hub.
Create The Legs
Legs keep the wheelbarrow stable when resting. They are near the back end, under the tray.
Use two short rectangles or lines for the legs. They should support the tray’s weight evenly.
Sketching The Wheel
Drawing a wheelbarrow starts with the wheel. It’s the most important part as it supports the load. Begin by sketching the wheel with careful attention to detail.
Focus on each element of the wheel. This will help you create a realistic and functional drawing. Let’s explore each part of the wheel in detail.
Drawing The Outer Rim
The outer rim is the circular frame of the wheel. It’s essential for maintaining the wheel’s shape.
- Start with a light circular outline.
- Ensure the circle is even all around.
- Darken the edges for a stronger look.
Adding The Spokes
Spokes connect the rim to the hub. They provide strength and support to the wheel.
| Number of Spokes | Common Design |
| 4-8 | Basic wheelbarrow |
| 10-12 | Heavy-duty wheelbarrow |
Detailing The Tire
The tire is the part that touches the ground. It needs to be drawn with tread patterns for realism.
Drawing The Tray
The tray is the main part of a wheelbarrow. It holds the items you want to carry.
Drawing the tray correctly helps your wheelbarrow look real and strong.
Outlining The Tray Shape
Start by drawing a large rectangle with rounded corners. This will be the tray base.
Make sure the rectangle is wide and slightly longer than tall. This shows the tray’s flat surface.
- Draw a horizontal oval for the front edge
- Connect the oval to the rectangle sides with smooth lines
- Keep the lines light for easy changes
Adding Depth And Angle
To add depth, draw another similar shape behind the first one. This shows the tray’s thickness.
Connect the corners of both shapes with straight lines to create sides. This makes the tray look 3D.
- Draw the back edge slightly higher than the front
- Use diagonal lines to link front and back edges
- Shade the sides to show shadow and depth
Creating The Handles
Drawing the handles is an important step in making your wheelbarrow look real. The handles help show how to hold and move the wheelbarrow.
Good handles add balance and make the wheelbarrow drawing complete. Let’s see how to place and shape them well.
Positioning The Handles
Start by drawing two straight lines at the back of the wheelbarrow body. These lines should point outward and slightly upward.
Make sure the handles are long enough for a hand to hold. They should also be parallel and spaced apart evenly.
- Draw handles extending from the back frame
- Keep them parallel and evenly spaced
- Angle them slightly upward for natural grip
- Ensure handles are long and strong-looking
Shaping And Detailing
After placing the handles, add thickness by drawing parallel lines around the first lines. This gives a 3D look.
Add small details like rounded ends or grip textures. These make the handles look real and easier to understand.
- Draw parallel lines for handle thickness
- Round the ends to show smooth grips
- Add small lines or dots for texture
- Keep details simple and clear

Credit: www.shutterstock.com
Adding The Legs And Supports
Drawing the legs and supports gives your wheelbarrow stability. These parts hold the weight and keep it balanced.
In this section, you will learn how to add the legs and the support beams to your wheelbarrow sketch.
Sketch The Legs
Start by drawing two legs under the main tray. Make them thick and strong to hold the weight. The legs should angle slightly outward for balance.
Add The Support Beams
Connect the legs with support beams. These beams keep the legs steady and prevent wobbling. Draw two beams crossing between the legs.
- Draw a horizontal beam near the top of the legs.
- Add a diagonal beam from the front leg to the wheel area.
- Make sure the beams are straight and even on both sides.
- Use light lines first, then darken them once you are happy.
Check Proportions And Angles
| Part | Angle (degrees) | Length (relative) |
|---|---|---|
| Legs | 10-15° outward | Medium |
| Horizontal Beam | 0° (flat) | Same as distance between legs |
| Diagonal Beam | 30-45° | Shorter than legs |
Refining The Drawing
After sketching your wheelbarrow, it’s time to improve its look. Refining makes your drawing clear and neat.
This stage focuses on cleaning lines and adding details to bring the wheelbarrow to life.
Cleaning Lines
Start by erasing extra pencil marks that are not part of the final design. Use a sharp eraser for best results.
- Trace over the main lines with a fine pen or darker pencil.
- Remove any stray or overlapping lines carefully.
- Ensure the shapes of the wheel, handles, and tray are smooth and clear.
- Keep the lines consistent in thickness for a balanced look.
Enhancing Details
Add small features to make your wheelbarrow drawing realistic. Focus on parts like the wheel texture and wood grain.
| Detail | How to Draw |
| Wheel | Draw spokes and tread lines carefully |
| Handles | Show wood grain with light, short strokes |
| Tray | Add shading to show depth and curve |
| Nails and Joints | Small circles or dots at connection points |
Shading And Texturing
Shading and texturing bring your wheelbarrow drawing to life. They add depth and realism to the image.
Focusing on light, shadows, and material details helps your wheelbarrow look three-dimensional and real.
Light Source Placement
Decide where your light source is before shading. This affects all shadows and highlights on the wheelbarrow.
- Place the light source to one side for clear shadows.
- Top lighting creates soft shadows underneath.
- Front lighting reduces shadow size but shows texture.
- Keep the light consistent for all parts of the drawing.
Adding Shadows
Shadows give your wheelbarrow shape and weight. Start with soft shadows near the light source.
Darker shadows appear where light is blocked, like under the wheel and inside the tray.
| Shadow Area | Shade Intensity | Effect |
| Under the wheel | Dark | Shows contact with ground |
| Inside the tray | Medium | Shows depth |
| Under handles | Light | Suggests roundness |
| Opposite light source | Darkest | Creates contrast |
Texturing Wood And Metal
Wood and metal have different surfaces. Use shading and lines to show their textures.
- For wood, draw light grain lines following the shape.
- Add small knots and rough patches on wooden parts.
- Metal surfaces are smooth with shiny spots.
- Use sharp highlights and small reflections on metal edges.
- Combine smooth shading with scratches for worn metal.
Final Touches
Adding final touches makes your wheelbarrow drawing look complete and polished. Small details bring life and depth to the image.
Focus on light, shadow, and background to create a realistic effect. These elements make your drawing stand out.
Highlighting
Highlight the parts of the wheelbarrow that catch light. Use a lighter shade or white pencil to add shine.
- Focus on the metal parts like the wheel and handles.
- Add small bright spots where the light hits directly.
- Use gentle strokes to avoid harsh lines.
- Blend highlights smoothly into the base color.
Background Elements
Add simple background elements to give context to your wheelbarrow. This makes the drawing feel more natural.
| Element | Purpose |
| Grass | Shows the wheelbarrow is outdoors |
| Soil | Suggests it is used in gardening |
| Tools | Adds detail and story |
| Shadows | Creates depth and realism |

Credit: www.dreamstime.com
Frequently Asked Questions
How Do I Start Drawing A Wheelbarrow?
Begin by sketching the basic shapes: a rectangle for the tray, a circle for the wheel, and lines for handles. This simple framework makes it easier to add details later and maintain correct proportions in your wheelbarrow drawing.
What Materials Are Best For Drawing A Wheelbarrow?
Use a pencil for initial sketches, an eraser for corrections, and fine liners or markers for outlines. Colored pencils or watercolors can add depth. Quality paper helps prevent smudging and ensures clean, crisp lines in your artwork.
How Can I Make My Wheelbarrow Drawing Look Realistic?
Focus on accurate proportions, shading, and texture details like wood grain or metal. Add shadows beneath the wheelbarrow to ground it. Observing a real wheelbarrow or reference photos will help capture realistic features.
What Common Mistakes Should I Avoid When Drawing A Wheelbarrow?
Avoid disproportionate wheels or handles, inconsistent angles, and ignoring perspective. Skipping basic shapes can lead to imbalance. Taking time to plan your drawing prevents these errors and improves overall quality.
Conclusion
Drawing a wheelbarrow can be simple and fun. Start with basic shapes and add details step by step. Practice helps improve your skills quickly. Keep your lines clear and your shapes balanced. Soon, you will create a nice wheelbarrow drawing.
Enjoy the process and try different styles. Drawing builds creativity and patience. Give yourself time and keep practicing. You will see great progress soon.