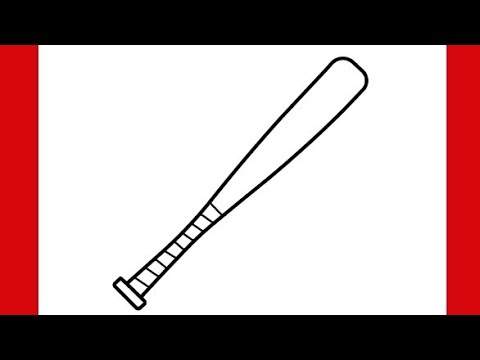
Have you ever wanted to draw a baseball bat but didn’t know where to start? Whether you’re an aspiring artist or just looking for a fun way to improve your skills, this guide is made for you.
Drawing a baseball bat might seem tricky at first, but with the right steps, you’ll be surprised at how easy and rewarding it can be. Stick with me, and by the end, you’ll have your very own realistic baseball bat drawing to be proud of.
Ready to get started? Let’s dive in!
Materials Needed
Drawing a baseball bat starts with having the right tools. These materials help you create clear and precise lines. You can choose basic tools or add some extras for more details.
Below, you will find the essential drawing tools and some optional supplies to improve your drawing experience.
Essential Drawing Tools
These tools are necessary to draw a baseball bat. They help you sketch, outline, and erase mistakes easily.
- Pencil (preferably HB or 2B for sketching)
- Eraser (soft and clean for corrections)
- Sharpener (to keep pencil tips fine)
- Ruler (for straight lines and measurements)
- Drawing paper (smooth surface, medium weight)
Optional Supplies
These extra supplies can add detail or color to your baseball bat drawing. They are not required but can enhance your work.
| Supply | Purpose |
| Colored pencils | Add color and shading |
| Fine liner pens | Outline and define edges |
| Blending stump | Smooth pencil shading |
| Sketchbook | Keep your drawings organized |

Credit: www.vecteezy.com
Basic Shapes
Drawing a baseball bat starts with basic shapes. These shapes form the foundation for your bat drawing.
Understanding these shapes makes it easier to sketch a realistic bat. Let’s explore how to create these foundational elements.
Drawing The Bat’s Outline
Begin by drawing a long, narrow oval. This oval will be the main part of the bat. It represents the bat’s barrel.
Next, add a straight line from the end of the oval. This line will guide you in drawing the handle. Make sure it is centered.
- Draw a long oval for the barrel
- Add a straight line for the handle
- Keep the line centered with the oval
Sketching The Handle
To sketch the handle, start with a small rectangle. This connects to the straight line from the barrel.
The handle should be thinner than the barrel. Make it smooth and even for a realistic look.
- Draw a small rectangle for the handle
- Ensure it connects to the barrel’s line
- Keep the handle smooth and thin
Adding Details
Adding details makes your baseball bat drawing look real. Small touches bring the bat to life.
Focus on shaping the bat carefully and creating texture on the grip. These details improve the drawing.
Refining The Shape
Check the bat’s outline. Smooth any rough lines. Make sure the bat looks balanced and natural.
- Darken the edges to show thickness
- Add slight curves to the barrel for roundness
- Shape the tip with a gentle point
- Make the handle narrow and straight
Creating The Grip Texture
The grip needs a pattern to look like wrapped tape or rubber. Add small lines or dots to show this texture.
| Texture Type | How to Draw |
| Wrapped Tape | Draw diagonal lines crossing each other |
| Rubber Grip | Use tiny dots or small horizontal lines |
| Leather Grip | Add small wrinkles and uneven lines |

Credit: www.youtube.com
Shading Techniques
Shading adds depth and realism to your baseball bat drawing. It helps show the bat’s shape and texture clearly.
Use light and shadow carefully to make the bat look three-dimensional and lifelike on paper.
Light And Shadow Basics
Understand where your light source is before shading. Shadows appear opposite the light source. The bat’s round shape affects shadow curves.
- Identify the strongest light direction.
- Shade the areas farthest from the light darker.
- Use soft shading for gradual light changes.
- Leave highlights where the light hits directly.
- Blend shadows smoothly to avoid harsh lines.
Highlighting The Wood Grain
Wood grain gives the bat a natural look. Use shading to show the grain’s texture and direction.
| Technique | Description |
| Light Strokes | Draw thin lines following the wood grain pattern. |
| Vary Pressure | Press lightly for soft grain, harder for dark grain lines. |
| Blend Carefully | Use blending tools to soften harsh grain edges. |
| Highlight Areas | Leave small light spots to mimic natural wood shine. |
Final Touches
After drawing the baseball bat, the final touches make it look neat and complete. These steps help your bat stand out clearly.
Focus on cleaning lines and adding background details to finish your artwork nicely.
Cleaning Up Lines
Remove extra sketch marks and overlapping lines gently. Clear lines make your bat look sharp and professional.
Use an eraser or digital tool to smooth out rough edges. Fix any uneven parts to keep the bat’s shape accurate.
- Erase stray pencil marks carefully
- Make sure the bat’s outline is solid
- Smooth curves to avoid jagged edges
- Double-check proportions and correct if needed
Adding Background Elements
Add simple background features to give context to your bat drawing. This makes the image more interesting to look at.
Keep background details light so they do not distract from the bat. Small elements like grass or a baseball field work well.
- Draw light grass or dirt under the bat
- Add a baseball or glove nearby
- Use soft colors or light shading
- Avoid large objects that cover the bat
Common Mistakes To Avoid
Drawing a baseball bat can be simple, but some errors make the drawing look wrong.
Knowing what to avoid helps you create a better, more realistic bat.
Ignoring Proportions
Many people draw the bat too short or too thick. A baseball bat is long and slim.
Wrong Handle Size
The handle should be thin and easy to hold. A thick handle looks odd and unrealistic.
Forgetting The Bat’s Tapered Shape
A bat is not the same width all over. It slowly gets thicker from the handle to the barrel.
- Start with a thin handle
- Gradually widen the middle
- Finish with a large barrel end
Skipping The Bat End Details
The barrel end and the knob are important. They give the bat its shape and balance.
| Part | Common Mistake | How to Fix |
| Barrel End | Too flat or missing | Draw a rounded, thicker end |
| Handle Knob | Not visible or too small | Add a small flare at the handle’s end |
Overcomplicating The Design
Adding too many lines or patterns can confuse the drawing. Keep it simple and clean.
Ignoring Light And Shadows
Use light shading on one side of the bat to show roundness.
Do not color the entire bat evenly. This makes it look flat.
Practice Tips
Drawing a baseball bat takes patience and practice. You need to focus on shapes and lines.
Practicing often helps you improve your skills and draw better bats every time.
Daily Sketch Ideas
Try drawing baseball bats in different styles every day. This builds your drawing habit.
Start with simple shapes, then add details like wood grain and shadows.
- Draw a plain bat from different angles
- Add simple textures like scratches or dents
- Sketch a bat in action, like hitting a ball
- Draw bats with different sizes and styles
- Combine bats with other baseball gear
Improving Your Style
Work on your own way of drawing bats. Try new lines and shading styles.
Look at real bats or photos to see details. Use these to add realism.
- Use thicker lines for the bat edges
- Shade softly to show round shapes
- Add highlights where light hits the bat
- Experiment with colors or black and white
- Practice drawing fast to improve speed

Credit: www.freepik.com
Frequently Asked Questions
How Do I Start Drawing A Baseball Bat?
Begin by sketching a long, narrow oval for the bat’s top. Then, draw parallel lines downward to form the bat’s body. Add a tapered handle at the bottom for a realistic shape.
What Materials Are Best For Drawing A Baseball Bat?
Use pencils for initial sketches, then fine liners or ink pens for outlines. Colored pencils or markers work well for shading and adding details.
How Can I Add Realistic Details To My Bat Drawing?
Include wood grain lines, shadows, and highlights. Focus on the bat’s taper, handle grip, and rounded edges for authenticity.
How Long Should My Baseball Bat Drawing Be?
Keep the bat’s length proportional to typical bats, usually about 26 to 34 inches. Adjust size based on the drawing scale you choose.
Conclusion
Drawing a baseball bat can be simple and fun. Start with basic shapes, then add details step by step. Practice helps you improve with each try. Use light lines first to fix mistakes easily. Try different styles to find what you like best.
Keep your hand steady and enjoy the process. Soon, your drawings will look more real and neat. Remember, every artist begins with simple steps. Keep drawing and have fun with your art!