
If you’ve ever wanted to create your own fishing lures, you’re in the right place. Drawing fishing lures might seem tricky at first, but with a few simple steps, you can design lures that look just like the real thing.
Imagine how satisfying it will be to see your ideas come to life on paper—and maybe even inspire your next fishing trip. In this guide, you’ll learn easy techniques to draw lures that catch the eye and spark creativity. Ready to start?
Let’s dive in and make your fishing lure drawings stand out!

Credit: www.shutterstock.com
Materials Needed
Drawing fishing lures is a fun and creative hobby. You need some basic tools to start your drawing. These tools help you create clear and detailed sketches.
Besides the main drawing tools, you can use coloring supplies to make your lure drawings more vivid and attractive. These are optional but add a nice touch.
Essential Drawing Tools
These tools help you create the shape and details of your fishing lure. Make sure to have good quality items for the best results.
- Pencils (HB and 2B for light and dark lines)
- Eraser (soft and clean for corrections)
- Sharpener (to keep pencils fine)
- Ruler (for straight lines and measurements)
- Sketchbook or drawing paper (smooth surface is best)
- Fine liner pens (for outlining details)
Optional Coloring Supplies
These supplies add color and texture to your fishing lure drawings. You can use any combination depending on your style.
| Coloring Tool | Purpose |
| Colored pencils | For shading and smooth color blending |
| Markers | For bright and bold colors |
| Watercolors | For soft, transparent color effects |
| Blending stumps | To smooth pencil colors |
| White gel pen | For highlights and fine details |
Basic Shapes For Lures
Drawing fishing lures starts with simple shapes. These shapes form the base of your design.
Using basic shapes helps you sketch lures quickly and clearly. It also makes details easier to add.
Common Lure Forms
Fishing lures come in many shapes. Each shape mimics different types of bait.
- Worm-shaped lures are long and thin. They look like worms or eels.
- Fish-shaped lures have a rounded body. They often have a tail fin shape.
- Spinnerbaits include a blade and a hook. Their shapes are more complex.
- Crankbaits are round or oval. They often have a lip at the front.
- Jigs have a bulbous head and a hook. Their shape is simple but effective.
Sketching Simple Outlines
Start your drawing with light lines. Use basic shapes like ovals and rectangles.
Draw the body shape first. Add fins, hooks, and eyes after.
- Use an oval for the main body.
- Add a small circle for the eye.
- Draw a thin rectangle or line for the tail.
- Sketch curves for fins and lips.
- Keep lines light so you can erase if needed.
Adding Details
Adding details makes your fishing lure drawing look real. Small features give it life and character.
Focus on parts like hooks, eyes, textures, and patterns. These details help show the lure’s purpose.
Hooks And Eyes
Hooks are sharp and shiny. Draw thin curved lines to show the hook shape. Add small highlights for shine.
The eyes should look round and clear. Draw a circle with a dark center. Add a tiny white spot for the light reflection.
- Draw hooks with smooth curves and pointed tips
- Use small ovals or circles for eyes
- Add highlights on eyes and hooks for shine
Texturing And Patterns
Textures give the lure a real feel. Use short lines or dots to show scales or rough surfaces.
Patterns add color and interest. Draw stripes, spots, or zigzags on the body. Keep patterns simple and clear.
- Use small dots or lines for texture
- Draw stripes or spots along the lure body
- Keep patterns balanced and neat
Coloring Techniques
Coloring fishing lures is an important step to make them look real and attractive. Using the right techniques helps to create depth and interest.
Good coloring makes your drawing stand out. It also shows details like shine and texture on the lure.
Choosing Color Palettes
Pick colors that match the type of fish you want to catch. Natural colors like green, brown, and silver work well for many lures.
Bright colors like red, orange, or yellow can attract fish in murky water. Use colors that fit the fishing environment.
- Use natural colors for clear water
- Choose bright colors for dark or muddy water
- Mix colors to create realistic patterns
- Limit your palette to avoid messy colors
Blending And Shading
Blending colors smoothly helps create a 3D look on the lure. Start with light colors and add darker shades for depth.
Shade areas where shadows naturally fall. This adds realism and makes the lure look shiny and round.
- Use a soft pencil or brush for smooth blending
- Layer colors lightly to build depth
- Shade under curves and edges for shadows
- Add highlights with white or light colors
Creating Different Lure Types
Fishing lures come in many shapes and styles. Each type mimics different prey to attract fish. Drawing these lures can help you understand their design and function.
We will explore how to draw three popular lure types. These are crankbaits, spinnerbaits, and soft plastics. Each has unique features to focus on.
Crankbaits
Crankbaits have a hard body and a lip that makes them dive underwater. They look like small fish or frogs. To draw a crankbait, start with an oval shape for the body. Then add a curved lip at the front.
- Draw an oval for the body
- Add a curved lip at the front
- Sketch fins or scales for details
- Include hooks under the body
- Use shading to show roundness
Spinnerbaits
Spinnerbaits have a wire frame, a weighted body, and spinning blades. These parts create flash and vibration in the water. To draw a spinnerbait, first sketch the wire frame as a bent line.
| Part | Drawing Tip |
| Wire Frame | Draw a bent, thin line |
| Weighted Body | Shape like a small oval or teardrop |
| Spinning Blades | Draw curved leaf shapes attached to the wire |
| Hooks | Sketch sharp hooks under the body |
Use simple shapes and connect them with smooth lines. Add details like blade holes and hook points to make it look real.
Soft Plastics
Soft plastic lures are flexible and lifelike. They often look like worms, grubs, or minnows. Start by drawing a long, wavy shape for the body. Add texture with small lines or bumps.
- Draw a wavy, elongated body
- Add segmented lines for texture
- Include a curled tail or fin
- Sketch small eyes near the head
- Shade lightly to show softness
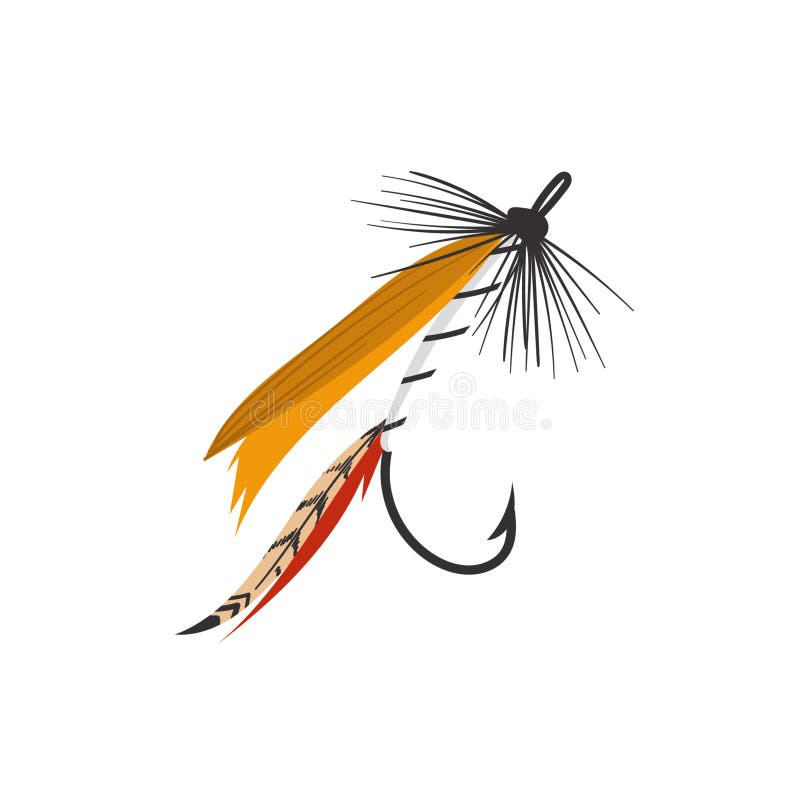
Credit: www.dreamstime.com
Tips For Realistic Designs
Creating realistic fishing lure drawings takes attention to detail. Adding the right textures and colors helps make the design lifelike.
Using specific techniques can improve the drawing’s depth and appearance. Focus on how light hits the lure and how to capture that effect.
Using References
Look at photos or real fishing lures to understand shapes and colors. References guide your drawing and keep designs accurate.
- Study lure patterns and color schemes closely
- Notice small details like hooks and eyes
- Observe how materials reflect light differently
- Take notes or sketch from multiple angles
Highlighting And Shadows
Highlights and shadows give a 3D feel to your lure drawing. They show where light hits and where shadows fall.
| Effect | Description | Tip |
| Highlights | Bright spots on shiny parts | Use white or light colors sparingly |
| Midtones | Natural color areas | Blend colors smoothly for realism |
| Shadows | Dark areas where light is blocked | Use darker shades under hooks and curves |
Common Mistakes To Avoid
Drawing fishing lures can be fun but tricky. Avoiding common mistakes helps your art look better.
Pay attention to shapes and details. These parts make your drawing clear and realistic.
Proportion Errors
One big mistake is wrong proportions. Lures should have balanced parts like hooks and bodies.
If the hook is too big or small, the lure looks strange. Keep parts sized correctly.
- Check the size of hooks compared to the lure body
- Keep the lure length and width in realistic ratio
- Use reference images to compare shapes and sizes
Overcomplicating Details
Adding too many details can confuse the drawing. Simple lines often look better.
Focus on main features like shape and key patterns. Avoid drawing every small scale or line.
- Draw clear shapes before adding patterns
- Limit fine details that do not add meaning
- Use shading to show depth instead of many lines

Credit: www.dreamstime.com
Practice Exercises
Drawing fishing lures takes patience and practice. Exercises help improve your skills.
Try different exercises often to build confidence and accuracy in your drawings.
Step-by-step Projects
Follow simple projects to learn how to draw fishing lures clearly. Break the drawing into small parts.
Start with the lure’s shape, then add details like hooks and colors.
- Sketch the basic outline of the lure body.
- Add the hook shapes below the body.
- Draw the eye and small details on the lure.
- Shade or color the lure to show texture.
Daily Sketch Challenges
Practice drawing lures every day with quick sketches. This builds speed and creativity.
Try to draw a new lure shape or pattern each day. Keep your sketches simple and fast.
- Draw a different lure shape in 10 minutes daily.
- Focus on capturing the lure’s main features fast.
- Try sketching lures from photos or real items.
- Experiment with adding patterns or colors.
Frequently Asked Questions
What Basic Materials Do I Need To Draw Fishing Lures?
You need paper, pencils, erasers, and colored markers or pencils. A ruler helps with straight lines. Reference images of fishing lures improve accuracy. These materials ensure clear, detailed, and vibrant drawings.
How Can I Draw Realistic Fishing Lure Shapes?
Start with simple shapes like ovals or rectangles. Add details like hooks, eyes, and patterns gradually. Observe real lures to capture proportions. Use shading to create depth and realism in your drawing.
What Colors Best Represent Fishing Lures In Drawings?
Use bright colors like red, yellow, green, and silver. These mimic real lure designs that attract fish. Blend colors smoothly for a natural look. Adding highlights and shadows enhances the three-dimensional effect.
How Do I Add Texture To Fishing Lure Drawings?
Use fine lines or dots to simulate scales or reflective surfaces. Layer colors to create depth and texture. Experiment with cross-hatching for shadows. Texture makes your drawing more lifelike and appealing.
Conclusion
Creating your own fishing lures can be fun and rewarding. Start with simple designs and gradually try more complex ones. Practice improves your drawing skills over time. Always observe real lures for inspiration and accuracy. Experiment with colors and shapes to see what works best.
Share your creations with friends or online communities. Enjoy the process and watch your skills grow. Remember, patience is key. Keep drawing, learning, and refining your technique. Soon, you’ll have a collection of unique lures. Dive into this creative hobby and discover endless possibilities.
Happy drawing!