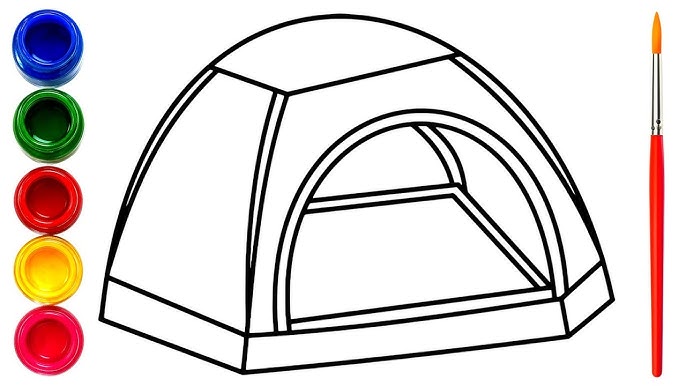
Have you ever wanted to draw a tent but didn’t know where to start? Whether you’re planning a camping scene or just want to add a simple tent to your sketches, this guide will help you create one step by step.
You don’t need to be an expert artist to follow along. By the end, you’ll have a clear, easy-to-draw tent that you can be proud of. Ready to see how simple it can be? Let’s get your pencil moving and bring your tent to life!
Materials Needed
Drawing a tent is easy with the right materials. You need some basic tools to start your sketch.
Optional supplies can help make your drawing look better and more detailed.
Basic Drawing Tools
Start with simple tools to create the outline of your tent. These tools are easy to find and use.
- Pencil – Use a sharp pencil for clean lines.
- Eraser – Fix mistakes and clean up your drawing.
- Paper – Choose plain white paper or sketchbook paper.
- Ruler – Draw straight lines for the tent’s edges.
Optional Supplies
These supplies help add color and depth to your tent drawing. They are not required but useful.
- Colored pencils – Add color to your tent and background.
- Markers – Use for bright and bold colors.
- Blending tools – Blend pencil shades smoothly.
- Sharpener – Keep your pencils sharp for fine details.
- Sketching pen – Outline your drawing for a clear look.

Credit: www.youtube.com
Choosing Tent Styles
Drawing a tent starts with picking the right style. Each style has a unique shape and look.
Knowing different tent styles helps you create simple or detailed drawings.
Simple Tent Shapes
Simple tents use basic shapes like triangles and rectangles. These shapes are easy to draw and recognize.
Start with a triangle for the roof and a rectangle for the body. This makes a classic tent shape.
- A-frame tents have a triangle roof and straight sides
- Lean-to tents use one slanting rectangle for the roof
- Dome tents are round shapes with curved lines
Detailed Tent Designs
Detailed tents show more parts, like windows, doors, and poles. These details make drawings look realistic.
Add lines for tent fabric folds and shading for depth. Show ropes and stakes for a complete look.
- Draw door flaps with small rectangles or curved shapes
- Add window shapes like circles or squares on the sides
- Sketch poles as thin lines inside or outside the tent
- Use light shading to show fabric texture and shadows
Sketching The Tent Frame
Drawing a tent frame starts with simple shapes. These shapes help you build the tent’s basic form.
After the shapes, add lines that show the tent’s structure. These lines create the frame and support details.
Drawing Basic Shapes
Begin by sketching simple shapes like triangles and rectangles. These shapes form the tent’s main body and roof.
- Draw a large triangle for the tent’s roof.
- Add a rectangle below for the tent’s base.
- Use small rectangles for the tent entrance.
- Sketch circles or ovals for any attached parts.
Adding Structural Lines
Next, add lines to show the tent’s poles and supports. These lines give the tent its shape and strength.
| Part | Line Type | Description |
| Roof Pole | Diagonal Lines | Draw lines from the base to the top point of the triangle. |
| Side Supports | Vertical Lines | Add lines along the rectangle’s sides for poles. |
| Entrance Frame | Curved Lines | Use curves to outline the entrance shape. |
| Ground Stakes | Short Lines | Draw small lines at the base corners for stakes. |
Outlining Tent Fabric
Drawing a tent starts with outlining the fabric. This shows the shape and size of the tent. Clear outlines help bring the tent to life on paper.
Focus on the main fabric areas first. These parts hold the tent’s form and look natural when drawn carefully.
Creating Tent Panels
Tent fabric is made of panels sewn together. Draw each panel separately to add depth and realism. Use straight or slightly curved lines for panel edges.
- Start by sketching the main tent shape.
- Divide the shape into smaller sections for panels.
- Draw lines where the panels meet.
- Keep edges neat and consistent.
- Use light strokes to adjust if needed.
Adding Folds And Creases
Folds and creases make the tent fabric look real. They show where the fabric bends or stretches. Add these details after outlining panels.
| Fold Type | How to Draw |
| Sharp Crease | Use short, dark lines at angles |
| Soft Fold | Draw gentle curved lines with light shading |
| Wrinkle | Sketch thin, irregular lines close together |
Adding Tent Details
Adding details to your tent drawing makes it look more real. These details include stakes, ropes, zippers, and openings. They help show how the tent stands and works.
Focus on small parts that add depth. Use simple shapes and lines to keep the drawing clear and easy to follow.
Drawing Tent Stakes And Ropes
Tent stakes anchor the tent to the ground. Draw small angled lines from the base of the tent to show stakes. Add ropes from the tent corners to the stakes for support.
- Draw stakes as small, pointed rectangles or triangles.
- Show ropes as curved or straight thin lines.
- Connect ropes from tent corners to stakes.
- Use light shading to show rope tension.
- Add ground texture near stakes to show placement.
Including Zippers And Openings
Zippers and openings give the tent its function. Draw zippers as thin lines with small rectangles for zipper teeth. For openings, use curved or straight lines to show flaps.
| Feature | How to Draw | Tips |
| Zipper | Thin line with tiny rectangles on each side | Keep teeth small and evenly spaced |
| Opening Flap | Curved or straight line overlapping tent wall | Use light shading to show flap folds |
| Door Outline | Rectangle or square shape inside tent wall | Make edges slightly curved for soft look |
Shading And Texturing
Drawing a tent involves more than just outlining its shape. Shading and texturing bring life and depth to your sketch.
Understanding how light and shadow work helps create realistic effects. Let’s explore techniques for shading and texturing a tent.
Light And Shadow Placement
Light and shadow give your tent drawing a 3D look. First, decide where the light is coming from. This will guide where you place shadows.
Shadows are darker on the side opposite the light. Draw these areas with a pencil to create depth. Use softer shading for areas with less light.
- Determine light source direction
- Shade opposite side of the light
- Use soft shading for subtle shadows
Fabric Texture Techniques
Fabric texture makes your tent look more realistic. Start by observing how fabric folds and creases.
Use short, light strokes to mimic fabric lines. Add detail by varying pressure on your pencil to create different textures.
| Technique | Effect |
| Light strokes | Soft fabric look |
| Vary pressure | Diverse textures |
Final Touches
After drawing the main shape of your tent, it is time to add the final details. These touches will make your drawing look clean and complete.
Focus on refining your lines and adding color to bring your tent to life.
Cleaning Up Lines
Use an eraser to remove extra or overlapping lines carefully. Clean lines make your drawing neat and easier to understand.
- Erase sketch lines that are no longer needed
- Darken the important outline of the tent
- Make sure corners and edges are sharp and clear
- Check for any smudges and clean them up
Enhancing With Color
Adding color helps your tent look more realistic and visually appealing. Use simple shading techniques for depth.
| Color | Use |
| Green | For the tent fabric |
| Brown | For wooden poles or stakes |
| Gray | For metal parts or zippers |
| Light Blue | For shaded areas and highlights |

Credit: www.youtube.com
Common Mistakes To Avoid
Drawing a tent can be fun but tricky. Many beginners make simple errors. Avoiding these mistakes helps your tent look real and balanced.
Focus on the basics to improve your drawing. This guide points out common errors and how to fix them.
Proportion Errors
One big mistake is wrong tent size and shape. The tent’s parts must fit well together. If the door is too big or the roof too tall, the tent looks odd.
- Make sure the tent’s base is wider than the top.
- Keep the tent’s height realistic compared to its width.
- Draw the poles and fabric with correct thickness.
- Check the door and windows for balanced size.
Overcomplicating Details
Adding too many lines or decorations can confuse the drawing. Simple shapes show the tent clearly and neatly. Avoid drawing every stitch or fold.
| Too Much Detail | Simple Detail |
| Many tiny lines and patterns | Few clear shapes and lines |
| Cluttered fabric folds | Only key folds shown |
| Excessive shading | Basic shadows for depth |
Practice Tips
Drawing a tent takes time and effort. Practice helps improve your skills. Try different ways to draw tents every day.
Focus on simple shapes and details. Keep your sketches quick and clear. Use helpful tools to guide your drawing.
Daily Sketching Ideas
Sketch tents in many styles and settings. Draw camping tents, large event tents, or simple shelters. Change the angle and size to learn more.
Try drawing tents with different materials and weather effects. This practice makes your drawings more interesting and realistic.
- Draw a small camping tent from the front view
- Sketch a tent from the side with open flaps
- Draw a large tent with poles and ropes
- Try tents in rain or windy weather
- Add people or objects near the tent
Using Reference Images
Use photos or real tents to help your drawing. Look closely at shapes, lines, and details. Reference images show how tents look in real life.
Study the way fabric folds or how tent poles connect. Reference helps you draw tents that look natural and correct.
- Find photos of tents online or in books
- Observe different tent styles and sizes
- Focus on light and shadow on the fabric
- Use reference to check your sketch’s accuracy
- Try drawing tents from photos at different angles

Credit: www.youtube.com
Frequently Asked Questions
How Do I Start Drawing A Tent?
Begin by sketching a simple triangle to form the tent’s shape. Add lines for the tent poles and base. This basic structure helps create a clear outline to build upon. Starting simple ensures your tent looks proportionate and realistic.
What Materials Are Best For Drawing A Tent?
Use pencils for sketching and fine liners for outlining. Colored pencils or markers work well for shading and adding texture. Quality paper with a smooth surface helps achieve clean lines and vibrant colors. These materials enhance the overall drawing quality.
How Can I Make My Tent Drawing Look Realistic?
Add shading to show light and shadow on the tent fabric. Include details like ropes, stakes, and folds for texture. Use soft, gradual shading to mimic natural lighting. Realistic touches bring depth and life to your tent drawing.
What Are Common Mistakes To Avoid When Drawing Tents?
Avoid uneven lines and incorrect tent proportions. Don’t skip details like shadows or fabric folds. Avoid flat shading; instead, use gradients for depth. These errors can make your tent look unnatural and less convincing.
Conclusion
Drawing a tent can be simple and fun. Follow the steps one by one. Use basic shapes to build your tent. Practice lines and shading to add depth. Keep your drawing neat and clear. Enjoy creating your own tent design.
With time, your skills will improve. Try drawing different tent styles next. Drawing helps you see details better. Keep practicing, and don’t give up. Your tent drawings will look great soon!