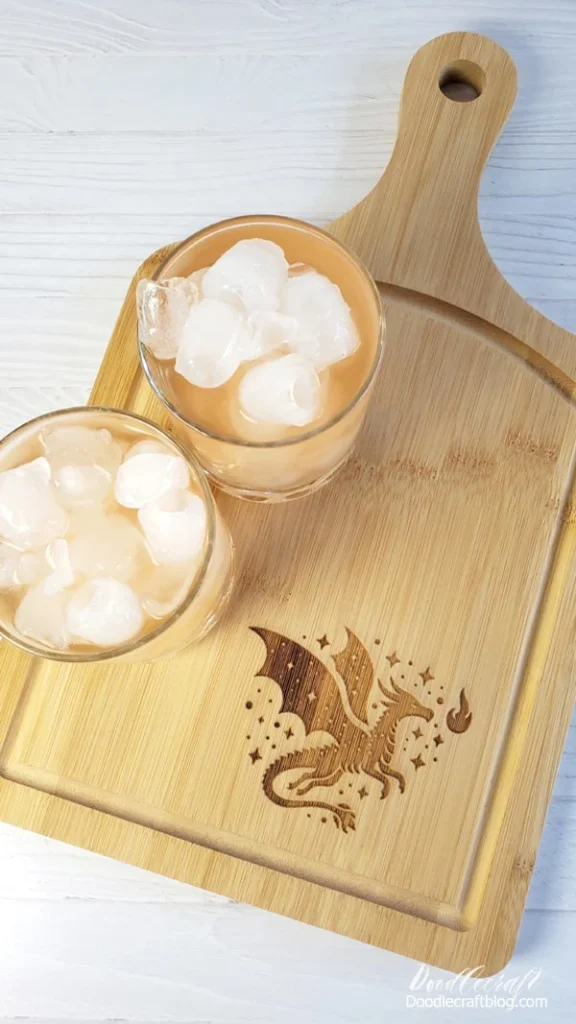
Have you ever wanted to add a personal touch to your kitchen or create a unique gift for someone special? Learning how to engrave a cutting board is easier than you think, and it can transform a simple kitchen tool into a beautiful keepsake.
Whether you want to carve a family name, a meaningful quote, or a custom design, this guide will walk you through every step. By the end, you’ll have the skills to make your cutting board truly one-of-a-kind. Ready to get started?
Let’s dive in!
Choosing The Right Cutting Board
Engraving a cutting board is a great way to add a personal touch. Picking the right board is very important before you start.
The material, size, and surface all affect how your engraving will look and last. Let’s look at the main points.
Types Of Wood
Choose wood that is strong and easy to carve. Hardwoods work best for engraving.
Some popular woods include maple, walnut, and cherry. Each has a different color and grain.
- Maple:Light color, smooth surface, great for detailed work
- Walnut:Dark brown, rich look, engraves well
- Cherry:Reddish tone, ages nicely, shows engraving clearly
- Bamboo:Eco-friendly, light color, but may be harder to engrave
Size And Shape Considerations
Pick a board size that fits your engraving design and use. Bigger boards offer more space.
The shape affects how easy it is to engrave. Flat, rectangular boards are simpler to work on.
- Small boards suit simple designs or initials
- Large boards allow for detailed images or text
- Round or oval boards may need special engraving tools
- Thicker boards are more durable for deep engraving
Surface Preparation
Prepare the board surface well before engraving. A smooth surface gives the best results.
Clean the board and sand it lightly to remove bumps and dust. This helps the engraving tool move smoothly.
- Wash the board with mild soap and dry it fully
- Use fine sandpaper to smooth the wood surface
- Wipe away all dust with a dry cloth
- Avoid oily or wet surfaces before engraving
Selecting Engraving Tools
Choosing the right tool is important for engraving a cutting board. Different tools give different results. Pick one that fits your skill and design.
Consider the type of wood and the detail you want. Some tools work better on certain woods. Safety is also key when selecting tools.
Laser Engravers
Laser engravers use focused light to burn designs into wood. They create precise and clean cuts. This tool is great for detailed and complex designs.
Laser engraving works well on smooth, flat cutting boards. It does not damage the wood much. The process is fast and repeatable.
Rotary Tools
Rotary tools have spinning bits to carve designs. You can control depth and style by changing bits. This tool works well for simple to medium detail.
Rotary tools are handheld and easy to use. They need steady hands and patience. Use low speed to avoid wood burning or splintering.
- Choose bits designed for wood
- Wear safety goggles to protect eyes
- Practice on scrap wood first
Hand Engraving Options
Hand engraving uses knives or chisels to carve designs. It needs skill and patience. This method gives a personal touch and unique texture.
Hand tools work well for simple patterns or initials. They are quiet and require no power. Sharpen tools often for best results.
- Use a sharp carving knife or chisel
- Hold the board firmly while engraving
- Work slowly to avoid mistakes
Design Ideas And Templates
Engraving a cutting board adds a personal touch to your kitchen or gift. Choosing the right design makes your board special and unique.
Templates help guide your engraving process. They show you how the final design will look before you start.
Simple Patterns
Simple patterns are easy to engrave and look clean. They often use basic shapes like lines, dots, or small icons.
These patterns work well for beginners or quick projects. They add charm without needing detailed work.
- Geometric shapes like triangles and circles
- Leaf or flower outlines
- Wavy or straight lines as borders
- Small kitchen-related icons like forks or knives
Personalized Text
Adding names or messages makes the cutting board special. Use clear fonts that are easy to read when engraved.
Choose meaningful words like family names, dates, or short quotes. This adds a warm, personal feel.
- Family name with established year
- Short cooking quotes or sayings
- Initials in fancy fonts
- Custom messages for gifts
Intricate Artwork
Intricate artwork uses detailed images and fine lines. This style needs careful engraving tools and patience.
Complex designs look elegant and professional. They often include nature scenes, animals, or artistic patterns.
- Floral designs with many details
- Animal portraits like birds or deer
- Mandala or lace-inspired patterns
- Custom illustrations or logos
-min.jpg)
Credit: www.doodlecraftblog.com
Step-by-step Engraving Process
Engraving a cutting board adds a personal touch. The process requires patience and care.
This guide shows how to engrave a cutting board in clear steps. Follow them for a neat result.
Setting Up The Workspace
Choose a clean, well-lit area to work. Make sure the surface is flat and stable.
- Gather all tools such as engraving pen, sandpaper, and stencil.
- Wear safety glasses to protect your eyes.
- Use clamps to hold the cutting board steady.
- Keep a damp cloth nearby to wipe dust.
Marking The Design
Decide on the design you want to engrave. Use a pencil or stencil to mark it on the board.
| Method | Details |
|---|---|
| Freehand Drawing | Draw directly with pencil for simple designs. |
| Stencil Transfer | Place stencil and trace outlines carefully. |
| Carbon Paper | Use carbon paper to copy printed design onto wood. |
Engraving Techniques
Engrave slowly to avoid mistakes. Use light pressure at first to outline the design.
- Start with shallow cuts to create guide lines.
- Deepen the cuts gradually for a bold look.
- Keep your hand steady and move the tool smoothly.
- Take breaks to prevent hand fatigue.
Finishing Touches
After engraving, sand the board gently to smooth rough edges. Wipe off dust.
Apply a food-safe finish to protect the wood and enhance the design.
Maintaining Your Engraved Cutting Board
Engraved cutting boards add beauty to your kitchen. Caring for them helps keep their look and function. Simple steps can protect your board for years.
Learn how to clean, oil, and avoid damage to keep your engraved board in top shape.
Cleaning Tips
Clean your cutting board after every use. Use mild soap and warm water. Avoid soaking it or putting it in the dishwasher. Dry it with a towel right away to stop warping.
- Use a soft sponge or cloth for cleaning
- Do not use harsh chemicals or bleach
- Rinse thoroughly to remove soap
- Dry immediately with a clean towel
Oiling And Conditioning
Oiling your cutting board protects the wood and keeps the engraving clear. Use food-safe mineral oil or a special cutting board conditioner. Apply oil once a month or when the wood looks dry.
| Oiling Frequency | Condition |
| Every 1 month | Normal use |
| Every 2 weeks | Heavy use |
| When dry or dull | Visible cracks or roughness |
Avoiding Damage
Protect your board by using it properly. Avoid cutting on the engraved side if the design is deep. Do not expose the board to extreme heat or moisture. Store it in a dry place away from direct sunlight.
- Use both sides of the board to reduce wear
- Do not cut with very sharp or serrated knives on engraved areas
- Keep the board away from heat sources like ovens or stoves
- Store upright or flat in a cool, dry spot
-min.jpg)
Credit: www.doodlecraftblog.com
Creative Uses For Engraved Boards
Engraved cutting boards add a personal touch to your kitchen tools. They can be both useful and beautiful.
Many people use engraved boards in creative ways beyond cutting. These ideas can inspire your next project.
Gifts And Keepsakes
Engraved cutting boards make special gifts for weddings and birthdays. You can add names, dates, or messages.
They become keepsakes that remind people of important moments. Many choose designs that fit the recipient’s style.
- Wedding gifts with couple’s names and date
- Birthday gifts with a favorite quote
- Family recipes engraved for heritage
Kitchen Decor
Engraved boards add charm to kitchen walls or counters. They can display fun sayings or artistic designs.
Use them to brighten up your cooking space. Choose wood tones that match your kitchen style.
- Display boards with cooking tips
- Boards with family names or monograms
- Artistic patterns or nature scenes
Serving Platters
Engraved cutting boards work well as serving platters. They add a rustic look to your food presentation.
Use them to serve cheese, bread, or appetizers. Personalize with designs that match your party theme.
- Cheese boards with custom labels
- Charcuterie boards with engraved borders
- Boards with holiday or event themes

Credit: www.laserpecker.net
Frequently Asked Questions
What Tools Are Needed For Engraving A Cutting Board?
To engrave a cutting board, you’ll need a wood-burning tool or laser engraver. Ensure you have a stencil or design template. Safety gear like gloves and goggles are essential. Choose the right type of wood for best results. Softwoods are easier to engrave than hardwoods.
How Do You Prepare A Cutting Board For Engraving?
Clean the cutting board thoroughly to remove any residue. Sand the surface to ensure it’s smooth. Secure the board on a stable surface to prevent movement. Choose your design and transfer it onto the board. Ensure the board is dry and free from oils or moisture before starting.
Can You Engrave Any Type Of Wood Cutting Board?
Yes, you can engrave most wood cutting boards. However, softer woods are easier to work with. Hardwoods like maple or walnut require more skill and patience. Ensure the wood grain is tight for detailed designs. Always test on a small area first to check compatibility.
How Do You Maintain An Engraved Cutting Board?
To maintain an engraved cutting board, clean it with mild soap and water. Avoid soaking it in water to prevent warping. Regularly oil the board with food-safe mineral oil. This helps preserve the engraving and wood quality. Store it in a dry place to avoid moisture damage.
Conclusion
Engraving a cutting board adds a personal touch to your kitchen. Choose the right tools and design before you start. Take your time and work carefully for best results. Practice on scrap wood to build confidence. Clean and finish your board to protect the engraving.
Enjoy a unique, handmade cutting board that lasts. Simple steps lead to beautiful, lasting art on wood. Try engraving and see how fun and rewarding it can be.