Are you ready to beat the heat without calling a pro? Fitting a window air conditioner might seem tricky, but with the right steps, you can do it yourself quickly and safely.
Imagine enjoying cool air in your room this summer, all thanks to your own handy work. In this guide, you’ll discover simple, clear instructions that take the guesswork out of the process. Keep reading to learn how to fit your window air conditioner perfectly and stay comfortable all season long.

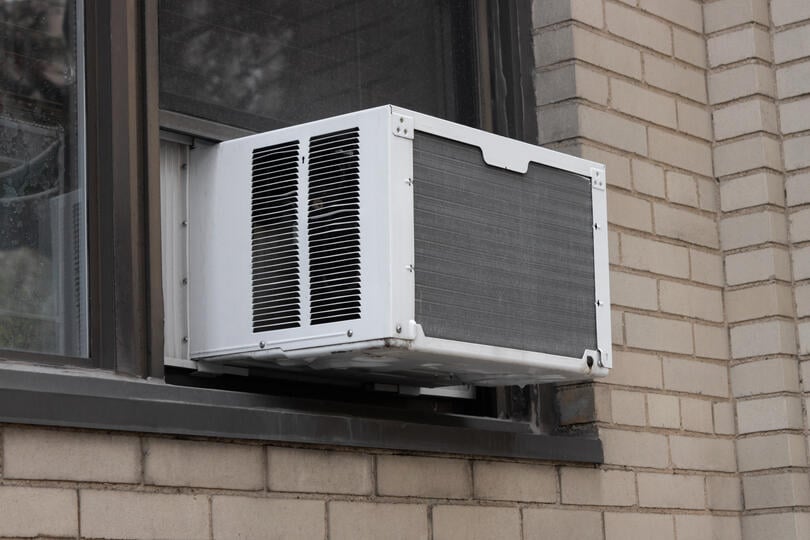
Credit: www.familyhandyman.com
Choose The Right Ac Unit
Picking the right window air conditioner is important for comfort. The right unit cools your room well and saves energy.
Think about your window size, room size, and energy use before buying. This helps you find the best fit.
Measure Your Window Space
Measure the width and height of your window opening. The air conditioner must fit securely in this space.
Check the window type too. Some units fit better in sliding or double-hung windows.
- Use a tape measure for accuracy
- Write down the measurements
- Leave space for installation brackets
Check Cooling Capacity
Cooling capacity is how much air the unit can cool. It is measured in BTUs (British Thermal Units).
Choose a BTU size that matches your room size for best cooling. Too small or too big units do not work well.
- Up to 150 sq ft: 5,000 BTUs
- 150 to 250 sq ft: 6,000-8,000 BTUs
- 250 to 350 sq ft: 8,000-10,000 BTUs
- 350 to 450 sq ft: 10,000-12,000 BTUs
Consider Energy Efficiency
Energy efficiency helps lower electricity bills. Look for units with a good Energy Efficiency Ratio (EER).
An efficient air conditioner uses less power and cools better. This saves money over time.
- Check the EER rating on the label
- Higher EER means better efficiency
- Energy Star certified units save more energy
Gather Necessary Tools
Installing a window air conditioner needs the right tools. These tools help you work safely and easily. Prepare everything before you start to avoid delays.
This guide covers the basic tools and safety gear you need. Having them ready makes the installation smoother and safer.
Basic Tools Needed
Use these tools to fit your window air conditioner correctly. They help with measuring, securing, and adjusting the unit.
- Measuring tape for accurate dimensions
- Screwdriver set to tighten screws
- Level to make sure the unit is straight
- Drill with bits for making holes
- Utility knife for trimming insulation or packaging
- Wrench set for bolts and nuts
Safety Equipment
Wear safety gear to protect yourself during installation. This gear prevents injuries and keeps you comfortable.
| Safety Item | Purpose |
| Gloves | Protect hands from cuts and sharp edges |
| Safety glasses | Shield eyes from dust and debris |
| Dust mask | Prevent inhaling dust and allergens |
| Non-slip shoes | Keep firm footing on ladders and surfaces |
Prepare The Window
Fitting a window air conditioner starts with preparing the window correctly. A clean and clear window frame ensures a good fit and proper operation.
Follow simple steps to get your window ready. This helps the air conditioner work safely and efficiently.
Clean The Window Frame
Remove dirt and dust from the window frame before installing the air conditioner. Use a damp cloth to wipe all surfaces. Clean frames hold the unit better and prevent damage.
- Wipe down the frame with warm soapy water
- Remove old paint or debris with a scraper
- Dry the frame completely before installation
Remove Obstructions
Check the window area for any objects that block the air conditioner. Clear away plants, curtains, or furniture. This space helps air flow freely and keeps the unit stable.
| Obstruction | Action |
| Plants | Trim or move away |
| Curtains | Pull back or tie up |
| Furniture | Relocate temporarily |
| Loose Items | Remove from window sill |
Inspect For Damage
Look closely at the window frame for cracks or rot. Damage can cause leaks and reduce support. Fix small problems before fitting the air conditioner.
- Check for wood rot or soft spots
- Look for cracks in the frame or glass
- Seal gaps with weatherproof tape or caulk
- Replace broken parts if needed

Credit: www.youtube.com
Install The Mounting Bracket
The mounting bracket holds the window air conditioner in place. You must install it correctly for safety and performance.
Follow these steps to position, secure, and check the bracket before adding the air conditioner.
Position The Bracket
Place the mounting bracket on the window sill or frame. Align it so the air conditioner will sit level.
Make sure the bracket covers the width needed to support the unit fully.
- Center the bracket on the window opening.
- Check for even spacing on both sides.
- Use a level to ensure it is straight.
Secure With Screws
Use screws to fasten the bracket firmly to the window frame. Choose screws that fit the bracket holes.
Drive the screws deep enough to hold the bracket without damaging the frame.
- Pre-drill holes if needed to avoid splitting wood.
- Use at least two screws per side for stability.
- Check that screws are tight but not overdriven.
Check Stability
Test the bracket by applying light pressure. It should not move or wobble.
Confirm the bracket is secure before placing the air conditioner.
- Push gently on the bracket from different sides.
- Look for any cracks or loose screws.
- Re-tighten screws if the bracket shifts.
Place The Ac Unit
Placing the window air conditioner correctly is important for good cooling. The unit must fit tightly and stay stable in the window.
This guide explains how to place your AC unit safely and securely in the window.
Lift And Position The Unit
Lift the air conditioner carefully. It can be heavy, so ask for help if needed.
Place the unit on the window sill with the front facing inside. The back should stick out the window to release hot air.
- Check the window frame is strong enough to hold the unit.
- Keep the unit level to avoid water leaks inside.
- Rest the AC securely on the sill before locking it.
Extend Side Panels
Most window AC units have side panels to cover gaps. Pull these panels out to fill the empty spaces on each side.
The panels help stop air and insects from coming in through the sides of the window.
- Slide each panel slowly to avoid damage.
- Make sure panels reach the window frame fully.
- Secure panels with screws or clips if provided.
Seal Gaps
After positioning and extending panels, check for any small gaps around the unit. Seal these gaps to keep air outside.
Use weatherstripping or foam sealant to fill open spaces. This improves cooling and keeps bugs out.
- Press weatherstripping firmly along the edges.
- Apply foam sealant in cracks if needed.
- Check seals regularly and replace if worn out.

Credit: www.abt.com
Secure The Window
Fitting a window air conditioner needs a strong and tight window seal. This prevents air leaks and keeps the unit stable. Securing the window ensures the air conditioner works well and stays safe.
Follow these steps to secure your window before installing the air conditioner. Each step helps protect your home from drafts and supports the unit.
Lower The Window Sash
Start by lowering the window sash carefully so it rests on top of the air conditioner. This holds the unit in place and stops it from moving. Make sure the sash is tight against the air conditioner frame.
Install Weather Stripping
Weather stripping fills gaps between the window and the air conditioner. It blocks air leaks and stops bugs from entering. Use foam or rubber weather stripping for a better seal.
- Measure the gap around the air conditioner
- Cut weather stripping to fit the gap
- Peel off adhesive backing
- Press the weather stripping firmly into place
- Check for any remaining gaps and seal them
Add Support Brackets
Support brackets hold the air conditioner securely from below. They prevent the unit from falling or tilting. Use brackets made for window air conditioners and attach them to the window frame.
| Bracket Type | Material | Load Capacity |
|---|---|---|
| Adjustable | Steel | Up to 150 lbs |
| Fixed | Aluminum | Up to 100 lbs |
| Heavy Duty | Reinforced Steel | Up to 200 lbs |
Connect To Power
Connecting your window air conditioner to power is an important step. It helps the unit run safely and efficiently. Make sure you follow the right steps for a good setup.
Check your power source before you plug in the air conditioner. This will prevent problems and keep your home safe.
Locate A Suitable Outlet
Find an outlet that matches the air conditioner’s plug type. The outlet should be close enough to the window unit. It must also be able to handle the unit’s power needs.
- Use a dedicated outlet if possible
- Check the outlet’s voltage and amperage rating
- Avoid using outlets shared with many devices
- Ensure the outlet is not loose or damaged
Avoid Extension Cords
Do not use extension cords to power your window air conditioner. Extension cords can cause overheating and fire risks. They may not supply enough power to the unit.
| Reason | Explanation |
| Overheating | Extension cords can get too hot under heavy load |
| Power Loss | Voltage drops over long cords reduce unit performance |
| Fire Hazard | Damaged cords or poor connections increase fire risk |
Test The Unit
After plugging in, test the air conditioner to make sure it works well. Check if it starts smoothly and cools the room. Listen for unusual noises or smells.
- Turn on the unit using its controls
- Feel for air coming from the vents
- Watch the power indicator light
- Unplug if you notice any issues
Maintain Your Ac
Keeping your window air conditioner in good shape helps it work well. Regular care saves energy and money.
This guide shows easy ways to maintain your AC. Follow these tips to keep your unit cool and efficient.
Clean Filters Regularly
Dirty filters block airflow and reduce cooling. Clean filters every month during use to keep air fresh.
- Remove the filter from the unit
- Use warm water and mild soap to wash it
- Let the filter dry completely before reinstalling
- Replace the filter if it is damaged or very dirty
Check For Leaks
Leaks can let cool air escape and warm air enter. Check the seal around your AC regularly.
| Leak Location | What to Check | Fix Method |
| Window Frame | Gaps or cracks around the unit | Apply weather stripping or caulk |
| Side Panels | Loose or broken panels | Tighten screws or replace panels |
| Drainage Area | Water leaks or blockages | Clear drainage holes and clean drip tray |
Store During Off-season
Proper storage protects your AC in winter or when not in use. Prepare your unit before storing.
Follow these steps for safe storage:
- Unplug and remove the unit carefully
- Clean the filter and all accessible parts
- Cover the AC with a plastic bag or cloth
- Store in a dry, cool place away from dust
Frequently Asked Questions
How Do I Measure My Window For An Air Conditioner?
Measure the width and height of your window’s opening. Compare these dimensions to the air conditioner’s size. Ensure the unit fits securely without gaps to prevent air leaks and maintain efficiency.
What Tools Are Needed To Install A Window Ac?
You need a screwdriver, tape measure, level, and mounting brackets. A drill may help with securing screws. Having a helper is useful for lifting and positioning the unit safely.
How To Secure A Window Ac Unit Safely?
Use mounting brackets and screws to anchor the unit firmly. Seal gaps with weatherstripping or foam to prevent air leaks. Follow the manufacturer’s instructions for proper installation and safety.
Can I Install A Window Ac Alone?
Yes, but having a helper is safer. The unit can be heavy and awkward to handle. Assistance ensures proper alignment and reduces the risk of damage or injury.
Conclusion
Fitting a window air conditioner is easier than it seems. With the right tools and steps, anyone can do it. Measure carefully to ensure a good fit. Secure the unit tightly to keep it stable. Seal gaps to stop hot air from entering.
Regular cleaning keeps the air conditioner working well. Enjoy cool air during warm days. A properly installed unit saves energy and money. Take your time and follow the guide for best results. Cool comfort is just a few steps away.