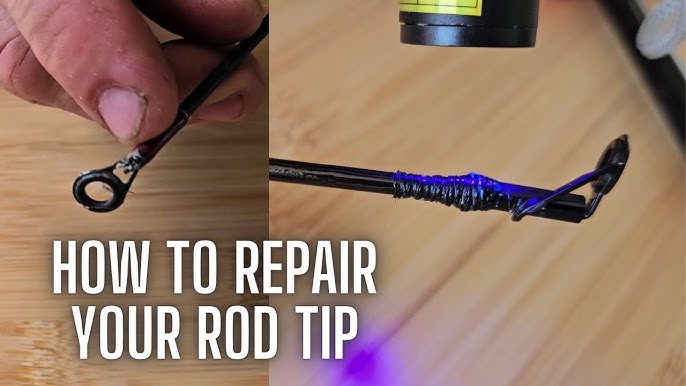
Is your fishing rod acting up just when you’re about to catch the big one? Don’t let a broken rod ruin your day on the water.
You might think fixing it is too hard or costly, but with the right steps, you can repair your fishing rod quickly and easily. In this guide, you’ll discover simple tricks to get your gear back in shape, save money, and get fishing again faster than you imagined.
Keep reading, and you’ll be ready to tackle your next fishing trip with confidence!
Common Fishing Rod Issues
Fishing rods can have problems that affect their performance. Knowing these issues helps you fix them quickly.
This guide covers common issues like broken guides and cracked rod blanks. Learn how to address each problem effectively.
Broken Guides
Guides help control the fishing line on your rod. They can break from wear or impact.
- Inspect guides regularly for damage.
- Replace broken guides with new ones from a tackle shop.
- Use a small file to smooth sharp edges before replacing.
Cracked Rod Blank
A cracked rod blank affects the strength of your fishing rod. It can break under pressure.
Repair small cracks with a rod wrap kit. For large cracks, consider professional repair.
Loose Reel Seat
A loose reel seat makes it hard to control the rod. It can cause the reel to fall off.
Tighten the reel seat using a screwdriver. If it remains loose, apply a small amount of epoxy glue.
Damaged Handle
Handles can wear out from frequent use. They might feel uncomfortable or slippery.
| Handle Type | Repair Method |
| Cork | Sand down rough areas and seal with cork sealant. |
| Foam | Replace damaged foam with new grips. |
| Wood | Sand and apply varnish for a smooth finish. |
Tools Needed For Repairs
Fixing a fishing rod requires the right tools. Using proper tools makes repairs easier.
This guide covers the basic tools you need to repair your fishing rod at home.
Essential Repair Kit
An essential repair kit has basic items that fix most common rod problems. These tools help with small breaks and loose parts.
- Rod glue or epoxy for cracks and breaks
- Replacement guides for damaged line guides
- Thread to wrap new guides in place
- Sandpaper to smooth rough areas
- Small scissors or clippers for trimming thread
- Razor blade or knife for precise cuts
- Masking tape to hold parts while drying
These items fit in a small box and are easy to carry on fishing trips.
Specialized Tools
Specialized tools help with more detailed or tough repairs. They improve accuracy and speed.
- Rod dryer to speed up glue curing
- Guide puller tool for removing broken guides
- Thread tensioner for tight and even wraps
- Heat gun to shape rod parts carefully
- Small clamps to hold pieces firmly
- Caliper to measure rod diameter
These tools are useful for serious repairs or restoring old rods.
Fixing Broken Guides
Fishing rod guides help keep the line in place during casting and reeling. Broken guides can cause line damage and poor fishing performance.
Fixing broken guides is a simple task you can do at home. Follow these steps to remove old guides and attach new ones properly.
Removing The Old Guide
Start by cutting the thread that holds the old guide to the rod. Use a sharp blade or scissors carefully to avoid damage.
After cutting the thread, gently pull the guide off the rod. If glue is present, soften it with heat or rubbing alcohol.
- Cut the thread wrapping the guide
- Use heat or alcohol to soften glue
- Pull the guide off gently
Selecting Replacement Guides
Choose guides that match the size and type of your original ones. This keeps your rod balanced and working well.
Look for guides made from strong materials like stainless steel or ceramic. These last longer and reduce line wear.
- Match guide size to the original
- Pick durable materials like stainless steel
- Consider ceramic inserts for smooth line flow
Attaching New Guides
Place the new guide where the old one was. Align it carefully along the rod to keep the line straight.
Wrap strong thread tightly around the guide foot and rod. Use several layers to secure it well. Add epoxy or glue to finish.
- Align guide with the rod
- Wrap thread tightly around guide foot
- Apply epoxy or glue for extra hold
- Let the glue dry fully before use

Credit: anglersresource.net
Repairing Cracks In The Rod Blank
Fishing rods can develop cracks in the blank after use or impact. Fixing these cracks early keeps your rod strong and reliable. This guide covers simple ways to repair cracks and know when to replace the rod.
Small cracks do not always mean you need a new rod. With the right tools and care, you can restore your rod and continue fishing safely.
Assessing The Damage
Check the crack closely to see how deep and long it is. Light surface cracks may only need simple repairs. Large or deep cracks could weaken the rod too much. Test the rod’s strength by gently bending it near the crack. If it feels weak or breaks easily, it may be unsafe to repair.
- Look for cracks on both sides of the rod blank.
- Use a bright light to see small or hidden cracks.
- Mark the cracked area with a pencil for repair.
- Check if the rod bends normally without extra flex near the crack.
Using Epoxy For Small Cracks
Epoxy glue works well to fill and seal small cracks in the rod blank. It creates a strong, waterproof bond that helps restore the rod’s strength. Choose a clear, two-part epoxy for best results.
- Clean the cracked area with rubbing alcohol and let it dry.
- Mix the two parts of the epoxy according to instructions.
- Apply epoxy over the crack using a small brush or toothpick.
- Wrap the area with plastic wrap to keep it smooth.
- Let the epoxy cure for 24 hours at room temperature.
- Lightly sand the dried epoxy to smooth the surface if needed.
When To Replace The Rod
| Damage Type | Repair Possible | Risk Level |
|---|---|---|
| Small surface cracks | Yes, with epoxy | Low |
| Deep cracks over 2 inches | Usually no | High |
| Cracks causing rod to bend abnormally | No | Very high |
| Cracks near the handle or guides | No | High |
If the rod shows any signs of serious damage or safety risk, replacing it is best. Fishing with a weak rod can cause it to break during use and may cause injury or lost fish.
Tightening Or Replacing The Reel Seat
The reel seat holds the fishing reel firmly in place on your rod. If it is loose or damaged, you may lose control while fishing.
This guide covers how to spot problems, tighten a loose seat, or replace it if needed.
Identifying Reel Seat Issues
Look for these signs that your reel seat may need attention:
- The reel moves or spins when you try to use it.
- You see cracks or damage on the seat.
- The locking ring does not tighten properly.
- The reel feels unstable during casting or reeling.
Securing Loose Seats
If the reel seat is loose, try these steps to tighten it:
- Remove the reel from the seat.
- Clean the seat and reel foot to remove dirt or debris.
- Check the locking ring for damage and replace if worn.
- Slide the reel foot back into the seat.
- Turn the locking ring clockwise until it is snug.
- Test by gently trying to move the reel; it should stay firm.
Installing A New Reel Seat
Replace the reel seat if it is cracked or cannot tighten properly.
| Tool or Material | Purpose |
|---|---|
| New reel seat | Replacement part |
| Epoxy glue | Secure the new seat to the rod |
| Sanding paper | Prepare the rod handle |
| Masking tape | Protect areas during installation |
| Clamps | Hold the seat while glue dries |
Follow these steps to install the new reel seat:
- Remove the old reel seat by carefully sanding or cutting it off.
- Clean and sand the rod handle to remove old glue and smooth the surface.
- Wrap masking tape around the rod to protect it from glue.
- Apply epoxy glue inside the new reel seat.
- Slide the new seat onto the rod handle in the correct position.
- Use clamps to hold the seat firmly while the glue dries (check glue instructions for drying time).
- After drying, remove clamps and tape, then reattach your reel.

Credit: www.youtube.com
Restoring Damaged Handles
A fishing rod handle can get worn out or broken after many uses. Fixing it can make your rod feel like new again. This guide shows how to restore damaged handles.
We will cover cleaning and sanding, replacing grips, and sealing the handle. These steps help improve grip and protect the rod.
Cleaning And Sanding
Start by cleaning the handle to remove dirt and old glue. Use warm water and mild soap with a soft cloth. Let the handle dry fully.
Next, sand the handle lightly with fine sandpaper. This removes rough spots and old finish. Sanding helps new materials stick better.
- Use 220-grit sandpaper for light sanding
- Sand evenly around the handle
- Wipe off dust with a clean cloth
Replacing Cork Or Foam Grips
Old grips may crack or fall apart. Remove damaged cork or foam grips carefully. Use a knife or grip remover tool if needed.
Cut a new grip to the right length. Slide it onto the handle tightly. For cork grips, use cork cement to hold it in place.
- Choose foam or cork grips based on your preference
- Trim grips with scissors for a perfect fit
- Allow glue or cement to dry before use
Sealing And Finishing
After fitting the grip, apply a sealant to protect it. Use a clear epoxy or varnish for foam grips. Cork grips can be sealed with a special cork finish.
Apply thin coats and let each dry before adding another. Sealing makes the handle last longer and resist water damage.
- Use brushes or cloth for even sealant layers
- Work in a well-ventilated area
- Let the handle dry for 24 hours before fishing
Preventive Maintenance Tips
Keeping your fishing rod in good shape helps it last longer. Small actions prevent big problems.
Regular care keeps your rod working well for every fishing trip. Follow simple tips to avoid damage.
Regular Cleaning
Clean your fishing rod after each use. Salt, dirt, and grime can harm the rod and guides.
Use fresh water and a soft cloth or sponge. Avoid harsh chemicals that damage the finish.
- Rinse the rod with fresh water
- Wipe all parts gently
- Dry completely before storing
Proper Storage
Store your fishing rod in a cool, dry place. Avoid places with extreme heat or moisture.
Keep the rod straight or in a rod rack to prevent bending. Protect the guides from damage.
- Use a rod rack or holder
- Keep away from direct sunlight
- Store indoors if possible
Routine Inspections
Check your fishing rod often for cracks, loose guides, or damage. Early fixes stop bigger problems.
Look at the reel seat and handle for wear. Tighten or replace parts if needed.
- Inspect guides for cracks or chips
- Check rod blank for any cracks
- Examine reel seat and handle
- Tighten loose parts

Credit: www.amazon.ca
Frequently Asked Questions
How Do I Fix A Broken Fishing Rod Tip?
To fix a broken rod tip, first remove the damaged tip. Use a rod tip replacement kit to attach a new tip securely. Align it properly, then wrap with thread and apply epoxy for strength and durability.
What Causes Fishing Rod Guides To Break?
Fishing rod guides break due to impact, corrosion, or wear from line friction. Rough handling and exposure to saltwater can weaken guides, causing cracks or breaks over time.
How Can I Repair A Cracked Fishing Rod Blank?
To repair a cracked blank, clean the area and sand it lightly. Apply epoxy resin or fiberglass tape over the crack. Let it cure fully before use to restore strength and prevent further damage.
When Should I Replace My Fishing Rod Guides?
Replace guides if they are visibly cracked, bent, or have rough spots. Damaged guides can fray your line and reduce casting performance, so timely replacement is crucial.
Conclusion
Fixing a fishing rod is easier than it seems. Small problems can become big ones if ignored. Regular checks help keep your rod in good shape. Use the right tools and follow simple steps. Practice patience and take your time with repairs.
This saves money and extends your fishing fun. A well-maintained rod gives better performance on water. Keep learning and trying to improve your skills. Enjoy every fishing trip with confidence in your gear. Simple fixes can make a big difference.