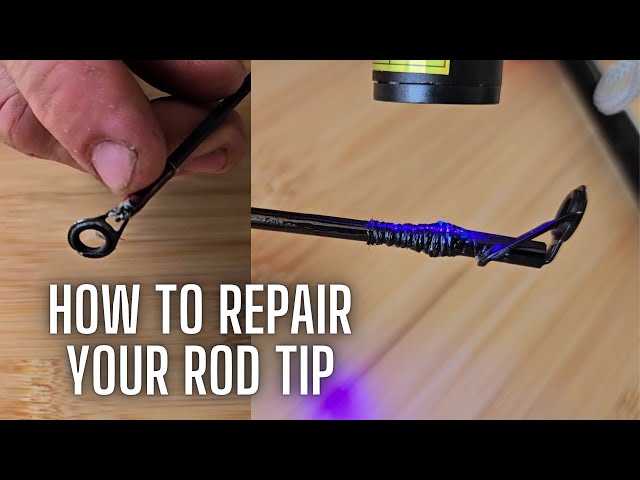
Your fishing rod tip just broke, and you’re wondering what to do next. Don’t worry—you don’t have to throw away your rod or spend a lot on a new one.
Fixing your fishing rod tip is easier than you think, and it can save you time and money. You’ll learn simple, step-by-step ways to repair your rod tip quickly so you can get back to fishing without hassle. Keep reading, and discover how to turn this frustrating moment into a small victory.
Identify The Damage
Fixing a fishing rod tip starts with finding the exact problem. Careful inspection helps you know what to repair or replace.
Look closely at the tip area. Check all parts for any damage signs before fixing the rod.
Check For Cracks Or Breaks
First, look along the rod tip for cracks or breaks. These can weaken the rod and cause it to fail while fishing.
- Hold the rod up to light to see fine cracks
- Run your fingers gently over the tip to feel rough spots
- Look for any missing pieces or sharp breaks
Assess The Tip Top Guide
The tip top guide is the small ring at the rod’s end. It guides the fishing line and takes a lot of stress.
| Damage Type | What to Check | Effect on Fishing |
| Loose guide | Wobbles or moves on the tip | Line may catch or break |
| Cracked ring | Look for splits or chips in the ring | Line can cut or fray |
| Missing guide | Guide completely gone | Line slips off the rod |
Inspect The Rod Blank
The rod blank is the main body of the rod. Check it near the tip for damage that can affect strength.
Look for these common problems:
- Deep scratches or gouges
- Soft or bent areas
- Discoloration or cracks under the finish
Damaged blanks may need special repair or replacement.

Credit: www.youtube.com
Gather Repair Materials
Fixing a fishing rod tip requires the right materials. Having the right tools makes the repair easier.
Before starting, collect all the necessary items. This ensures a smooth process.
Select Replacement Tip
Choose a replacement tip that matches your rod’s size. This helps maintain the rod’s balance.
| Rod Type | Tip Size |
| Lightweight | Small |
| Medium | Medium |
| Heavy | Large |
Choose The Right Glue
Using the correct glue is crucial. It ensures the tip stays attached securely.
- Epoxy glue for strong bonds
- Super glue for quick fixes
- Fishing rod-specific glue for best results
Prepare Sandpaper And Tools
Sandpaper smooths the rod’s surface before attaching the tip. Have the right tools ready.
Remove The Old Tip
Fixing a fishing rod tip starts with removing the old one. This step needs care to avoid damaging the rod.
Use heat to soften the glue holding the tip in place. Then, gently remove the tip without forcing it off.
Heat To Soften Adhesive
Heat helps loosen the adhesive that holds the tip. You can use a lighter or a heat gun. Keep the heat moving to avoid burning the rod.
- Hold the tip near the heat source for about 10 seconds.
- Rotate the rod to warm the adhesive evenly.
- Do not overheat to prevent damage.
Gently Twist Off The Tip
After heating, twist the tip gently to remove it. Avoid pulling or bending the rod.
| Action | Reason |
| Twist tip slowly | Prevents rod damage |
| Use moderate heat | Softens adhesive |
| Do not pull hard | Avoids breaking the rod |
Prepare The Rod Tip
Fixing a fishing rod tip starts with good preparation. You need to get the rod tip ready before making any repairs.
Cleaning and sanding the rod tip help the new parts stick well. This makes your repair strong and lasting.
Clean The Rod End
Remove dirt and old glue from the rod end. Use a cloth to wipe the surface clean.
If needed, use rubbing alcohol on a cloth to clean better. This removes oils and dust.
Sand The Surface For Grip
Lightly sand the rod tip where you will attach the new tip. Use fine sandpaper for this task.
Sanding makes the surface rough. This roughness helps glue stick tightly to the rod.
- Use 220 to 400 grit sandpaper
- Sand gently to avoid damage
- Clean dust after sanding
Attach The New Tip
Fixing a fishing rod tip needs care and patience. A new tip can make your rod work like new.
Follow these steps to attach the new tip properly and ensure it lasts long.
Apply Glue Carefully
Use a strong, fast-drying glue made for fishing rods. Apply a small amount inside the new tip’s tube.
- Do not use too much glue to avoid mess
- Spread glue evenly inside the tip
- Use a small brush or toothpick for accuracy
Align And Insert The Tip
Match the new tip with the rod’s end carefully. Make sure it points straight along the rod.
| Check | Action |
| Tip alignment | Line up with the rod guides |
| Fit | Insert snugly without forcing |
| Position | Keep the tip straight and centered |
Allow To Dry Properly
Let the glue dry fully before using the rod. This keeps the tip from moving or falling off.
- Place the rod in a safe, dry place
- Avoid moving or touching the tip
- Wait at least 24 hours for full drying

Credit: www.amazon.com
Test The Repair
After fixing the fishing rod tip, you must test the repair. This step ensures the tip is strong and works well. Testing helps avoid future breaks while fishing.
Use simple methods to check if the tip is stable and flexible. These tests confirm the repair is safe and reliable.
Check Stability
Hold the rod tip firmly and gently shake it. The tip should feel solid without any loose parts. A stable tip does not wobble or move unexpectedly.
- Grip the tip and the rod handle tightly.
- Move the tip side to side slowly.
- Notice any looseness or clicking sounds.
- Make sure the repair joint feels secure.
- If the tip feels weak, repeat the repair process.
Perform Flexibility Test
Fishing rod tips need to bend without breaking. Test this by flexing the tip gently. It should bend smoothly and return to its original shape.
| Test Action | Expected Result |
| Bend tip slowly | Tip bends without cracks |
| Release tip | Tip returns to straight position |
| Apply light pressure repeatedly | No damage or weak spots appear |
Prevent Future Damage
Fixing a fishing rod tip is important. You also need to protect it from future harm.
Taking simple steps can keep your rod tip safe for a long time.
Use Protective Caps
Protective caps cover the tip and stop it from breaking. They also keep dirt and dust away.
Use a cap that fits tightly on your rod tip for the best protection.
- Buy caps made for your rod size
- Always put the cap on after fishing
- Replace worn or loose caps quickly
Store Rods Safely
Store fishing rods where they won’t bend or fall. This prevents pressure on the tip.
Use racks or holders designed for fishing rods to keep them upright and secure.
- Keep rods away from heavy objects
- Store rods indoors to avoid weather damage
- Use rod tubes for extra safety during travel

Credit: anglersresource.net
Frequently Asked Questions
How Do I Know If My Fishing Rod Tip Is Broken?
A broken tip often shows visible cracks, bends, or missing pieces. It may cause poor casting or line tangling. Inspect the tip closely for damage before fishing.
Can I Repair A Fishing Rod Tip Myself?
Yes, you can fix minor tip damage at home using replacement tips and adhesive. Follow tutorials for proper alignment and secure attachment. Major damage may require professional repair.
What Materials Do I Need To Fix A Fishing Rod Tip?
You need a replacement tip, rod glue or epoxy, sandpaper, and a heat source like a lighter. These tools help secure the new tip firmly in place.
How Long Does It Take To Fix A Fishing Rod Tip?
Fixing a tip usually takes 15 to 30 minutes. Drying time for adhesive may add extra hours. Proper curing ensures a strong and lasting repair.
Conclusion
Fixing a fishing rod tip can save time and money. Small cracks or breaks don’t mean you must buy a new rod. Use simple tools and follow easy steps to repair it. A strong tip helps you cast better and catch more fish.
Take care of your rod after fixing it to last longer. Try these tips next time your rod tip breaks. Keep fishing fun and stress-free with quick repairs. Your rod can be ready to use again in no time.