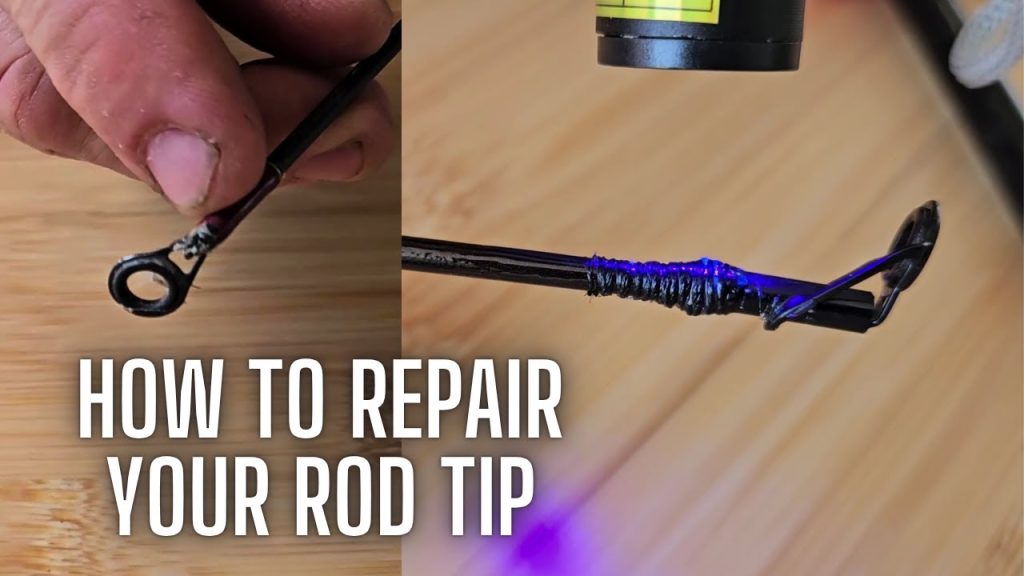
Have you ever been out fishing, only to have your rod tip snap or bend at the worst moment? It’s frustrating, right?
But don’t worry—fixing your fishing rod tip is easier than you think. You’ll discover simple, step-by-step methods to repair your rod quickly and get back to catching fish. Keep reading, and you’ll save time, money, and the hassle of buying a new rod.
Let’s get your fishing gear ready for the next big catch!
Identifying A Broken Rod Tip
A broken fishing rod tip can ruin your fishing trip. It affects casting and line control. You need to spot damage early to fix it properly.
Not all damage is easy to see. Some cracks or bends are small but still affect performance. Learn what to look for before repairing.
Common Causes Of Tip Damage
Fishing rod tips break from many reasons. Understanding these helps prevent damage and know what caused it.
- Hitting hard surfaces like rocks or boat edges
- Overbending the rod during casting or fighting fish
- Line tangles pulling sharply on the tip
- Improper storage causing pressure or bending
- Extreme weather conditions making materials brittle
Signs Your Rod Tip Needs Repair
You should check your rod tip if you notice these signs. Early repair stops bigger problems.
| Sign | Description |
| Visible Cracks | Thin lines or breaks on the tip surface |
| Bent Tip | Tip does not align straight with the rod |
| Loose Guides | Ring guides wobble or move on the tip |
| Unusual Casting Feel | Rod feels weak or less responsive |
| Line Snags | Line catches or frays around the tip |

Credit: www.amazon.se
Tools And Materials Needed
Fixing a fishing rod tip needs the right tools and materials. Using proper items makes the repair easier.
Gathering everything before starting helps you work faster and avoid mistakes.
Essential Repair Tools
You need some basic tools to fix a fishing rod tip correctly. These tools help you remove the old tip and attach the new one firmly.
- Heat source (like a lighter or heat gun) to loosen the glue
- Pliers for gripping and pulling the old tip
- Sandpaper to clean the rod end
- Super glue or epoxy for securing the new tip
- Cloth or paper towels for cleaning
- Protective gloves to avoid burns
Choosing Replacement Tips
Replacement tips come in different sizes and shapes. Pick the one that fits your rod’s diameter and style.
| Tip Size | Description | Common Rod Type |
| Small (1-2 mm) | Thin and light, for ultralight rods | Spinning rods |
| Medium (3-4 mm) | Standard size, fits most rods | Baitcasting rods |
| Large (5 mm and up) | Thick and strong, for heavy rods | Saltwater rods |
Removing The Damaged Tip
Fixing a fishing rod tip starts with removing the broken part carefully. This step prepares the rod for a new tip to be attached properly.
Removing the damaged tip requires softening the glue and then detaching the tip without harming the rod itself.
Softening The Glue
The glue holds the tip firmly in place. Softening it makes removal easier and safer for the rod.
- Heat the glued area gently using a hairdryer or heat gun on low setting.
- Move the heat source back and forth to avoid overheating one spot.
- Apply heat for 2 to 3 minutes until the glue becomes soft.
- Be careful not to burn the rod’s finish or weaken it.
Safely Detaching The Broken Tip
After softening the glue, remove the broken tip without damaging the rod’s end.
| Tool | Purpose | Tip |
| Pliers | Grip and pull the broken tip | Use gentle pressure to avoid cracking |
| Utility Knife | Cut any remaining glue | Make small cuts carefully |
| Sandpaper | Clean the rod end after tip removal | Use fine grit for smooth surface |
Preparing The Rod For Repair
Fixing a fishing rod tip starts with proper preparation. Cleaning and sizing the rod ensures a strong repair.
This guide covers how to clean the rod end and prepare the tip for replacement or repair.
Cleaning The Rod End
Remove dirt and old glue from the rod end. Use rubbing alcohol and a cloth for cleaning.
- Wipe off any debris or dust.
- Apply rubbing alcohol to break down old adhesive.
- Use a soft cloth to scrub the area gently.
- Allow the rod end to dry completely before moving on.
Sanding And Sizing The Tip
Sanding helps the new tip fit snugly. Use fine-grit sandpaper to smooth the rod end.
| Sandpaper Grit | Purpose |
| 120-150 | Remove rough spots and old glue |
| 220-320 | Smooth the rod end for a tight fit |
Test the fit by sliding the new tip onto the rod. It should fit snugly but not too tight.
Attaching The New Tip
Fixing a fishing rod tip needs care and the right steps. Attaching the new tip well helps the rod work like new.
Follow the instructions below to apply adhesive and secure the tip firmly. This will keep your fishing rod ready for use.
Applying Adhesive Correctly
Use a strong adhesive made for fishing rods. Apply a small amount inside the new tip’s tube. Too much glue can cause mess and weak hold.
- Clean the rod tip and new tip before gluing.
- Use a toothpick to spread glue evenly inside the tip.
- Do not apply glue on the outside of the tip.
- Wait a few seconds for the glue to become tacky before attaching.
- Wear gloves to keep hands clean and avoid weakening the glue.
Aligning And Securing The Tip
Place the new tip on the rod end carefully. Align the tip ring with the other guides on the rod. This keeps the line smooth and prevents tangles.
| Task | Details |
| Align Tip Ring | Match the new tip’s ring with the other guides on the rod. |
| Push Firmly | Slide the tip on until it fits tightly over the rod end. |
| Hold Steady | Keep the tip in place for 1–2 minutes to let glue set. |
| Check Position | Make sure the tip has not moved after gluing. |

Credit: www.youtube.com
Finishing Touches
Fixing a fishing rod tip is only part of the repair. The final steps ensure it works well and lasts long.
Paying attention to these finishing touches helps keep your rod strong and ready for your next fishing trip.
Allowing Proper Drying Time
Let the glue or epoxy dry completely. This prevents the repair from breaking during use.
Drying time depends on the material used and room temperature. Avoid rushing this step.
- Check the product instructions for drying time
- Keep the rod tip in a steady position
- Avoid touching or moving the tip during drying
- Allow extra time if the room is cold or humid
Testing The Repair
After drying, test the fishing rod tip to ensure it is strong and stable.
Gently flex the tip and check for any cracks or weak spots before using it to fish.
- Hold the rod and bend the tip slowly
- Listen for any unusual sounds
- Look for any movement in the repaired area
- Try casting softly to feel the tip’s strength
Tips To Prevent Future Damage
Fixing a fishing rod tip is important to keep your gear in good shape. Preventing damage helps you avoid repairs and saves money.
Use these tips for proper storage and careful handling. They will protect your fishing rod tip and make it last longer.
Proper Storage Methods
Store your fishing rods in a dry place away from direct sunlight. Avoid leaning them against walls where they can bend or fall.
- Use rod holders or racks to keep rods straight
- Keep rods in protective tubes during off-season
- Remove reels and store them separately
- Make sure rods are clean and dry before storing
Handling And Transport Tips
Careful handling and transport reduce the risk of bending or breaking the rod tip. Always carry your rod with care.
| Action | Tip |
| Carrying | Hold rod by the handle, not the tip |
| Transporting | Use a padded rod case or tube |
| Loading | Place rods securely to avoid movement |
| Unloading | Remove rods carefully one at a time |

Credit: www.ebay.com
Frequently Asked Questions
How Do I Repair A Broken Fishing Rod Tip?
To repair a broken tip, remove the damaged section carefully. Use a replacement tip of the same size. Attach it with strong adhesive or epoxy. Allow it to dry fully before use. This restores the rod’s functionality and prevents further damage.
What Tools Are Needed To Fix A Fishing Rod Tip?
Essential tools include replacement rod tip, strong adhesive or epoxy, sandpaper, and pliers. A small knife or cutter helps remove damaged parts. Having a clean workspace and patience ensures a precise fix. Proper tools improve repair quality and durability.
Can I Fix A Fishing Rod Tip Without Professional Help?
Yes, you can fix a fishing rod tip yourself. Follow step-by-step instructions carefully. Use proper replacement parts and adhesives. DIY repair saves time and money. However, ensure the fix is secure to avoid breakage during fishing.
How Long Does It Take To Fix A Fishing Rod Tip?
Fixing a fishing rod tip typically takes 30 to 60 minutes. Drying time for adhesive may extend the process. Patience during drying ensures a strong bond. Quick repairs get you back fishing sooner with a reliable rod.
Conclusion
Fixing a fishing rod tip is easier than you think. Follow the steps shared, and you’ll be back fishing soon. Start by gathering the right tools and materials. Carefully remove the broken tip and clean the area. Attach the new tip with glue or tape, ensuring it’s secure.
Test your repair by gently pulling on the line. This will ensure the tip is properly fixed. Regular maintenance helps avoid future issues. Always keep spare parts handy. Enjoy your fishing adventure with a fully functional rod. Happy fishing!