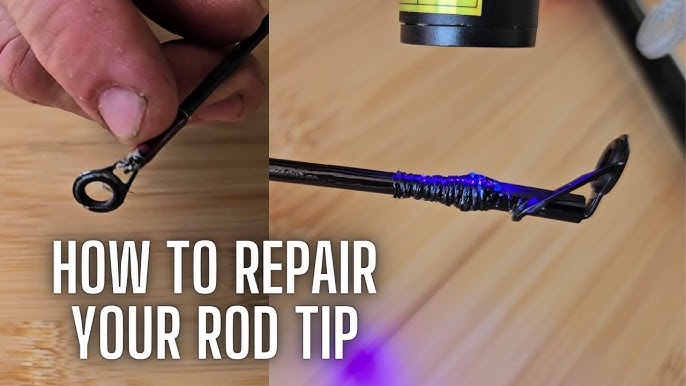
Is your fishing rod giving you trouble just when you need it most? You don’t have to toss it aside or rush out to buy a new one.
Fixing your fishing rod can be easier than you think, and it saves you time and money. In this guide, you’ll discover simple, effective steps to get your rod back in perfect shape. Whether it’s a broken tip, tangled guides, or a loose reel seat, you’ll learn how to handle it like a pro.
Keep reading—your next great catch depends on a rod that works flawlessly.

Credit: www.youtube.com
Common Fishing Rod Issues
Fishing rods can have problems after regular use. Fixing them can save money and keep fishing fun.
Knowing common issues helps you spot damage early. This guide covers four main problems.
Broken Guides
Guides are the small rings along the rod. They help the line move smoothly.
Broken guides can cut your fishing line. Fix or replace them quickly to avoid losing fish.
- Check all guides for cracks or missing rings
- Use replacement guides and strong glue
- Wrap thread around the guide foot for extra strength
- Seal the thread with rod finish or clear nail polish
Cracked Rod Blank
The rod blank is the main part of the rod. Cracks weaken it and can cause breakage.
Small cracks can be fixed with rod repair epoxy. Large cracks may need professional help.
- Clean the cracked area well
- Apply epoxy evenly over the crack
- Let it dry for the recommended time
- Sand lightly for a smooth finish if needed
Loose Reel Seat
The reel seat holds your reel on the rod. A loose seat makes fishing difficult and unsafe.
Tighten the reel seat by turning its locking rings. Use tape if it still feels loose.
- Remove the reel first
- Check for dirt or damage inside the seat
- Clean and dry the seat area
- Use plumber’s tape around the reel foot for a tighter fit
Damaged Handle
Handles give you grip while fishing. Damage can cause discomfort and reduce control.
Replace worn or cracked handles with cork or foam grips. You can also repair small cracks with glue.
- Remove the old handle carefully
- Choose a new grip that fits your rod
- Use strong adhesive to attach the new handle
- Let the glue dry completely before use

Credit: www.youtube.com
Tools And Materials Needed
Fixing a fishing rod requires some basic tools and materials. Having the right supplies makes the repair easier and faster.
This guide covers essential items you need for a simple fishing rod repair.
Basic Repair Kit
A basic repair kit holds the main tools for fixing most fishing rod problems. It helps you handle small breaks and loose parts.
- Small screwdrivers for tightening screws
- Pliers for bending or pulling parts
- Utility knife for trimming lines or tape
- Sandpaper to smooth rough edges
- Fishing line for temporary fixes
Epoxy And Glue
Epoxy and glue join broken parts or secure loose pieces on your fishing rod. They create a strong hold that lasts a long time.
- Two-part epoxy for strong repairs
- Super glue for quick fixes
- Water-resistant glue for wet conditions
- Applicator sticks for precise application
Replacement Parts
Some fishing rod parts wear out or break and need to be replaced. Keeping spare parts helps you fix your rod faster.
- Rod guides to replace broken rings
- Reel seats for damaged reel holders
- Tip tops for broken rod tips
- Handle grips for worn or torn handles
Cleaning Supplies
Cleaning your fishing rod before repair removes dirt and grime. Clean parts help glue stick better and show damage clearly.
- Mild soap and water for basic cleaning
- Soft cloths to wipe down surfaces
- Alcohol wipes to remove grease
- Brushes to clean tight spots
Fixing Broken Guides
Fishing rod guides help control the line and improve casting. Broken guides can make fishing hard and damage the line. Fixing them is simple with the right tools and steps.
This guide will show you how to remove old guides, prepare your rod, and attach new ones safely and correctly.
Removing The Old Guide
Start by locating the broken guide on your rod. Use a sharp blade or small scissors to cut the thread wrapping the guide. Be careful not to cut the rod blank.
- Cut the thread wrap holding the guide in place.
- Peel off any leftover epoxy or glue gently.
- Remove the broken guide from the rod.
- Clean the rod blank surface with rubbing alcohol.
Preparing The Rod
After removing the old guide, smooth the rod surface. This helps the new guide stick well and stay in place during use.
| Material | Purpose |
|---|---|
| Sandpaper (400-600 grit) | Gently smooth the rod where the guide was |
| Rubbing alcohol | Clean dirt and old glue from the surface |
| Cloth or paper towel | Wipe the rod clean after sanding and cleaning |
Attaching The New Guide
Place the new guide in the right spot on the rod. Wrap it tightly with thread to hold it firm. Use epoxy or rod finish to seal and protect the guide.
- Align the new guide on the rod blank.
- Wrap the guide foot with rod wrapping thread evenly.
- Apply epoxy or rod finish over the thread wraps.
- Let the epoxy dry completely before use.
Repairing Cracks In The Rod
Fishing rods can develop cracks from heavy use or accidents. Fixing these cracks helps keep the rod strong and usable.
Small cracks may seem minor but can grow if not repaired. Learn how to fix cracks properly for longer rod life.
Assessing The Damage
Look closely at the crack on your fishing rod. Check how deep and long it is. This helps decide the right repair.
Test if the rod still bends at the crack. If it feels weak or bends oddly, the damage is serious and needs careful fixing.
Using Epoxy For Fixes
Epoxy glue works well to seal and fill cracks in fishing rods. It sticks tightly and dries very hard.
Clean the cracked area before applying epoxy. Use a small brush to spread it evenly over the crack. Let it dry fully.
- Mix epoxy resin and hardener as instructed
- Apply epoxy carefully inside and around the crack
- Remove extra epoxy before it hardens
- Allow at least 24 hours to cure in a dry place
Reinforcing The Repair
After epoxy dries, reinforce the rod for extra strength. Use a thin wrap of fiberglass or strong tape over the repair.
This helps protect the crack from reopening and adds support when you fish. Make sure the wrap is tight and smooth.
- Cut a fiberglass strip or use strong nylon tape
- Wrap tightly around the cracked area
- Cover the wrap with a final coat of epoxy for sealing
- Let everything dry before using the rod again
Securing A Loose Reel Seat
A loose reel seat can affect your fishing experience. It makes casting and reeling difficult. Fixing it helps you enjoy fishing without interruptions.
This guide shows easy ways to secure a loose reel seat. Follow each step carefully for the best results.
Identifying The Issue
First, check if the reel seat moves or wiggles on the rod. Hold the rod and try to twist the reel seat. If it turns or feels loose, you need to fix it.
Look for cracks or worn parts on the reel seat. These can cause looseness and need attention.
Tightening Techniques
To tighten a loose reel seat, try these methods:
- Loosen the reel seat completely.
- Clean the threads with a soft cloth.
- Apply a small amount of waterproof grease to the threads.
- Reinstall the reel seat and twist firmly to tighten.
- Check if the reel seat still moves. Repeat if needed.
Applying Adhesive
If tightening does not fix the issue, use adhesive to secure the reel seat. Choose a removable glue like epoxy or thread locker.
| Adhesive Type | Use | Dry Time |
|---|---|---|
| Epoxy | Strong bond, permanent fix | 24 hours |
| Thread Locker (Blue) | Removable, medium strength | 1 hour |
| Super Glue | Quick fix, not very strong | 5 minutes |
Apply a small amount of adhesive to the reel seat threads. Avoid excess glue. Let it dry fully before using the rod.
Replacing Or Fixing The Handle
The handle of a fishing rod can wear out or break after long use. Fixing or replacing it can improve your grip and comfort while fishing.
This guide helps you remove the old handle, pick the right new one, and attach it properly to your rod.
Removing The Old Handle
Start by loosening any wrapping or glue holding the handle in place. Use a heat gun or warm water to soften the adhesive carefully.
Slide or pull the old handle off the rod blank gently. Avoid forcing it to prevent damage to the rod.
Choosing The Right Replacement
Choose a handle that fits the length and style of your fishing rod. Handles come in cork, EVA foam, or wood materials.
- Cork handles offer a classic look and good grip.
- EVA foam handles are durable and comfortable.
- Wood handles provide a traditional and sturdy feel.
- Measure your rod to match the handle size.
Attaching The New Handle
Apply waterproof epoxy or rod building glue inside the new handle. Slide it onto the rod blank carefully, aligning it with the guides.
Tips For Preventing Future Damage
Fixing a fishing rod is important, but preventing damage saves time and money. Taking good care of your rod helps it last longer.
Follow simple steps to keep your fishing rod safe and working well for many fishing trips.
Proper Storage
Store your fishing rod in a dry place away from direct sunlight. Keep it upright or hang it to avoid bending or warping.
Use a rod holder or a case to protect it from dust and accidental damage.
- Keep rods away from heat and moisture
- Store rods vertically or hang them
- Use protective cases for transport
- Avoid placing heavy objects on rods
Regular Maintenance
Clean your fishing rod after each use with fresh water. Wipe it dry to prevent rust and dirt build-up.
Check guides, reel seats, and joints for damage. Tighten loose parts and replace worn-out pieces quickly.
- Rinse rod with fresh water after fishing
- Dry rod completely before storage
- Inspect guides and joints regularly
- Replace damaged parts on time
Handling Best Practices
Hold the rod carefully and avoid bending it too much. Use both hands when carrying long rods.
Do not lean the rod against hard surfaces. Avoid dropping or hitting the rod to prevent cracks and breaks.
- Use both hands to carry long rods
- Keep rod away from hard or sharp objects
- Do not bend rod beyond its limit
- Handle with care during transport and use

Credit: anglersresource.net
Frequently Asked Questions
How Do I Repair A Broken Fishing Rod Tip?
To repair a broken fishing rod tip, first clean the broken area. Then, gently sand it to ensure smoothness. Use a strong adhesive like epoxy to attach a new tip. Allow it to dry completely before use. This simple repair can restore your rod’s functionality effectively.
What Should I Do If My Rod Snaps?
If your fishing rod snaps, assess the damage. For minor breaks, use a rod repair kit. Apply epoxy to the broken parts and bind them with thread. For severe breaks, consider replacing the entire rod. Always ensure the repair is strong enough for future fishing trips.
How Can I Fix A Loose Reel Seat?
To fix a loose reel seat, remove the reel and clean the area. Apply a strong adhesive or epoxy to the seat. Reattach the reel firmly and let it dry thoroughly. This will secure the reel seat, ensuring it stays in place during your fishing adventures.
Can I Repair A Cracked Rod Blank?
Yes, you can repair a cracked rod blank. Clean the cracked area and apply a strong epoxy. Wrap the area tightly with rod thread to reinforce it. Once dry, sand the surface smoothly. This method can restore the rod’s strength and prolong its lifespan.
Conclusion
Fixing a fishing rod is easier than it seems. Small steps lead to big results. Regular care keeps your rod strong and ready. Simple tools and patience make repairs smooth. You save money and enjoy fishing more. Try these tips next time your rod breaks.
Keep fishing fun and stress-free. Don’t let a broken rod stop your day. Practice fixing, and confidence will grow fast. Happy fishing!