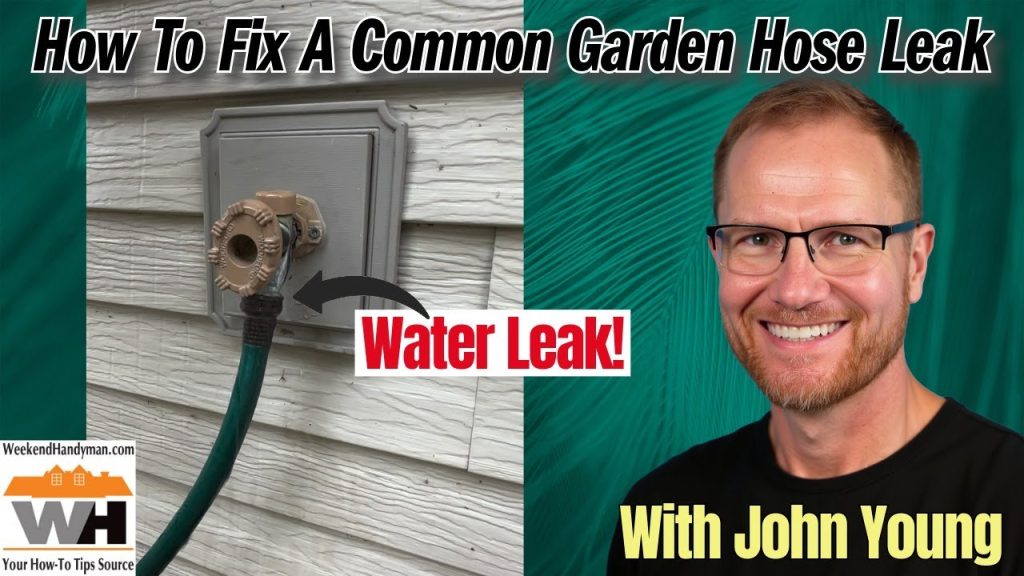
Is your garden hose leaking and wasting water every time you water your plants? A dripping hose is not only annoying but can also increase your water bill and slow down your gardening tasks.
The good news is that fixing a leaking garden hose is easier than you might think. You’ll discover simple, step-by-step methods to stop those leaks quickly. Keep reading, and you’ll have your hose working perfectly again in no time—saving you money and hassle.

Credit: www.familyhandyman.com
Identify The Leak Source
Finding where your garden hose is leaking is the first step to fix it. Check the hose carefully to spot the leak.
Leaks can happen at different parts of the hose. Look closely to find the exact spot.
Check Hose Connections
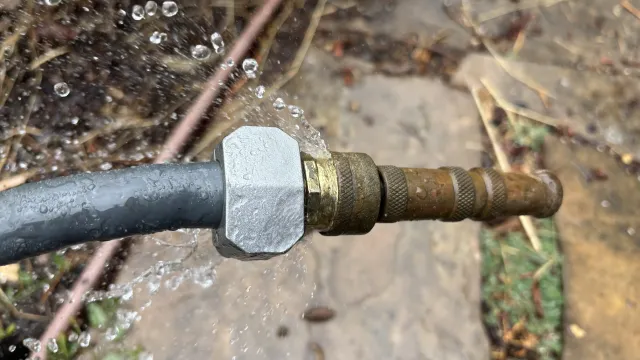
Look at where the hose connects to the faucet and the spray nozzle. These spots often cause leaks.
Loose or damaged connections let water escape. Make sure all parts fit tightly and are not cracked.
- Turn off the water supply before checking.
- Unscrew and inspect washers inside connections.
- Tighten any loose parts by hand or with a wrench.
- Replace washers if they look worn or cracked.
Inspect Hose Length
Look along the entire length of the hose for holes or cracks. These can cause leaks anywhere.
Small holes may be hard to see. Run your hand along the hose to feel for wet spots.
- Lay the hose flat on the ground.
- Turn on the water to pressurize the hose.
- Look for water spraying or dripping out.
- Mark any damaged areas for repair.
Examine Hose Fittings
Check the metal or plastic fittings at the hose ends. These parts can crack or loosen over time.
Damaged fittings cause leaks where the hose meets the connectors. Inspect them carefully.
- Look for cracks or splits in the fittings.
- Make sure the fittings are tightly screwed on.
- Replace fittings if they are broken or rusted.
- Use plumber’s tape to seal threaded fittings if needed.
Gather Repair Materials
Fixing a leaking garden hose needs the right materials. Gather everything before you start the repair.
Having the correct supplies helps you work faster and avoid mistakes. Prepare well to fix the leak properly.
Select Appropriate Tape
Choose tape made for plumbing or outdoor use. This tape should resist water and stick well to the hose.
- Look for waterproof and weatherproof tape
- Check if the tape is flexible enough to wrap around hoses
- Avoid general-purpose tapes that do not seal leaks properly
Choose Replacement Parts
Find the parts that match your hose size and type. Using the right parts ensures a secure and lasting fix.
| Part | Purpose | Tip |
| Hose washers | Seal connection points | Replace old washers to stop leaks |
| Couplings | Join hose sections | Match diameter for a tight fit |
| Hose clamps | Hold hose ends firmly | Choose rust-resistant clamps |
Prepare Cutting Tools
Use sharp tools to cut the hose cleanly. A neat cut helps create a better seal with replacement parts.
- Get garden scissors or a utility knife
- Ensure blades are sharp and clean
- Have a cutting mat or board to protect surfaces
Fix Small Punctures
Garden hoses can develop small punctures over time. These leaks waste water and reduce pressure. Fixing them is easy and can extend the life of your hose.
There are several methods to patch up small leaks. Each method uses simple tools and materials. Follow these steps to repair your garden hose effectively.
Apply Waterproof Tape
Waterproof tape is a quick fix for small holes. It’s easy to use and widely available. The tape creates a tight seal that stops water from escaping.
First, clean the area around the puncture. Wrap the tape tightly around the hose. Make sure the tape covers the hole completely.
- Ensure the hose is dry before applying tape
- Overlap the tape for a stronger seal
- Test the hose by turning on the water
Use Hose Repair Tape
Hose repair tape is designed for fixing leaks. It stretches and forms a strong bond. This tape is ideal for garden hoses with small punctures.
Start by cleaning the damaged area. Stretch the tape as you wrap it around the hose. Cover the puncture and overlap the tape layers.
- Cut the tape with scissors for a neat finish
- Press the tape firmly to ensure good adhesion
- Check for leaks after applying the tape
Seal With Rubber Patch
Rubber patches are another way to fix leaks. They work well for larger punctures. You can find these patches in hardware stores.
Begin by cleaning the hose surface. Apply adhesive to the patch and place it over the hole. Hold it in place until the glue sets.
- Choose the right size patch for the hole
- Allow the adhesive to dry completely
- Test the hose by running water through it

Credit: www.familyhandyman.com
Replace Damaged Sections
Fixing a leaking garden hose saves water and extends its life. You can replace the damaged part instead of buying a new hose.
This guide shows how to cut out leaks, attach new couplings, and secure everything with clamps.
Cut Out Leaking Area
Find the leaking part of your hose. Use a sharp knife or scissors to cut out the damaged section. Make sure the cut edges are straight and clean for a good fit.
Attach Hose Couplings
Choose hose couplings that fit your hose size. Insert the cut ends of the hose into each side of the coupling. Push firmly to ensure a tight connection.
- Slide one hose end into the coupling.
- Push until it reaches the middle of the coupling.
- Repeat with the other hose end.
- Check that both ends are secure and aligned.
Secure With Clamps
Use hose clamps to hold the hose and coupling tightly together. This stops leaks and keeps the hose from slipping off.
| Clamp Type | Use |
| Worm Gear Clamp | Adjustable and tight fit |
| Spring Clamp | Easy to install and remove |
| Ear Clamp | Permanent and strong hold |
Repair Hose Fittings
Fixing a leaking garden hose often means working on the hose fittings. These parts connect the hose to the faucet or nozzle. Repairing them can stop water waste and keep your hose working well.
Follow simple steps to tighten, replace, or seal hose fittings. This guide shows easy ways to fix common hose leaks.
Tighten Loose Connections
Loose connections between the hose and fittings cause leaks. Use your hands or a wrench to tighten these joints. Turn the connector clockwise until it feels snug. Do not overtighten because it can damage the fitting.
Replace Broken Fittings
Broken fittings can cause leaks that tightening will not fix. Replace damaged parts with new ones. Follow these steps to replace a fitting:
- Turn off the water supply and drain the hose.
- Use pliers to remove the old fitting.
- Choose a matching replacement fitting.
- Attach the new fitting firmly to the hose.
- Tighten the connection and check for leaks.
Seal Threads With Tape
Thread tape can stop leaks at the threaded connections. Wrap the tape around the threads before attaching the fitting. This creates a tight seal and prevents water from escaping.
| How to Apply Thread Tape |
|---|
| Clean the threads before wrapping |
| Wrap tape clockwise around threads 3-5 times |
| Press tape into the threads smoothly |
| Attach the fitting tightly after wrapping |
Prevent Future Leaks
Fixing a leaking garden hose is important, but stopping leaks from happening again is better. Taking care of your hose helps it last longer. You can avoid leaks by using good habits every time.
Simple steps like storing the hose right and handling it carefully can save you money and time. Learn easy ways to prevent future leaks below.
Store Hose Properly
Always keep your garden hose in a dry and cool place. Avoid leaving it under the sun for many hours. Sunlight can make the hose material weak and crack.
Use a hose reel or hanger to keep it off the ground. This helps stop dirt and damage. When you roll the hose, do it gently to avoid sharp bends.
Avoid Kinks And Twists
Kinks and twists cause stress on the hose walls. This leads to cracks and leaks over time. Always pull the hose straight when using it.
Check the hose while you unroll it. Fix any twists or loops before watering. Moving the hose smoothly stops damage and keeps water flow steady.
Drain Water After Use
Water left inside the hose can freeze or cause pressure. This weakens the hose and causes leaks. After watering, unplug the hose and drain all water out.
Lift one end of the hose to help water flow out. Store the hose empty to keep it safe from damage and leaks in the future.
Test The Repair
After fixing your garden hose, testing the repair is important. This helps confirm the leak is gone.
Follow simple steps to check if your hose works well and does not drip.
Turn On Water Gradually
Open the water supply slowly to avoid sudden pressure on the hose. This prevents new leaks from forming.
Check For Drips
- Watch the repair area carefully for any water drops.
- Look along the entire hose for hidden leaks.
- Check the fittings and connectors as well.
- Dry the area first to spot new drips easily.
Make Adjustments If Needed
| Issue | Adjustment |
|---|---|
| Small drips at the joint | Tighten the connector by hand or with a wrench |
| Leak at cut hose end | Reapply hose clamp or replace the end cap |
| Water sprays from repaired area | Replace damaged section or use stronger patch |
| Hose bursts under pressure | Lower water flow and check hose condition |
Credit: ucanr.edu
Frequently Asked Questions
How Do I Stop A Garden Hose From Leaking?
To stop leaks, first identify the leak source. Tighten connections, replace washers, or use hose repair kits. Regularly inspect your hose for damage to prevent leaks and ensure efficient watering.
What Tools Are Needed To Fix A Leaking Garden Hose?
You need a hose repair kit, utility knife, pliers, and a screwdriver. These tools help cut damaged sections, replace washers, and secure fittings, making hose repair quick and easy.
Can I Fix A Leaking Garden Hose Without Replacing It?
Yes, small leaks can be fixed by tightening fittings or using waterproof tape. For larger holes, a repair kit or patch can effectively seal the hose without full replacement.
How Long Does It Take To Fix A Leaking Garden Hose?
Fixing a leaking garden hose usually takes 10 to 20 minutes. Simple repairs like replacing washers or using tape are quick, while patching holes might take slightly longer.
Conclusion
Fixing a leaking garden hose saves water and money. Small leaks cause big problems over time. Tighten connections or replace washers to stop drips. Check for cracks and patch them carefully. Regular hose care keeps your garden healthy. A working hose makes watering easy and stress-free.
Simple steps bring quick results. No need to buy a new hose right away. Save resources and enjoy a dry, efficient garden.