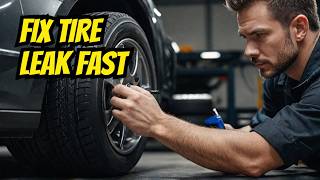
Is your car tire losing air, but you can’t spot the problem? A slow leak can be frustrating and dangerous if left unchecked.
You might think it’s just a small issue, but ignoring it could lead to bigger, costly repairs down the road. The good news is, you don’t have to be a mechanic to fix it. You’ll discover simple, step-by-step methods to find and repair that slow leak quickly.
Keep reading, and you’ll save time, money, and avoid unexpected trouble on the road.

Credit: www.youtube.com
Identifying A Slow Leak
A slow leak in a car tire can be hard to notice at first. It causes the tire to lose air over time.
Finding a slow leak early helps you avoid bigger problems and keeps you safe on the road.
Signs Of A Slow Leak
You may see your tire pressure drop without any clear damage. The tire might look a bit flat when parked.
Other signs include the car pulling to one side or a change in how the steering feels.
- Low tire pressure warning light on the dashboard
- Tire looks visibly less full than the others
- Car pulls or drifts when driving
- Steering feels loose or different
- Hissing sound near the tire
Common Causes
Slow leaks happen for several reasons. Small holes or damage can let air escape slowly.
Sometimes, the valve stem or wheel rim has problems that cause leaks.
- Punctures from nails, screws, or sharp objects
- Damaged valve stem or loose valve core
- Cracks or corrosion on the wheel rim
- Worn or damaged tire bead seal
- Improper tire installation
Gathering Necessary Tools
Fixing a slow leak on a car tire needs the right tools. Getting them ready helps you work quickly and safely.
Before you start, collect all tools to avoid delays. This guide covers what you need for the job.
Essential Repair Kits
A repair kit has items to fix small leaks without replacing the tire. It is useful for quick repairs on the road.
- Tire plug or patch kit
- Rubber cement or adhesive
- Reamer tool to clean the hole
- Insertion tool to add the plug
- Air pressure gauge
- Portable air compressor or pump
Make sure the repair kit fits your tire size and type. Check the kit’s instructions before use.
Safety Equipment
Safety is important when fixing a tire leak. Wear gear to protect yourself from injury and dirt.
- Work gloves to protect your hands
- Safety glasses to shield your eyes
- Reflective vest for visibility
- Wheel chocks to stop the car from moving
- Jack and jack stands to lift the car safely
Use these tools carefully to avoid accidents. Check your car is on a flat surface before lifting it.
Locating The Leak
Finding a slow leak on a car tire can save you time and money. It helps keep your tire safe and your car running well.
Leaks are often small and hard to spot. Use simple ways to find where the air is escaping.
Visual Inspection Techniques
Look closely at the tire surface and sidewall. Check for nails, screws, or sharp objects stuck in the tire.
Inspect the valve stem for cracks or damage. Also, look at the rim for any bends or gaps where air might leak.
- Examine tread for foreign objects
- Check sidewalls for cuts or bubbles
- Inspect valve stem for damage
- Look at rim edges for gaps or bends
Using Soapy Water Method
Mix water and dish soap in a spray bottle or bowl. Spray or apply the soapy water over the tire surface and valve.
Bubbles will form where air escapes. Watch closely for small bubbles that show the exact leak location.
- Prepare a soap and water mixture
- Spray or brush on tire and valve area
- Look for tiny bubbles forming
- Mark the spot where bubbles appear
Preparing The Tire
Fixing a slow leak requires good preparation of the tire. Proper steps help find and repair the leak fast.
Start by getting the tire ready. This makes the repair process safer and easier.
Removing The Tire
First, remove the tire from the car to access the damaged area. Follow these safe steps:
- Park the car on a flat surface and apply the parking brake.
- Loosen the lug nuts slightly with a wrench.
- Use a jack to lift the car off the ground.
- Remove the lug nuts completely and take off the tire.
- Place the tire on a clean surface for repair.
Cleaning The Area
Cleaning the tire area around the leak is important. Dirt can block the repair and cause problems later.
| Cleaning Step | Purpose |
|---|---|
| Remove dirt and debris | Clear the surface to see the leak clearly |
| Dry the area | Help repair materials stick better |
| Inspect closely | Find the exact spot of the slow leak |
Applying The Repair
Fixing a slow leak on a car tire requires the right tools and care. You can use plug kits or patch kits to stop the leak.
Both methods help seal the hole and get your tire back in shape. Follow the steps carefully for a safe repair.
Using Plug Kits
Plug kits fill the hole from the outside of the tire. They work well for small punctures in the tread area.
First, remove the object causing the leak. Then, clean and roughen the hole with the tool in the kit.
- Insert the plug coated with rubber cement into the hole
- Push it in until about two-thirds of the plug is inside
- Pull out the tool carefully, leaving the plug inside
- Cut off the excess plug sticking out of the tire
After plugging, check the tire for leaks and inflate it to the right pressure.
Using Patch Kits
Patch kits fix the leak from the inside of the tire. You must remove the tire from the wheel first.
Clean the inside of the tire around the hole. Use the roughening tool to prepare the surface.
- Apply rubber cement or vulcanizing glue on the roughened area
- Place the patch over the hole and press firmly
- Let the patch cure as per the instructions
- Reinstall the tire on the wheel and inflate it
Check for leaks by listening or using soapy water on the patched area.

Credit: www.whocanfixmycar.com
Reinstalling And Inflating
Fixing a slow leak on a car tire often ends with reinstalling the tire and inflating it properly. Doing these steps right helps keep your car safe on the road.
Follow simple tips to mount the tire back on the wheel and set the right pressure. This stops further damage and helps your tire last longer.
Mounting The Tire Back
Place the tire carefully on the wheel hub. Make sure the tire fits correctly and lines up with the bolts.
Tighten the lug nuts by hand at first. Then use a wrench to secure them in a star pattern. This keeps the tire balanced and safe.
- Align tire with wheel bolts
- Tighten lug nuts by hand
- Use a wrench to tighten in a star pattern
- Check all nuts are secure
Proper Tire Pressure
Inflate the tire to the car maker’s recommended pressure. You can find this number on a sticker inside the driver’s door or in the owner’s manual.
Use a tire pressure gauge to check. Pump air slowly and check pressure often to avoid overinflation.
- Check recommended tire pressure
- Use a tire pressure gauge
- Add air slowly
- Recheck pressure after inflating
- Adjust if needed
Testing For Further Leaks
After fixing a slow leak on your car tire, it is important to check if any other leaks remain. Testing your tire carefully helps ensure your repair was successful.
This guide covers two key ways to test your tire: monitoring pressure and performing a road test.
Pressure Monitoring
Check your tire pressure regularly after repair. Use a reliable pressure gauge to track pressure levels over several days.
- Inflate the tire to the recommended pressure.
- Record the pressure reading right after inflation.
- Check the pressure again after 12 hours and then after 24 hours.
- Look for any noticeable drop in pressure.
- If pressure drops, inspect the tire for leaks again.
Road Test Tips
Take the car on a short drive to expose the tire to normal conditions. This can reveal leaks that only appear under pressure and movement.
| Tip | Details |
| Drive Slowly | Drive at low speed on smooth roads to avoid sudden pressure changes. |
| Listen Carefully | Listen for hissing sounds that indicate escaping air. |
| Feel the Tire | Stop and feel the tire for wet spots or bubbles. |
| Check Pressure Again | After the drive, check the tire pressure to see if it dropped. |
When To Seek Professional Help
Fixing a slow leak in a car tire can be simple. Some repairs you can do yourself. But some problems need a professional.
Knowing when to stop and call an expert keeps you safe. It also protects your car from more damage.
Limitations Of Diy Repairs
DIY tire repairs work for small leaks or punctures in the tread. But not all leaks can be fixed at home.
- If the hole is larger than 1/4 inch, do not attempt a DIY fix.
- Sidewall damage cannot be repaired safely with home kits.
- Leaks near the tire bead or rim need professional tools.
- If the tire loses air quickly after repair, get expert help.
- DIY repairs may not work on old or worn tires.
Signs Of Irreparable Damage
Some tire problems go beyond a simple patch. Recognizing these signs helps you avoid risks.
| Sign | Description | Action |
|---|---|---|
| Bulges or bubbles | Raised areas on the sidewall show internal damage | Replace the tire immediately |
| Multiple punctures | More than one hole or crack close together | Seek professional inspection |
| Cracks or deep cuts | Visible breaks in rubber surface | Do not repair yourself, get expert help |
| Rapid air loss | Tire deflates quickly after repair | Consult a professional mechanic |

Credit: www.crossroadshelpline.com
Frequently Asked Questions
How Do I Identify A Slow Leak In My Car Tire?
A slow leak causes gradual tire pressure loss. Check tire pressure weekly using a gauge. Look for visible punctures or damage. Listen for hissing sounds near the valve or tread. Inspect tires for nails or sharp objects.
Can I Fix A Slow Tire Leak Myself?
Yes, you can fix slow leaks using a tire repair kit. Clean the puncture area, insert a plug or patch, and reinflate the tire. For valve leaks, replace the valve core. If unsure, consult a professional for safety.
How Long Does A Slow Tire Leak Repair Last?
A proper repair can last the tire’s life if done correctly. Temporary fixes may fail quickly. Using quality plugs or patches ensures durability. Always have a professional inspect repaired tires regularly for safety.
What Tools Are Needed To Fix A Slow Tire Leak?
You need a tire repair kit with plugs or patches, a reamer, insertion tool, and air compressor or pump. A tire pressure gauge is essential to check pressure before and after repair. Gloves and safety glasses are recommended.
Conclusion
Fixing a slow tire leak can save time and money. Check the tire carefully for damage. Use simple tools like a tire plug kit or patch. Keep your tire pressure at the right level. Drive safely and watch for signs of air loss.
Regular tire checks help avoid bigger problems. Small steps make a big difference on the road. Stay prepared and confident with basic tire repair skills. Your car will run smoother and safer every day.