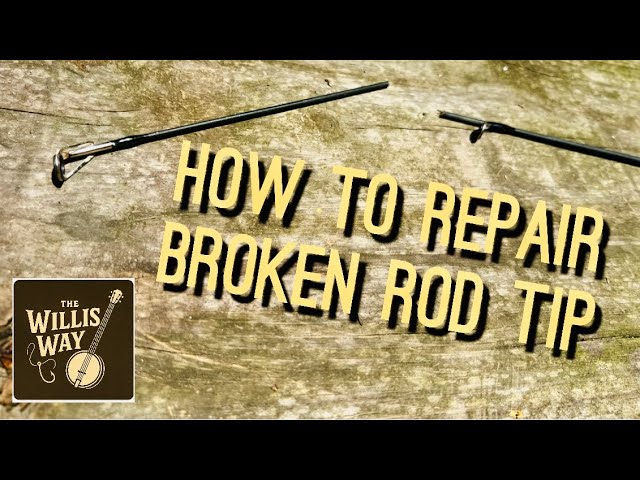
Your fishing rod just snapped, and you’re feeling frustrated. Don’t worry—this doesn’t have to be the end of your fishing trips.
You can fix your rod and get back on the water faster than you think. You’ll discover simple, step-by-step ways to repair your fishing rod, even if you’ve never done it before. Keep reading, because the solution is easier than you imagine, and your next great catch is waiting.

Credit: www.reddit.com
Assessing The Damage
Fixing a snapped fishing rod starts with checking the damage carefully. Knowing where and how the rod is broken helps you decide what to do next.
Look closely at the rod to find the exact break point and any other damage. This step is important before trying to repair it.
Identifying The Break Point
Find the main spot where the rod snapped. This is usually where the rod bends or snaps in two parts. The break point shows where the rod is weakest.
Check if the rod is broken cleanly or if it has splinters. This helps you know how to fix it and if you need any special tools or parts.
Checking For Additional Cracks
Look at the whole rod to find small cracks or damage around the break point. These cracks can make the rod weaker and cause it to break again.
Use good light and turn the rod slowly. Check near the guides, handle, and joints for any signs of cracks or damage.
Gathering Repair Materials
Fixing a snapped fishing rod requires the right materials. You will need tools, epoxy, and wrapping thread. Gathering these items beforehand makes the repair process smoother.
Each component plays a crucial role in ensuring your rod is as good as new. Let’s explore what you need.
Essential Tools
Gathering the right tools is the first step in repairing your rod. These tools help you fix the break effectively.
- Small hacksaw or cutter
- Sandpaper (fine grit)
- Small brush or applicator
- Measuring tape
Choosing The Right Epoxy
The epoxy you choose is vital for a strong bond. Select one that is durable and waterproof.
Look for fast-setting epoxies. They make the repair process quicker and more efficient.
- Two-part epoxy resin
- Waterproof and UV resistant
- Fast-curing options available
Selecting Rod Wrapping Thread
Rod wrapping thread secures the repair. Choose a thread that matches your rod’s original color and strength.
Opt for durable and flexible threads. These ensure the repair is both strong and aesthetically pleasing.
- Nylon or polyester thread
- Match color to the original rod
- High tensile strength
Preparing The Rod For Repair
Fixing a snapped fishing rod starts with good preparation. You need to clean and smooth the broken parts before gluing.
Proper preparation helps the repair hold strong and last longer. Take your time to get the rod ready.
Cleaning The Broken Area
Remove dirt, old glue, and debris from the broken rod sections. Clean surfaces help glue stick better.
Use rubbing alcohol and a soft cloth to wipe the broken ends. Let them dry completely before moving on.
Sanding For Better Adhesion
Lightly sand the broken areas with fine-grit sandpaper. This roughens the surface for stronger glue bonding.
Sanding also removes any remaining smooth spots or coatings. Clean off the dust after sanding with a dry cloth.

Credit: www.ebay.ca
Applying Epoxy And Joining
Fixing a snapped fishing rod needs care and the right steps. Using epoxy helps join broken parts firmly. This guide shows how to mix epoxy, align pieces, and clamp them properly.
Follow these simple methods to restore your fishing rod’s strength. Proper joining will make it ready for your next fishing trip.
Mixing Epoxy Correctly
Mixing epoxy in the right way is key for a strong fix. Use equal parts of resin and hardener. Stir slowly to avoid bubbles.
- Measure equal amounts of resin and hardener.
- Pour both into a clean container.
- Stir gently for about two minutes.
- Make sure the mix is smooth and even.
- Use the epoxy quickly before it starts to set.
Aligning The Broken Pieces
Correct alignment of the broken rod parts ensures a neat and strong repair. Hold the pieces so their edges match perfectly. Check from all sides to avoid gaps.
Clamping Techniques
Clamping holds the rod steady while the epoxy cures. Use gentle but firm pressure to keep the pieces from moving. Avoid tight clamps that can damage the rod.
- Wrap the broken area with soft cloth before clamping.
- Use spring clamps or rubber bands for even pressure.
- Check alignment again before tightening clamps.
- Leave clamps in place for at least 24 hours.
- Keep the rod in a warm, dry place during curing.
Wrapping And Securing The Repair
Fixing a snapped fishing rod needs careful wrapping and sealing. This process keeps the rod strong and ready for fishing again.
Using thread and epoxy correctly will protect the repair and help it last longer. Follow these steps to wrap and finish your rod repair well.
Wrapping With Thread Neatly
Start by choosing a strong, thin thread for wrapping. Wrap the thread tightly and evenly around the break area to hold the rod pieces together.
- Begin wrapping a few millimeters before the break
- Keep each wrap close to the last without overlapping too much
- Wrap several layers to cover the joint fully
- Tie off the thread securely at the end
- Trim any excess thread cleanly
Applying Finishing Epoxy Coats
After wrapping, apply epoxy to seal and protect the thread. Use thin coats and let each dry before adding the next.
| Epoxy Application Step | Details |
| Mix Epoxy | Combine resin and hardener as instructed |
| First Coat | Brush thin layer over thread wrapping |
| Dry Time | Let it dry for 4-6 hours |
| Additional Coats | Apply 2-3 more thin coats |
| Final Dry | Let cure for 24 hours before use |
Drying And Curing Time
Fixing a snapped fishing rod requires patience during drying and curing. Proper curing helps the repair hold strong and last longer.
Rushing to use the rod before it is fully cured can cause the repair to fail. Understanding the right conditions and timing is key.
Ideal Conditions For Curing
Keep the repaired rod in a warm, dry place with good airflow. Avoid direct sunlight or extreme heat, which can weaken the glue or resin.
- Temperature between 65°F and 75°F (18°C to 24°C)
- Low humidity to prevent moisture buildup
- Stable environment without sudden temperature changes
- Place rod on a flat surface to avoid stress on the repair
How Long To Wait Before Use
The curing time depends on the type of adhesive or epoxy used. Follow the manufacturer’s instructions carefully for best results.
| Adhesive Type | Recommended Curing Time |
| Two-part epoxy | 24 to 48 hours |
| Super glue (cyanoacrylate) | 1 to 2 hours |
| Polyurethane glue | 12 to 24 hours |
| UV resin | Minutes under UV light, plus 24 hours rest |
Testing The Repaired Rod
After fixing a snapped fishing rod, testing is important. It ensures the repair holds well during use.
Test the rod carefully to check its flexibility and strength before fishing again.
Checking Flexibility
Bend the rod slowly to see if it moves smoothly. The rod should flex without cracking or feeling stiff.
Flexibility shows if the repaired area can handle stress like the rest of the rod.
- Hold the rod near the repair spot.
- Bend it gently in different directions.
- Listen for unusual sounds like cracking.
- Look for any new cracks or weak spots.
Ensuring Strength And Safety
Check if the rod feels strong and safe to use. It must support normal fishing pressure without breaking.
Test by applying pressure like casting or pulling a fish. Avoid sudden force to prevent new damage.
- Secure the rod handle firmly.
- Pull the tip slowly as if reeling in a fish.
- Watch the repair for any bending or loosening.
- Stop testing if you see signs of damage.
Preventing Future Breaks
A snapped fishing rod can spoil your day. You can avoid this by taking good care of your rod. Learning simple tips can keep your rod strong and ready for your next fishing trip.
Proper handling and regular maintenance help stop breaks before they happen. Use these ideas to keep your fishing rod safe and long-lasting.
Proper Handling Tips
How you handle your rod affects its strength. Be gentle and avoid rough moves that can cause cracks or breaks.
- Hold the rod firmly but do not squeeze too hard.
- Do not bend the rod sharply or force it into tight spaces.
- Carry the rod in a protective case when not in use.
- Keep the rod away from hard surfaces and sharp objects.
- Use the right rod for the fish size and water conditions.
Regular Maintenance Practices
Check your rod often for signs of wear. Clean and fix small problems before they grow into big ones.
| Maintenance Task | Frequency | Why It Helps |
| Clean rod guides and tip | After each use | Prevents dirt buildup that can weaken the rod |
| Inspect rod for cracks | Monthly | Finds damage early to fix before breakage |
| Lubricate reel seat | Every 3 months | Keeps parts moving smoothly and reduces stress |
| Store rod in dry place | Always | Prevents moisture damage and warping |
| Replace worn guides | As needed | Stops line wear and keeps rod safe |

Credit: www.youtube.com
Frequently Asked Questions
How Can I Repair A Snapped Fishing Rod At Home?
You can fix a snapped fishing rod by cleaning the break, aligning the pieces, and using strong epoxy glue. Reinforce with a rod wrapping thread and finish with varnish for durability. This DIY method restores rod strength effectively for continued use.
What Materials Are Needed To Fix A Broken Fishing Rod?
You’ll need epoxy glue, rod wrapping thread, sandpaper, scissors, and varnish. These materials help bond the break and reinforce the repair. Having the right tools ensures a strong, long-lasting fix to your fishing rod.
How Long Does It Take To Fix A Snapped Fishing Rod?
Repairing a snapped fishing rod typically takes 1 to 2 hours. This includes drying time for epoxy and varnish. Proper curing is essential for a durable, reliable repair before you use the rod again.
Can A Snapped Fishing Rod Be As Strong As Before?
A well-repaired fishing rod can regain most of its original strength. Using proper materials and techniques ensures durability. However, it might not be 100% as strong as before but is usually reliable for regular fishing.
Conclusion
Fixing a snapped fishing rod can save your favorite gear. With the right tools and steps, you can repair it yourself. Take your time and follow each step carefully. Small cracks or breaks need quick attention to avoid more damage.
A repaired rod lets you get back to fishing sooner. Keep practicing these tips for better results next time. Your fishing trips will stay fun and worry-free. Don’t let a broken rod stop your outdoor adventures.