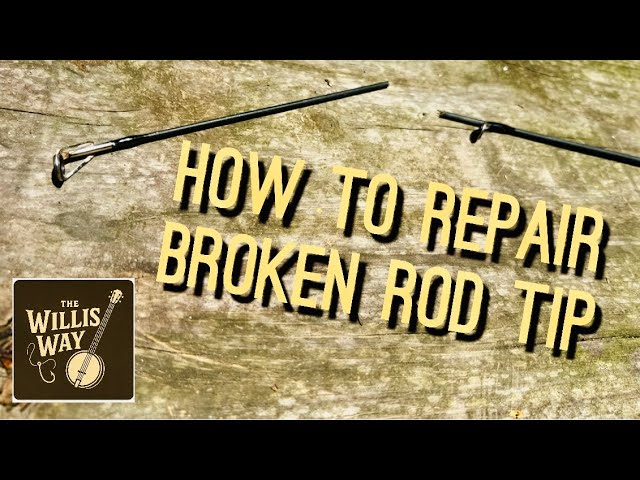
Losing the tip of your fishing rod can feel like the end of your fishing day before it even begins. But don’t worry—you don’t have to throw away your favorite rod or rush out to buy a new one.
You can fix that snapped tip yourself, saving time and money. In this guide, you’ll learn simple, step-by-step ways to restore your rod to its full strength. Keep reading, and you’ll be back on the water, casting with confidence in no time.
Identify The Damage
Fixing a snapped fishing rod tip starts by finding out how bad the damage is. You need to look closely at the broken part.
Knowing the damage helps you decide if you can fix it yourself or need help. Take your time to check every detail.
Check The Rod Tip
Look at the rod tip carefully. See if it is cracked, split, or completely broken off. Check if the guide ring is still attached.
Sometimes the tip looks fine, but small cracks can weaken it. Run your fingers gently along the tip to feel any rough spots or breaks.
- Find any cracks or breaks on the tip
- Check if the guide ring is loose or missing
- Feel for rough edges or splinters
Assess The Severity
Decide how bad the break is. A small crack might only need glue or tape. A full break may need a new tip or professional help.
Also check if the rod’s strength is affected. If the rod bends more than usual or feels weak, it might be unsafe to use.
- Small crack: possible simple repair
- Tip broken off: may need replacement
- Rod feels weak or bends oddly: consider full rod check

Credit: www.reddit.com
Gather Repair Materials
Fixing a snapped fishing rod tip is easier with the right tools. Before you begin, gather everything you need to make the repair smooth and quick.
Having the correct materials ensures your rod is as good as new. Let’s explore the essential tools and replacement tips you’ll need.
Essential Tools
Essential tools help you make accurate repairs. They are key to ensuring a secure and lasting fix.
- Super glue or epoxy for strong bonding
- Fine-grit sandpaper to smooth surfaces
- Rod tip repair kit for precise fit
- Small pliers to handle tiny parts
- Heat source like a lighter for adhesive activation
Replacement Tips
Replacement tips vary in size and type. Choose the one that matches your rod for the best results.
| Tip Type | Rod Compatibility |
| Ceramic | Best for all-purpose rods |
| Stainless Steel | Great for heavy-duty rods |
| Aluminum Oxide | Ideal for light-action rods |
Remove The Broken Tip
Fixing a snapped fishing rod tip starts by removing the broken part. You need a clean end to attach a new tip.
Carefully removing the damaged piece helps keep the rod strong and ready for repair.
Cutting The Damaged Part
Use a sharp cutting tool to remove the broken tip. Cut straight across for a smooth end.
Make sure to cut enough to remove all cracked or splintered sections. This gives a good base for the new tip.
- Use a fine saw or sharp knife
- Cut slowly to avoid more damage
- Remove all weak or broken pieces
- Check that the cut is even and clean
Sanding The Rod End
Sanding smooths the cut end of the rod. This helps the new tip fit tightly and stay secure.
Use fine-grit sandpaper and sand gently. Remove any rough edges or splinters around the cut.
- Use 220-grit or finer sandpaper
- Sand evenly around the rod end
- Remove all rough spots and splinters
- Wipe off dust before attaching the new tip

Credit: www.youtube.com
Attach The New Tip
Fixing a snapped fishing rod tip is simple if you attach the new tip carefully. This step is important for your rod to work well again.
Using the right materials and fitting the tip correctly will make your repair strong and lasting. Let’s look at how to do this.
Choosing The Right Adhesive
Select an adhesive that holds well and dries fast. The glue must work on metal and fiberglass or graphite.
Epoxy glue is a good choice. It sticks strong and resists water. Super glue also works but may be less durable.
- Use two-part epoxy for a strong bond
- Super glue works for quick fixes
- Avoid glue that stays soft or peels off
- Check if the glue is waterproof
Fitting The Replacement Tip
First, clean the rod tip to remove old glue or dirt. This helps the new tip fit tightly and stay in place.
Test the new tip by sliding it on the rod’s end. It should fit snugly without too much force or looseness.
- Trim the replacement tip if it is too long
- Apply a thin layer of glue inside the tip
- Slide the tip onto the rod carefully
- Hold the tip in place until the glue sets
Secure And Finish
Fixing a snapped fishing rod tip takes care and patience. After gluing the tip, you must secure and finish the repair properly. This part ensures the tip stays strong and works well on your next fishing trip.
Follow these steps to let the glue set and test the repair. These steps help your fishing rod tip hold tight and last longer.
Letting The Glue Set
After applying glue to the broken tip, let it dry fully. Rushing this step can weaken the repair. The drying time depends on the glue type and weather.
- Keep the rod tip still and avoid moving it.
- Allow at least 24 hours for most epoxy or super glue types.
- Dry time may increase in cold or humid conditions.
- Check the glue package for exact drying times.
- Do not handle the rod tip until glue is completely dry.
Testing The Repair
Once the glue is dry, test the fishing rod tip carefully. Testing shows if the repair is strong and ready for use.
| Test Type | What to Do | What to Look For |
| Flex Test | Bend the rod tip gently | No cracks or loose parts |
| Pull Test | Pull the tip lightly away from the rod | Tip stays firmly attached |
| Line Test | Run fishing line through the tip guides | Line moves smoothly without catching |
Prevent Future Breaks
Fixing a snapped fishing rod tip is only part of the solution. You need to take steps to stop it from breaking again. Proper care helps your rod last longer and work better.
This guide covers how to handle your rod correctly and keep it well maintained. Follow these tips to protect your fishing gear.
Proper Rod Handling
How you hold and use your fishing rod greatly affects its strength. Be gentle and avoid putting too much pressure on the tip.
- Hold the rod by the handle, not the tip.
- Don’t bend the rod sharply or force it beyond its limit.
- Avoid banging the rod on hard surfaces or rocks.
- Use the right rod for the type of fishing you do.
- Store the rod in a safe place when not in use.
Routine Maintenance Tips
Regular cleaning and checks keep your rod in good shape. Small problems can turn into breaks if you ignore them.
| Maintenance Task | How Often | Purpose |
| Clean rod and guides | After every trip | Remove dirt and salt |
| Check for cracks | Monthly | Spot damage early |
| Tighten reel seat | Every few trips | Prevent wobbling |
| Lubricate reel parts | Every month | Keep smooth operation |
| Store rod properly | Always | Prevent warping and breaks |

Credit: www.reddit.com
Frequently Asked Questions
How Do I Repair A Snapped Fishing Rod Tip?
To repair a snapped rod tip, clean the broken area, align the pieces, and use epoxy or rod tip cement. Secure with thread wraps and allow it to dry fully before use. This restores strength and functionality efficiently.
What Tools Are Needed To Fix A Fishing Rod Tip?
You need epoxy or rod tip glue, thread wraps, sandpaper, a small brush, and scissors. These tools help you clean, bond, and secure the broken tip properly for a strong fix.
Can I Replace A Fishing Rod Tip Myself?
Yes, you can replace it yourself by removing the old tip, cleaning the area, and attaching a new tip with epoxy. Proper alignment and wrapping ensure the rod performs well again.
How Long Does A Fishing Rod Tip Repair Take?
A repair usually takes 30 to 60 minutes, plus drying time for the epoxy. Drying can take several hours to overnight, depending on the adhesive used.
Conclusion
Fixing a snapped fishing rod tip is easier than it seems. You only need a few simple tools and patience. Take your time to match the new tip well. A good repair saves money and keeps your rod strong. With practice, you can fix breaks quickly and enjoy fishing more.
Don’t let a broken tip stop your fun. Try these steps next time your rod snaps. Fishing gear can last longer with small repairs. Keep your rod ready for the next catch.