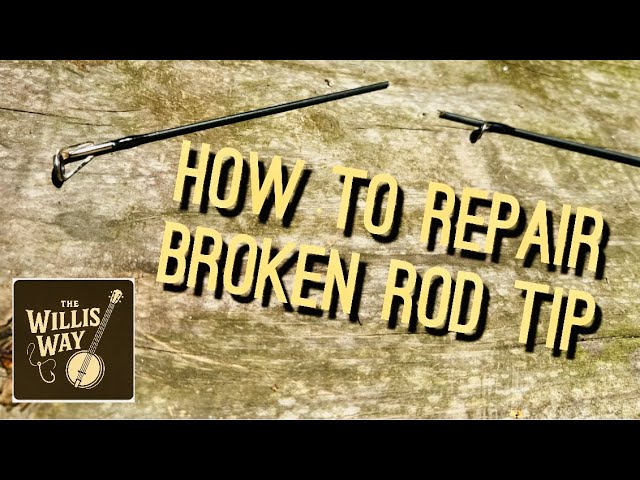
A snapped fishing rod can feel like the end of your fishing trip before it even begins. But don’t worry—you don’t have to toss it out or rush to buy a new one.
You can fix it yourself, save money, and get back to the water faster than you think. In this guide, you’ll discover simple, step-by-step methods to repair your rod and make it strong again. Keep reading, and you’ll learn how to turn that frustrating break into a quick win.
Assess The Damage
Fixing a snapped fishing rod starts with a careful check. You need to know where the rod is broken and if there are other problems.
This helps you decide the best way to repair the rod or if you need a replacement part.
Identify The Break Point
Look closely at the rod to find the exact spot where it snapped. This is usually the weakest part.
- Clean the rod to see the break clearly
- Check if the break is clean or splintered
- Note if the break is near a guide or joint
- Mark the break point with tape or a marker
Check For Additional Issues
After finding the break, check the rest of the rod. Look for cracks, loose guides, or damaged reel seats.
| Issue | What to Look For | Action Needed |
|---|---|---|
| Cracks | Small lines on the rod surface | Repair with epoxy or replace rod |
| Loose Guides | Guides that wobble or move | Re-glue or replace guides |
| Damaged Reel Seat | Cracks or looseness around the seat | Replace reel seat or rod section |

Credit: www.amazon.ca
Gather Repair Materials
Fixing a snapped fishing rod needs the right materials. Gathering these tools helps you repair the rod quickly.
Having everything ready makes the repair process smoother and more effective.
Essential Tools
Some tools are needed to fix the rod properly. These tools help hold parts and make the repair strong.
- Sandpaper to smooth rough edges
- Small clamps to hold the rod in place
- Utility knife to trim excess material
- Measuring tape for precise cuts
- Heat gun or hairdryer to soften adhesives
- Mixing stick for glue preparation
- Protective gloves for safety
Recommended Adhesives And Tapes
Choosing the right glue and tape is key for a strong repair. These materials keep the rod parts together firmly.
Use adhesives and tapes designed for outdoor use and water resistance.
- Epoxy resin glue for strong bonding
- Super glue for quick fixes
- Fiberglass tape for added strength
- Electrical tape to secure small parts
- Waterproof duct tape for temporary fixes
Prepare The Rod For Repair
Fixing a snapped fishing rod needs careful preparation. This helps the repair last longer and work better.
Start by getting the rod ready. Clean and align the broken parts before gluing or wrapping.
Clean The Broken Ends
Cleaning the broken ends removes dirt and old glue. This makes the repair strong and neat.
Use a soft cloth and rubbing alcohol. Gently wipe both broken ends until they are clean and dry.
- Remove any loose splinters or debris
- Dry the ends completely before continuing
- Avoid using water as it may weaken the rod
Align The Pieces Properly
Place the broken pieces together to check the fit. Good alignment keeps the rod straight and strong.
Hold the rod firmly but gently. Adjust the ends until they match perfectly without gaps or overlaps.
- Match the rod’s guide rings if possible
- Make sure the rod bends naturally after joining
- Use tape to hold the pieces in place during repair

Credit: www.youtube.com
Apply The Repair Techniques
Fixing a snapped fishing rod takes the right tools and patience. You can repair the rod using simple materials.
Below are effective ways to restore your fishing rod’s strength and usability.
Using Epoxy Or Super Glue
Epoxy and super glue are good for bonding broken rod parts. Clean the broken ends before applying glue. Hold the pieces tightly until the glue dries.
Use a small brush to spread epoxy evenly. Avoid using too much glue to prevent lumps. Let the rod rest for several hours to cure completely.
Reinforcing With Fiberglass Or Thread Wrap
After gluing, reinforce the break with fiberglass tape or strong thread. This adds extra support and prevents the rod from snapping again.
- Cut a fiberglass strip or strong thread long enough to wrap the break.
- Wrap tightly around the broken area several times.
- Apply clear epoxy over the wrap to seal it.
- Allow the epoxy to dry fully before use.
Temporary Fixes For On-the-go
If you need a quick fix while fishing, try these temporary methods. They help keep the rod usable until you can repair it properly.
| Temporary Fix | How to Do It |
| Electrical Tape | Wrap tightly around the break to hold parts together. |
| Rubber Bands | Loop several bands to keep the rod stable. |
| Zip Ties | Secure the broken pieces tightly with zip ties. |
Drying And Curing Tips
Fixing a snapped fishing rod needs proper drying and curing. This helps the repair hold strong.
Following the right steps after gluing keeps your rod safe from more damage.
Optimal Conditions
Keep the rod in a dry place with good air flow. Avoid direct sunlight to stop warping.
- Room temperature between 65°F and 75°F is best
- Avoid humid or damp areas that slow drying
- Lay the rod flat or hang it vertically without bending
- Use a fan to circulate air if needed
Avoiding Common Mistakes
Some mistakes can weaken the fix or cause the rod to break again. Watch out for these.
| Common Mistake | Why to Avoid | How to Prevent |
| Drying in direct sunlight | Causes heat damage | Keep rod in shade |
| Touching the glue too soon | Weakens the bond | Wait full cure time |
| Applying too much glue | Leads to mess and weak spots | Use glue sparingly |
| Moving rod during curing | Shifts repair parts | Keep rod still and supported |
Test The Repaired Rod
After fixing a snapped fishing rod, testing it is very important. This helps you know if the repair worked well. You should check both the rod’s flexibility and strength before using it again.
Testing the rod carefully keeps you safe and protects your gear. Below are key steps to follow for testing the repaired rod.
Check Flexibility And Strength
First, gently bend the rod to see how it flexes. The rod should bend smoothly without cracking or feeling weak. Then, test its strength by applying pressure like when you fish.
- Bend the rod slowly to avoid sudden stress
- Look for any cracks or weak spots
- Try lifting a small weight to test strength
- Repeat bending and lifting a few times
- Stop if you hear any strange noises
Safe Usage Guidelines
| Check | Action | Purpose |
| Visual Inspection | Look for cracks or loose parts | Prevent rod failure while fishing |
| Test Flexibility | Bend rod gently | Ensure smooth flex without damage |
| Strength Test | Lift a small weight | Confirm rod can handle load |
| Handle with Care | Use rod gently at first | Avoid stressing new repair |
Prevent Future Breaks
Fixing a snapped fishing rod is important, but preventing breaks is better. Taking care of your rod keeps it strong and ready to use.
Simple habits can stop your rod from snapping again. Use these tips to protect your fishing gear.
Proper Storage
Store your fishing rod carefully to avoid damage. Avoid leaning it against hard surfaces or placing heavy items on it.
Keep your rod in a cool, dry place away from direct sunlight. Heat and moisture can weaken the rod material over time.
- Use a rod rack or holder to keep rods straight
- Keep rods away from sharp objects
- Avoid storing rods in car trunks for long periods
- Cover rods with a protective sleeve or tube
Regular Maintenance
Check your fishing rod often for cracks or loose parts. Fix small problems before they cause breaks.
Clean your rod after each use. Dirt and salt can cause corrosion and weaken the rod.
- Rinse rod with fresh water after fishing
- Dry rod completely before storage
- Tighten reel seats and guides regularly
- Use a soft cloth to clean rod surfaces

Credit: www.reddit.com
Frequently Asked Questions
How Can I Repair A Snapped Fishing Rod At Home?
You can fix a snapped fishing rod by cleaning the break, aligning the pieces, and using strong epoxy or rod repair tape. Ensure the rod is dry before applying adhesive. Let it cure fully to restore strength and usability.
What Materials Are Needed To Fix A Broken Fishing Rod?
You need epoxy resin or rod repair glue, sandpaper, rod wrapping thread, and a heat source for curing. Optional items include replacement rod guides and a rod drying rack for proper alignment and finishing.
Is It Safe To Use A Repaired Fishing Rod Again?
Yes, a properly repaired fishing rod can be safe and functional. Ensure the adhesive has fully cured and the repair is strong. Test the rod gently before regular use to confirm its durability and performance.
Can I Fix A Snapped Fishing Rod Without Professional Help?
Yes, many fishing rod breaks can be fixed at home with the right tools and patience. Follow step-by-step repair guides and use quality materials. For complex breaks, consider professional repair for best results.
Conclusion
Fixing a snapped fishing rod can be simple. Follow the steps carefully. Gather your tools and materials. Repairing saves money and reduces waste. You’ll enjoy fishing with a fixed rod. Share your experience with friends. Encourage them to repair too.
Fishing is more fun with a trusty rod. Remember, practice makes perfect. Each repair builds skills. Next time, fixing will be easier. Enjoy your fishing adventures. Stay patient and persistent. Your rod is ready for many catches. Happy fishing!