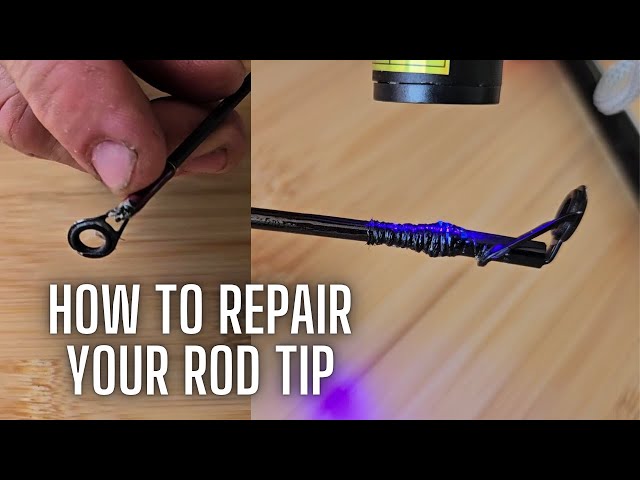
Have you ever felt the frustration of your fishing trip being cut short because your rod tip broke? It’s a common problem that can happen to anyone, but the good news is—you don’t have to replace your entire rod.
With a few simple steps, you can fix that broken tip yourself and get back to fishing in no time. You’ll discover easy, practical ways to repair your fishing rod tip quickly and effectively. Keep reading, and you’ll learn how to save your gear and enjoy more time on the water.
Identify The Damage
Fixing a broken fishing rod tip starts with finding the exact damage. You need to carefully check the rod tip to decide the best repair method.
This guide helps you identify the damage by checking the rod tip condition and assessing the break type.
Check The Rod Tip Condition
Look closely at the rod tip. See if it is cracked, bent, or missing. Check if the tip guide is still attached or if it has come off.
- Examine the tip for cracks or breaks.
- Check if the tip guide is loose or broken.
- Look for any bent or twisted parts.
- See if the rod blank near the tip is damaged.
Assess The Break Type
Knowing the type of break helps you choose the right fix. Some breaks are clean cuts while others are splintered or crushed.
| Break Type | Description | Repair Difficulty |
|---|---|---|
| Clean Break | Sharp, straight break with little splintering. | Easy to repair with tip replacement. |
| Splintered Break | Fibers are torn and frayed around the break. | Moderate repair; may need glue and wrapping. |
| Crushed Break | Rod tip is compressed or flattened. | Difficult to repair; sometimes requires rod section replacement. |
Gather Necessary Tools
Fixing a broken fishing rod tip needs the right tools. Having these tools ready makes the repair easier.
Using the proper tools helps you fix the rod correctly and safely. Prepare them before you start.
List Of Repair Materials
These materials help you repair the broken tip and make it strong again. Gather all before starting.
- Replacement tip guide
- Rod tip glue or epoxy
- Sandpaper (fine grit)
- Heat source (lighter or match)
- Clean cloth
- Small pliers or tweezers
- Scissors or cutting tool
Safety Precautions
Safety is important while fixing your fishing rod tip. Use care with tools and heat.
Wear eye protection and work in a well-ventilated area. Keep flammable things away from heat.
- Wear safety glasses
- Keep your work area clean
- Handle glue and epoxy with care
- Use heat source carefully to avoid burns
- Keep children and pets away
Remove The Broken Tip
Fixing a broken fishing rod tip starts with removing the damaged part. This process requires care to avoid hurting the rod or yourself.
Two important steps help make the removal easier: softening the adhesive and careful detachment.
Softening The Adhesive
The broken tip is usually glued tightly to the rod. Soften the glue to remove the tip without breaking the rod further.
- Warm the adhesive with a hair dryer on low heat.
- Do not use too much heat to avoid damage.
- Apply heat evenly around the tip area.
- Heat for about 1 to 2 minutes until the glue softens.
- Let the tip cool slightly before trying to remove it.
Careful Detachment
After softening the glue, gently remove the broken tip. Use tools that give good grip and control.
| Tool | Use |
| Pliers with soft jaws | Grip the broken tip without scratching |
| Cloth or tape | Wrap around tip for better hold |
| Light twisting and pulling | Detach the tip slowly |

Credit: www.youtube.com
Select A Replacement Tip
Fixing a broken fishing rod tip requires choosing the right replacement. Picking a good tip helps keep your rod balanced and strong.
Below are key points to consider when selecting a replacement tip for your fishing rod.
Matching Size And Style
Choose a tip that matches the size and style of your original rod tip. This ensures proper function and durability.
- Measure the diameter of the broken tip and rod end.
- Check the material type of the original tip.
- Match the style, such as single-foot or double-foot guides.
- Consider the tip’s ring size for smooth line movement.
Where To Buy Tips
You can find replacement tips at many places. Choose a reliable seller for quality parts.
| Place | Details |
| Local fishing shops | Offers hands-on advice and immediate purchase |
| Online retailers | Wide variety and easy comparison of tips |
| Rod repair specialists | Professional fitting and custom options |
Attach The New Tip
Fixing a broken fishing rod tip needs care and patience. Attaching the new tip correctly helps the rod work well again.
This guide shows how to put on the new tip with proper adhesive use and alignment.
Applying Adhesive Properly
Use the right amount of glue to hold the tip firmly. Too much glue can make a mess and too little will not hold well.
Choose a strong adhesive made for fishing rods or strong plastics. Apply it evenly inside the new tip.
- Clean the rod end before applying glue
- Put a thin layer of adhesive inside the new tip
- Do not use too much glue to avoid overflow
- Use a brush or toothpick for even spread
Aligning The Tip Correctly
Make sure the new tip lines up with the rod guides. This helps the fishing line move smoothly.
Hold the tip steady while the glue dries. Check that the tip is straight and points in the right direction.
- Match the new tip with the last guide on the rod
- Rotate the tip to align it straight with the rod
- Hold firmly until the adhesive sets
- Check alignment again before the glue fully dries

Credit: anglersresource.net
Test The Repair
After fixing a broken fishing rod tip, testing is important. This helps confirm the repair is strong and works well.
Testing your repair lets you catch problems early. It saves time and avoids further damage during fishing.
Checking Stability
Start by checking if the repaired tip feels solid. Gently press and twist the tip to see if it moves or feels loose.
- Hold the rod firmly near the repair point.
- Apply light pressure to the tip in different directions.
- Look for any cracks or signs of weakness around the fix.
- Make sure the glue or epoxy is fully set and dry.
Ensuring Proper Function
Next, test how the rod works with the repair. Cast the rod gently to see if it bends and moves naturally.
| Test Action | What to Watch For |
| Gentle casting | Rod tip moves smoothly without wobbling |
| Light bending | No cracking sounds or sudden breaks |
| Line tension test | Tip holds line firmly and flexes as normal |
| Visual inspection | Repair area shows no gaps or peeling |
Tips For Preventing Future Breaks
Keeping your fishing rod tip safe helps you enjoy fishing longer. Small actions can stop breaks before they happen.
Use care and check your rod often. These tips will guide you to protect your rod tip well.
Proper Rod Handling
Handle your fishing rod with care to avoid damage. Avoid bending the tip too much or hitting hard surfaces.
- Hold the rod by the handle, not the tip.
- Do not step on or lean the rod against sharp edges.
- Carry the rod in a protective case when not in use.
- Keep the rod away from heavy loads or pressure.
- Be gentle when casting and retrieving to reduce stress on the tip.
Regular Maintenance
Check your rod regularly for cracks or loose parts. Clean and store it properly after each use to keep it strong.
| Maintenance Task | Frequency | Purpose |
| Inspect rod tip and guides | Before each trip | Find cracks or wear early |
| Clean rod with fresh water | After every use | Remove dirt and salt |
| Check reel seat and connections | Monthly | Keep parts tight and secure |
| Store in dry, cool place | Always | Prevent warping and rust |

Credit: www.reddit.com
Frequently Asked Questions
How Do I Identify A Broken Rod Tip?
To identify a broken rod tip, inspect for cracks, splinters, or bends. A damaged tip may not align with the rest of the rod. It can cause casting issues or line fraying. Regularly checking your rod can prevent further damage.
What Tools Do I Need For Repair?
For a rod tip repair, you’ll need super glue, replacement tip tops, pliers, and a lighter. These tools help secure and align the new tip effectively. Ensure you have all tools ready before starting the repair process.
Can I Fix A Rod Tip Without Professional Help?
Yes, you can fix a rod tip yourself. With the right tools and replacement parts, it’s straightforward. Follow a step-by-step guide to ensure proper alignment and secure fitting. This DIY approach saves money and time.
How Long Does A Rod Tip Repair Take?
A rod tip repair typically takes 15 to 30 minutes. Preparation and careful alignment are key for a successful fix. The process is quick with the right tools and replacement parts. Ensure adhesive dries fully before using your rod.
Conclusion
Fixing a broken fishing rod tip is easier than it seems. Small steps can bring your rod back to life. Use the right tools and take your time. A repaired tip saves money and keeps you fishing longer. Practice patience, and soon your rod will feel like new.
Enjoy your next fishing trip with confidence and ease. Keep your gear ready and your passion alive. Simple fixes make big differences out on the water.