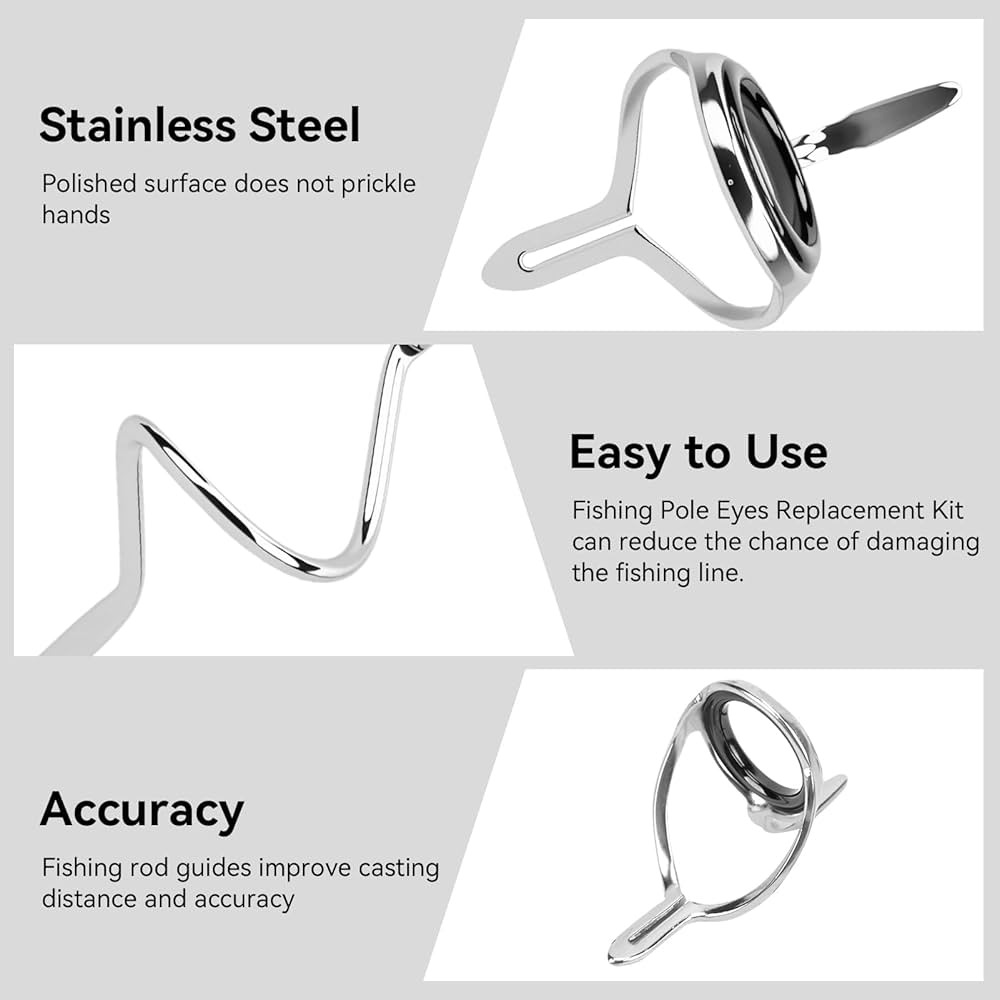
Have you ever been out fishing when your rod suddenly feels off? The problem might be your fishing rod guides.
These small rings play a big role in casting smoothly and keeping your line safe. When they get damaged or misaligned, your fishing experience can quickly turn frustrating. But don’t worry—you don’t need to buy a new rod or pay for expensive repairs.
You’ll learn simple, step-by-step ways to fix your fishing rod guides yourself. Keep reading, and you’ll be back to casting like a pro in no time.

Credit: www.amazon.com
Identifying Damaged Guides
Fishing rod guides help the line move smoothly. Damaged guides can harm your line and reduce casting quality.
It is important to check your guides often. Spotting damage early keeps your rod in good shape.
Common Guide Problems
Guides can get worn or broken from use. Look for cracks, bends, or missing rings.
- Cracked or chipped guide rings can cut your line.
- Bent frames cause poor line flow and casting issues.
- Loose or missing guides reduce rod performance.
- Rust or corrosion weakens metal parts.
Damaged guides often cause line frays or breaks. Fixing them can save your fishing gear.
Tools For Inspection
Use simple tools to check your rod guides well. A good inspection finds small problems fast.
- Bright light helps you see cracks or chips clearly.
- A magnifying glass shows fine damage on guide rings.
- Soft cloth can clean guides for better inspection.
- A thin, smooth object tests for rough spots inside guides.
Inspect guides carefully before and after fishing trips. This keeps your rod ready to use.
Gathering Repair Materials
Fixing fishing rod guides needs the right materials. Good tools and parts make the repair easier and last longer.
Gather everything before starting. This helps avoid delays and mistakes during the repair.
Essential Tools
You need some basic tools to fix fishing rod guides. These tools help remove old guides and attach new ones cleanly.
- Small screwdriver or knife
- Needle-nose pliers
- Fine sandpaper or emery cloth
- Thread scissors
- Brush for epoxy application
- Heat source (like a lighter) to set epoxy
Selecting Replacement Guides
Choose guides that match your fishing rod in size and style. Wrong guides can affect casting and rod balance.
| Guide Type | Use | Material |
|---|---|---|
| Single-foot | Lightweight rods | Stainless steel or ceramic |
| Double-foot | Heavy rods for big fish | Aluminum or stainless steel |
| Tip-top guide | Rod tip replacement | Ceramic ring |
Choosing Epoxy And Thread
Use strong thread and epoxy to secure guides. The thread wraps tightly, and epoxy seals and protects the repair.
- Use nylon or polyester thread for wrapping
- Pick epoxy made for rods or marine use
- Choose clear or colored epoxy to match your rod
- Get slow cure epoxy for more working time
Removing Old Guides
Fishing rod guides can wear out or get damaged over time. Removing old guides is the first step in fixing them. This process needs care to avoid harming the rod.
Softening the thread wraps helps loosen the guides. Removing them carefully keeps the rod in good shape for new guides.
Softening Thread Wraps
The thread wraps hold the guides tightly on the rod. They can be hard and brittle after years of use. Softening these wraps makes removal easier.
Use a small amount of heat to soften the thread without burning it. A heat gun or hair dryer works well. Keep the heat moving to avoid damage.
- Apply gentle heat to the thread wraps
- Keep the heat moving to prevent burns
- Check softness by gently pressing the thread
- Stop heating once the thread feels soft
Careful Guide Removal
After softening, slowly remove the guides. Use tweezers or a small tool to lift the thread wraps. Pull the guide off gently to avoid scratching the rod.
Take your time during removal. If the guide feels stuck, soften the thread again. This prevents damage and makes the process safer.
- Use tweezers or a small tool to lift thread wraps
- Gently pull the guide from the rod
- Reapply heat if the guide is hard to remove
- Work slowly to avoid scratches or breaks
Preparing The Rod Blank
Fixing fishing rod guides starts with preparing the rod blank. A clean and smooth surface helps guides stick better.
Take time to prepare the rod blank carefully. This will make your repair last longer and work well.
Cleaning The Surface
Remove old glue, dirt, and grease from the rod blank. Use rubbing alcohol or a mild cleaner.
Wipe the area with a clean cloth until it looks clean and dry. This helps the new glue hold tightly.
- Use rubbing alcohol on a soft cloth
- Clean the area where the guide will attach
- Let the rod dry completely before next steps
Sanding For Adhesion
Lightly sand the cleaned area with fine sandpaper. This roughens the surface for better glue grip.
Be gentle to avoid damaging the rod blank. Sand only enough to create a slightly rough texture.
- Use 400 to 600 grit sandpaper
- Sand in a circular motion
- Remove sanding dust with a clean cloth
Installing New Guides
Replacing fishing rod guides can restore your rod’s performance. Installing new guides requires care and patience.
This guide covers key steps to help you install new guides properly on your fishing rod.
Aligning The Guides
Start by placing the new guides along the rod blank. Make sure they line up straight from the reel seat to the tip.
- Lay the rod on a flat surface.
- Position each guide in its original spot or spaced evenly.
- Check alignment by looking down the rod’s length.
- Adjust until all guides form a straight line.
Wrapping The Thread
Wrap the guide feet securely with thread to hold it in place. Use tight, neat wraps for strength and appearance.
- Start wrapping a few millimeters before the guide foot.
- Keep tension steady to avoid loose wraps.
- Overlap each wrap slightly to cover the foot fully.
- Finish with several tight wraps and tie off carefully.
Applying Epoxy Coating
Apply epoxy over the thread wraps to protect and secure the guide. Use a thin, even layer for the best finish.
| Epoxy Type | Drying Time | Recommended Use |
| Two-part epoxy | 4-6 hours | Strong, durable finish |
| UV-cure epoxy | Minutes under UV light | Quick curing, clear coating |
| Brush-on epoxy | 12-24 hours | Easy application, smooth finish |

Credit: www.amazon.com
Drying And Curing
Fixing fishing rod guides requires careful drying and curing to ensure durability. Proper drying helps the glue or epoxy set well. It also prevents damage to the rod.
Following the right steps can save you from needing to redo the repair. Here, we explain how to create the best drying conditions and avoid common mistakes.
Optimal Drying Conditions
Drying your fishing rod guides in the right environment is key. The temperature, airflow, and humidity all affect the curing process.
- Keep the rod in a warm place, ideally between 70°F and 80°F (21°C to 27°C).
- Ensure good airflow around the rod to help the glue dry evenly.
- Avoid direct sunlight, which can cause uneven curing or damage the epoxy.
- Keep humidity low, around 40% to 60%, to prevent moisture from weakening the bond.
- Allow enough time for the glue or epoxy to harden fully, usually 24 to 48 hours.
Avoiding Common Mistakes
Many beginners rush the drying process or expose the rod to bad conditions. These errors weaken the repair or ruin the rod guides.
| Mistake | Effect | How to Avoid |
| Drying in cold places | Glue stays soft and weak | Use a warm room for curing |
| Covering rod tightly | Air cannot circulate | Leave space for airflow |
| Exposing to direct sunlight | Epoxy may crack or discolor | Dry in shaded, indirect light |
| Touching guides before cured | Disturbs glue, causes weak bond | Wait full curing time before handling |
Testing The Repair
After fixing your fishing rod guides, testing ensures they work well. This step checks if the repair is strong and smooth.
Proper testing helps avoid line damage and improves your fishing experience. Focus on guide stability and line flow during testing.
Checking Guide Stability
Hold the rod firmly and gently shake it near each repaired guide. Look for any movement or wobbling in the guides.
- Grip the rod tightly to feel loose guides
- Push and pull each guide lightly to test strength
- Check for cracked or broken guide frames
- Make sure the glue or epoxy holds the guide firmly
- Repeat this test several times to confirm stability
Ensuring Smooth Line Flow
Cast a line through the repaired guides to check for smooth movement. Watch for any snags or rough spots that can damage the line.
| Test Action | What to Look For | Fix Needed If… |
|---|---|---|
| Pull line through guides slowly | Line moves freely without catching | Line catches or stops at guide |
| Cast and retrieve line | Line flows smoothly and evenly | Line hesitates or jerks during cast |
| Inspect guide rings closely | Rings are smooth and unbroken | Rings are chipped, cracked, or rough |
Maintenance Tips
Fishing rod guides help your line move smoothly. Keeping them in good shape makes fishing easier.
Regular care stops damage and keeps your rod working well for a long time.
Regular Inspections
Check your fishing rod guides often for cracks or bends. Look closely at each ring and frame.
Use a soft cloth to clean dirt or salt from the guides after every fishing trip.
- Examine guides for chips or broken parts
- Feel for rough spots that can cut your line
- Clean with fresh water and dry well
- Check guide frames for looseness or rust
Preventing Future Damage
Handle your rod carefully to avoid bending or breaking the guides. Store it in a safe place.
Use rod covers or cases to protect guides during transport and storage.
- Carry the rod in a protective tube or sleeve
- Do not lean the rod against hard surfaces
- Avoid dropping or striking the rod
- Keep the rod away from extreme heat or sunlight

Credit: www.reddit.com
Frequently Asked Questions
How Do I Identify Damaged Fishing Rod Guides?
Inspect your fishing rod for cracks, chips, or rust on the guides. If the line snags or frays, it indicates damage. Regularly checking for these signs helps maintain your rod’s performance and longevity, ensuring a smooth fishing experience.
What Tools Do I Need To Fix Rod Guides?
To fix rod guides, you’ll need a heat gun, pliers, and epoxy resin. A thin thread and a guide foot are also essential. These tools ensure a secure fit and smooth line flow, enhancing your fishing experience.
How Do I Remove Broken Rod Guides?
Heat the guide’s foot with a heat gun to soften the adhesive. Carefully use pliers to remove the guide. Ensure you don’t damage the rod blank during the process. This method ensures a clean removal, ready for a new guide.
Can I Repair Rod Guides Without Professional Help?
Yes, you can repair rod guides yourself with basic tools and patience. Follow step-by-step guides and use the right materials. DIY repairs can save costs and enhance your understanding of rod maintenance, ensuring a longer lifespan for your equipment.
Conclusion
Fixing fishing rod guides helps keep your rod strong and reliable. Small cracks or bends can cause line breaks or poor casting. Regular checks and quick repairs save money and extend rod life. Use simple tools and follow step-by-step instructions carefully.
With patience, anyone can fix guides at home. Keep your fishing gear ready for every trip. A well-maintained rod makes fishing more fun and effective. Don’t wait for bigger problems—start fixing guides today.