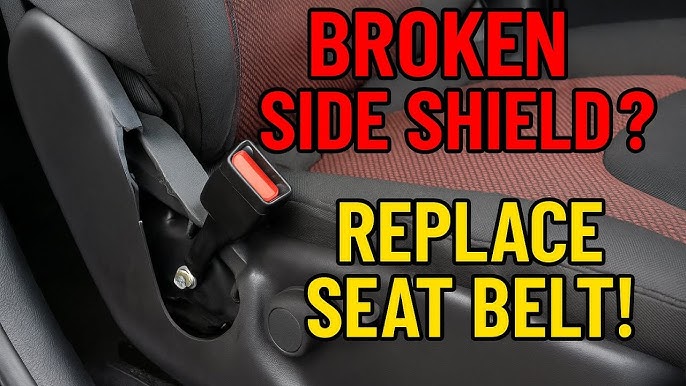
Your car’s seat belt is more than just a strap—it’s your first line of defense in an accident. When it stops working properly, it can leave you feeling unsafe and frustrated.
But don’t worry—fixing your seat belt might be easier than you think. You’ll discover simple steps to get your seat belt back in perfect shape. Keep reading, and you’ll soon feel confident and secure every time you hit the road.
Common Seat Belt Issues
Seat belts are important for safety in cars. They can sometimes have problems that stop them from working right.
Knowing common seat belt issues helps you fix them quickly. This keeps you and your passengers safe on the road.
Latch Problems
Latch problems happen when the seat belt does not click in or stay locked. This can stop the belt from holding you in place.
Sometimes dirt or debris blocks the latch. Other times, the latch parts wear out or break with use.
- Clean the latch area regularly
- Check for broken or bent parts
- Replace the latch if it does not lock securely
Retractor Malfunctions
The retractor pulls the seat belt back when you release it. If it stops working, the belt may stay loose or get stuck.
Common causes include dirt buildup, worn springs, or damage inside the retractor mechanism.
- Check if the belt pulls out and retracts smoothly
- Clean the belt and retractor area carefully
- Replace the retractor if it does not work properly
Belt Fraying And Damage
Belt fraying happens when the fabric wears thin or tears. Damage weakens the belt and lowers safety.
Sharp edges, dirt, or constant rubbing can cause damage over time. Always inspect the belt for signs of wear.
- Look for cuts, tears, or loose threads
- Keep the belt clean and dry
- Replace the belt if it shows serious damage

Credit: blog.myairbags.com
Tools Needed For Repair
Fixing a seat belt in your car requires the right tools. Having proper tools helps you do the job safely and correctly.
This guide explains the basic hand tools, replacement parts, and safety equipment you need for seat belt repair.
Basic Hand Tools
You need simple hand tools to remove and install parts of the seat belt. These tools help you open panels and unscrew bolts.
- Screwdrivers (flathead and Phillips)
- Socket wrench set
- Pliers
- Trim removal tools
- Torx drivers
Replacement Parts
Some seat belt parts may need replacing if they are worn or broken. Using the right parts ensures the seat belt works well.
- New seat belt webbing
- Buckles and latches
- Retractor mechanism
- Anchor bolts and screws
- Plastic covers and trim pieces
Safety Equipment
Safety gear protects you during the repair. It also helps prevent damage to your car’s interior.
- Work gloves to protect your hands
- Safety glasses to shield your eyes
- Flashlight for better visibility
- Protective mat to avoid scratches
Preparing For Seat Belt Repair
Fixing a seat belt needs careful preparation. This helps you work safely and avoid damage.
First, you must disconnect the battery and access the seat belt parts. These steps protect you and your car.
Disconnecting The Battery
Disconnecting the battery stops power flow in the car. This prevents electric shocks and airbag issues.
- Find the negative battery terminal. It usually has a black cable.
- Use a wrench to loosen the nut on the terminal.
- Remove the cable from the battery post carefully.
- Make sure the cable does not touch the battery or metal parts.
- Wait a few minutes before working on the seat belt.
Accessing The Seat Belt Mechanism
You need to reach the seat belt parts inside the car. This lets you check and fix any problems.
| Step | Action |
| Remove Covers | Take off plastic panels around the seat belt area. |
| Unbolt Seat Belt | Use a socket wrench to remove bolts holding the belt. |
| Check Retractor | Look at the retractor for damage or dirt. |
| Clean Parts | Wipe off dust and grease before repairs. |

Credit: www.reddit.com
Fixing A Stuck Retractor
A seat belt retractor can get stuck and stop working properly. This can be unsafe. Fixing it is often simple and can save a trip to the mechanic.
This guide explains how to clean, lubricate, and test the retractor to get it working again.
Cleaning The Retractor
Dirt and debris can block the retractor’s movement. Cleaning it helps the belt move smoothly.
- Locate the retractor inside the car pillar.
- Remove the cover to access the mechanism.
- Use a soft brush to clear dust and dirt.
- Wipe the area with a damp cloth.
- Let it dry before reassembling.
Lubricating Moving Parts
Lubrication reduces friction inside the retractor. Use a suitable lubricant for plastic and metal parts.
| Lubricant Type | Use Notes |
|---|---|
| Silicone Spray | Safe for plastic parts, water resistant |
| White Lithium Grease | Good for metal parts, long-lasting |
| Graphite Powder | Dries quickly, no sticky residue |
Apply lubricant sparingly to all moving parts inside the retractor. Avoid over-applying to prevent dirt buildup.
Testing Retraction
After cleaning and lubricating, test the belt’s retraction to ensure it works smoothly.
- Pull the seat belt out slowly until it stops.
- Let go and watch if it retracts smoothly.
- Repeat several times to confirm consistent movement.
- If it still sticks, check for damage or dirt again.
- Reassemble the cover and test once more.
Repairing Or Replacing The Latch
The seat belt latch is an important safety part in your car. It holds the belt in place during a drive. If the latch breaks or stops working, you must fix or replace it right away. This guide will help you do it safely and correctly.
Follow each step carefully to inspect, remove, and install the latch. Use the right tools to avoid damage. Safety is the top priority when working with seat belts.
Inspecting The Latch
First, look closely at the seat belt latch. Check for cracks, broken parts, or dirt inside. Try clicking the seat belt into the latch to see if it locks firmly. If it feels loose or won’t click, the latch needs repair or replacement.
- Look for visible damage or cracks.
- Check if the latch clicks and locks securely.
- Clean the latch if it is dirty or sticky.
- Test the release button to make sure it works well.
Removing The Old Latch
Remove the damaged latch carefully to avoid hurting the seat belt or car parts. You will need a wrench or screwdriver to take out the bolts holding the latch. Keep all removed parts safe if you need them later.
- Locate the bolts securing the latch to the car frame.
- Use the correct tool to loosen and remove the bolts.
- Gently pull the latch away from the seat belt strap.
- Check the seat belt strap for any damage before installing the new latch.
Installing A New Latch
Put the new latch in place and secure it tightly. Make sure it matches the old latch size and type. Test the latch to ensure it locks and releases smoothly. A proper latch keeps you safe in your car.
| Task | Details |
| Match latch | Use the same type and size as the old one |
| Attach latch | Secure bolts tightly with a wrench |
| Test latch | Check locking and releasing actions |
| Inspect seat belt | Ensure strap is undamaged and properly fixed |
Replacing The Seat Belt Webbing
Seat belts keep you safe in a car. If the belt webbing is worn out or damaged, replace it. This guide shows how to replace the seat belt webbing safely.
Follow these clear steps to remove the old webbing, measure and cut the new webbing, and attach it properly.
Removing The Old Belt
First, make sure the car is off and parked. Locate the bolts holding the seat belt retractor and buckle. Use a wrench to remove these bolts carefully.
Pull the old webbing out slowly from the retractor. Check for any hidden screws or clips that may hold the belt in place.
- Turn off the car and park it safely
- Remove bolts holding the retractor and buckle
- Carefully pull out the old webbing
- Check for extra clips or screws
Measuring And Cutting New Webbing
Measure the length of the old webbing you removed. Add a few extra inches to allow room for attaching it. Use a measuring tape for accuracy.
Cut the new seat belt webbing with sharp scissors or a fabric cutter. Make sure the cut is straight to avoid fraying edges.
- Measure old webbing length carefully
- Add extra length for attachment
- Use sharp scissors to cut new webbing
- Cut straight edges to prevent fraying
Attaching New Webbing Securely
Feed the new webbing into the seat belt retractor. Make sure it lies flat without twists. Secure the end with the bolt or clip removed earlier.
Test the belt by pulling it out and letting it retract. It should move smoothly and lock when pulled hard.
- Insert new webbing into retractor carefully
- Ensure webbing is flat and untwisted
- Tighten bolts or clips securely
- Test belt for smooth movement and locking
Reassembling And Testing
Fixing a car seat belt involves careful reassembly and testing to ensure safety. You must put all parts back correctly and check the belt’s function.
Testing the seat belt after repair helps confirm it works well and protects passengers. Follow these steps to finish the job safely.
Reinstalling Components
Start by placing the seat belt parts where they belong. Use the screws and clips you removed earlier.
Make sure the belt retractor, buckle, and anchor points are tight and secure. Loose parts can cause failure.
- Align the belt retractor in its slot
- Attach the buckle firmly to the car frame
- Screw or clip the anchor points tightly
- Check that no parts block the belt path
Checking Belt Functionality
Pull the seat belt slowly to test its movement. It should extend smoothly without sticking.
Let the belt retract on its own. It must pull back quickly and fully to the starting point.
- Pull the belt out completely
- Release and watch it retract smoothly
- Lock the belt by pulling sharply
- Check the buckle locks and releases easily
Safety Checks
Inspect all parts for damage or wear after reassembly. Replace any worn pieces to ensure safety.
Test the seat belt by sitting and buckling up. It should hold firmly and not loosen during movement.
- Look for cracks or frays on the belt
- Ensure the buckle clicks and holds tight
- Check that the belt locks in sudden pulls
- Confirm no loose screws or clips remain
When To Seek Professional Help
Fixing a seat belt in a car can be simple or hard depending on the problem. Some issues need a trained mechanic to keep you safe. Knowing when to get help is key.
Small problems like twisted belts or dirt can be fixed at home. But some repairs need special tools and skills. Read on to learn when to call a pro.
Complex Repairs
Some seat belt problems are not easy to fix. These include broken retractors, damaged buckles, or wiring issues in seat belt sensors. Fixing these requires experience and the right tools.
- Broken or jammed retractor mechanism
- Frayed or cut seat belt webbing
- Damaged seat belt buckle or release button
- Seat belt sensor or wiring faults
- Installation of new seat belt parts
Safety Concerns
Safety is the main reason to get professional help. A faulty seat belt can fail in an accident and cause injury. Only experts can ensure your seat belt works right after repair.
| Safety Issue | Why It Needs a Pro |
| Seat belt fails to lock | Can cause injury in crash |
| Seat belt stuck or hard to pull | May not protect you properly |
| Seat belt light stays on | Sensor or wiring problem |
| Seat belt webbing is torn | Weakens belt strength |

Credit: www.youtube.com
Frequently Asked Questions
How Do I Fix A Stuck Car Seat Belt?
First, inspect the belt for twists or debris. Use compressed air to clean the retractor. Gently pull the belt out and let it retract slowly to reset it.
Why Is My Seat Belt Not Retracting Fully?
A dirty or damaged retractor often causes this. Clean the mechanism carefully. If damaged, replacing the retractor might be necessary for proper function.
Can I Repair A Frayed Seat Belt Myself?
Minor frays can be fixed with heavy-duty thread and a needle. However, for safety, replace severely damaged seat belts immediately.
What Tools Do I Need To Fix A Seat Belt?
Common tools include screwdrivers, pliers, and a socket wrench. You may also need replacement parts like a new retractor or buckle.
Conclusion
Fixing a car seat belt is important for safety. Simple steps can solve most common problems quickly. Check the belt for twists, jams, or dirt. Clean and adjust parts as needed. Regular care keeps the seat belt working well. Don’t ignore signs of wear or damage.
A working seat belt protects you every time you drive. Stay safe by fixing issues early. Your car and passengers deserve that care. Easy fixes save time and money too. Take action today for a safer ride tomorrow.