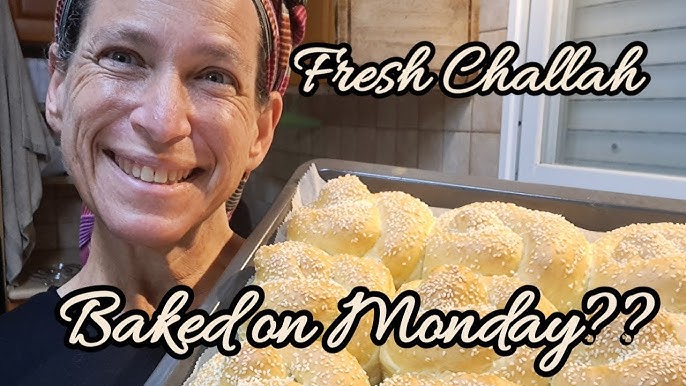
Have you ever wondered how to keep your delicious challah fresh for longer? Freezing challah is a simple trick that can save you time and reduce waste.
Whether you bake it yourself or buy it from a store, knowing the right way to freeze challah means you’ll always have soft, tasty bread ready when you want it. In this guide, you’ll discover easy steps to freeze your challah perfectly, so it tastes just as good as fresh.
Keep reading to learn how to make your challah last without losing any of its wonderful flavor or texture.

Credit: www.thefreshcooky.com
Choosing The Right Challah
Choosing the right challah to freeze can make a big difference in how well it keeps and tastes later. The type of challah you pick affects its texture, freshness, and how it responds to freezing. Let’s look closely at what kind of challah works best for freezing.
Fresh Vs. Store-bought
Freshly baked challah often freezes better because it hasn’t been exposed to preservatives or packaging that can change its texture. If you have access to fresh challah, try freezing it within a day or two of baking to lock in moisture and flavor.
Store-bought challah might be more convenient, but it sometimes contains additives that affect how it freezes and thaws. Check the ingredient list—if it has a lot of preservatives, the texture might be less satisfying after freezing.
Have you noticed how fresh challah feels softer and more fragrant? That’s a good sign it will come back nicely after thawing.
Ideal Texture For Freezing
The best challah for freezing has a slightly firm but soft texture. If it’s too fresh and soft, it may become mushy when thawed. On the other hand, challah that’s a bit stale but not hard can revive nicely after freezing.
You want a loaf that holds its shape and has a slight chew without being dry. This texture helps it maintain its integrity through freezing and thawing.
Next time you buy or bake challah, gently press the crust—does it spring back? If yes, it’s probably a good candidate for freezing. If it feels too soft or squishy, consider eating it fresh instead.
Preparing Challah For Freezing
Preparing your challah properly before freezing is key to keeping its delicious texture and flavor intact. How you handle the bread right after baking and before freezing can make a big difference in how it tastes when thawed. Let’s look at some practical ways to get your challah ready for the freezer.
Slicing Or Keeping Whole
Decide if you want to freeze your challah whole or sliced. Freezing it whole helps preserve moisture better, but it takes longer to thaw. Slicing the bread before freezing lets you grab just the amount you need, saving time and reducing waste.
Try slicing the challah into thick pieces if you plan to toast it later. This way, each slice will thaw quickly without drying out. Think about your typical use—do you eat it fresh in big pieces or prefer quick slices for snacks?
Wrapping Techniques
Proper wrapping is crucial to avoid freezer burn and keep your challah fresh. Start by wrapping the bread tightly in plastic wrap to lock in moisture. Make sure there are no air pockets around the bread.
After wrapping in plastic, add a layer of aluminum foil or place it inside a freezer bag. This double protection helps shield the bread from harsh freezer air. I once skipped the foil, and my challah tasted dry after thawing—don’t make the same mistake!
Using Airtight Containers
Using airtight containers is another smart way to freeze challah, especially if you’ve sliced it already. Containers prevent the bread from getting squished or absorbing odors from other foods.
Choose containers that fit your bread snugly but don’t crush it. If you don’t have containers, heavy-duty freezer bags with the air squeezed out work well too. How do you store your bread now? Trying airtight containers might surprise you with better results.
Freezing Methods
Freezing challah helps keep its fresh taste and soft texture for longer. Choosing the right freezing method protects the bread from freezer burn. It also makes thawing easier and faster. Proper freezing preserves challah’s flavor and crumb structure.
Freezing In Portions
Cut challah into smaller pieces or slices before freezing. Wrap each portion tightly in plastic wrap. Place wrapped pieces into a freezer-safe bag or container. This method allows you to thaw only what you need. It reduces waste and keeps the rest fresh. Label the bag with the date to track storage time.
Flash Freezing Tips
Flash freezing prevents challah slices from sticking together. Lay slices flat on a baking sheet lined with parchment paper. Make sure slices do not touch each other. Place the sheet in the freezer for 1 to 2 hours. Once frozen, transfer slices to a freezer bag or container. This method keeps slices separate for easy use.

Credit: lexiscleankitchen.com
Thawing Challah Properly
Thawing challah properly is just as important as freezing it correctly. How you bring your frozen bread back to life affects its texture and flavor. Taking the right approach ensures your challah tastes fresh and soft, almost like it just came out of the oven.
Room Temperature Thawing
The gentlest way to thaw challah is by leaving it at room temperature. Take the bread out of the freezer and keep it wrapped in plastic or foil to prevent moisture loss.
Allow it to sit for about 3 to 4 hours. This slow thaw keeps the crumb soft and prevents it from drying out.
Have you noticed how bread sometimes gets tough when rushed? Patience here makes a real difference.
Using An Oven To Refresh
If you want your challah warm and slightly crispy on the outside, the oven is your best friend. Preheat your oven to 350°F (175°C).
Unwrap the challah and place it on a baking sheet. Heat it for 10 to 15 minutes, checking occasionally to avoid over-drying.
This method restores that fresh-baked feel, perfect if you’re serving it immediately.
Microwave Thawing Tips
Microwaving can be tricky—it’s fast but risks making your challah chewy or hard. Use the microwave only if you’re in a hurry.
Wrap a damp paper towel around the bread to add moisture. Microwave on medium power for 15 to 30 seconds, then check its softness.
Repeat in short bursts if needed, but be careful not to overdo it. Have you ever microwaved bread that turned into a rubbery mess? These tips help avoid that.
Maintaining Freshness Post-thaw
Freezing challah preserves its delightful flavor and texture, but the real challenge lies in keeping it just as fresh after thawing. How you handle your challah once it’s thawed can make a noticeable difference in taste and softness. Let’s look at practical ways to maintain that fresh-baked quality, so your challah feels like it just came out of the oven.
Storage After Thawing
Once your challah has thawed, treat it like fresh bread to keep it from drying out. Wrap it tightly in plastic wrap or store it in an airtight container. This helps lock in moisture and slows down staleness.
Keep the wrapped challah at room temperature if you plan to eat it within a couple of days. Avoid refrigerating it, as cold air can make the bread crumbly and hard. If you don’t finish it quickly, consider freezing smaller portions for future use.
Reheating For Best Texture
Reheating your thawed challah can revive its soft crumb and slightly crisp crust. Wrap the bread in foil and warm it in the oven at 350°F (175°C) for about 10 minutes. This method evenly heats the bread without drying it out.
If you want to enjoy challah quickly, a short microwave burst works too—wrap it in a damp paper towel and heat for 15-20 seconds. However, avoid overheating, which can turn the bread tough or chewy.
Have you ever noticed how freshly reheated challah can almost taste like it just came out of the bakery? Give these reheating tips a try and see if your leftovers can surprise you.

Credit: lexiscleankitchen.com
Common Mistakes To Avoid
Freezing challah is a great way to keep it fresh longer. Avoid mistakes that harm its texture and taste. Simple errors can make your challah dry or freezer-burned. Knowing what to avoid helps you enjoy soft, delicious bread later.
Freezing Too Soon
Challah needs to cool completely before freezing. Warm bread traps moisture, causing ice crystals. These crystals damage the bread’s texture. Wait until challah is at room temperature. This keeps it soft and fresh after thawing.
Improper Wrapping
Wrapping challah poorly lets air inside the package. Air causes freezer burn and dryness. Use airtight wrap like plastic wrap or foil. Double wrapping adds extra protection. Place wrapped challah in a freezer bag. Remove as much air as possible before sealing.
Repeated Thawing And Refreezing
Thawing and refreezing challah breaks down its structure. Each freeze-thaw cycle dries the bread. Store challah in small portions to avoid this. Only thaw what you plan to eat. This keeps the bread’s texture intact longer.
Additional Tips For Long-term Storage
Freezing challah is a great way to keep your homemade bread fresh for weeks. But to truly make the most of long-term storage, you need to go beyond just tossing it in the freezer. Proper techniques can protect the flavor and texture, so your challah tastes as good as the day you baked it.
Labeling And Dating
Have you ever found a mystery bag in your freezer and wondered how long it’s been there? Labeling your challah with the date you froze it can save you from that confusion. Use a permanent marker to write the date and contents on the packaging.
This simple step helps you keep track of freshness and avoid freezer burn. It also makes meal planning easier—you’ll know exactly when to use each loaf. Imagine reaching for your challah and feeling confident it’s still delicious.
Using Freezer-friendly Bags
Choosing the right storage bag is key to preserving your challah’s softness. Look for thick, freezer-safe bags that seal tightly to keep out moisture and air. Avoid regular plastic wrap alone—it doesn’t provide enough protection on its own.
Double wrapping can also help. Place your challah in parchment paper first, then put it inside a freezer bag. This extra layer guards against freezer burn and keeps your bread tasting fresh.
Have you tried vacuum sealing? It’s an excellent option if you freeze challah often. Removing air significantly extends shelf life and maintains texture.
Frequently Asked Questions
How Do I Properly Freeze Challah Bread?
To freeze challah, first let it cool completely. Wrap tightly in plastic wrap, then place in a freezer bag. Remove excess air to prevent freezer burn. Freeze up to 3 months for best taste and texture.
Can I Freeze Challah Dough Before Baking?
Yes, you can freeze challah dough after the first rise. Wrap it tightly and freeze for up to 2 weeks. Thaw overnight in the fridge before shaping and baking.
How Do I Thaw Frozen Challah Bread?
Thaw frozen challah by leaving it at room temperature for 2-3 hours. For quicker thawing, use a microwave on low power for short intervals. Avoid overheating to keep the bread soft and fresh.
Does Freezing Challah Affect Its Texture Or Taste?
Freezing slightly changes texture, making challah a bit denser. Proper wrapping helps preserve taste and softness. Toasting or warming after thawing restores freshness and flavor.
Conclusion
Freezing challah keeps it fresh for later enjoyment. Follow these easy steps. Always cool the bread completely. Slice it before freezing for convenience. Wrap it tightly in plastic wrap. Then, use a freezer-safe bag for extra protection. This prevents freezer burn.
Label the bag with the date. It helps track freshness. Thaw at room temperature when ready to eat. You can also warm it in the oven for a fresh taste. Enjoy your delicious challah anytime. With proper storage, it remains tasty and delightful.
Happy baking and freezing!