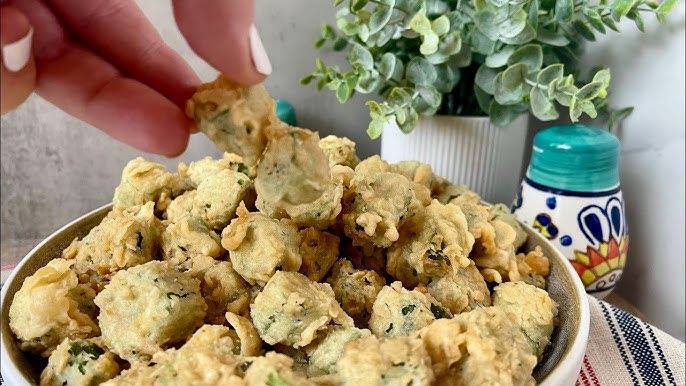
Have you ever found yourself craving the crispy goodness of fried okra, only to realize that fresh okra isn’t in season? Don’t let that stop you from enjoying one of your favorite dishes.
Freezing okra is a simple solution that keeps it fresh and ready for frying whenever your heart desires. Imagine having that delicious taste at your fingertips year-round, without any of the hassle. In this guide, you’ll discover how to freeze okra perfectly, ensuring it retains its flavor and texture for the ultimate fried okra experience.
Stick around to learn the secrets that will transform your kitchen into a hub of endless culinary possibilities.

Credit: homeatcedarspringsfarm.com
Choosing Fresh Okra
Choosing fresh okra is the first step to making crispy fried okra. Fresh pods ensure a better taste and texture. They hold their shape well during cooking and freezing. Picking the right okra enhances the final dish’s flavor and crunch.
Selecting The Best Pods
Look for okra pods that are bright green and firm. The pods should feel smooth and slightly soft to touch. Small to medium size pods work best for frying. These are tender and cook evenly. Avoid pods with dark spots or blemishes.
Avoiding Overripe Okra
Overripe okra feels hard and looks dull. The pods may have brown or dry tips. Large pods tend to be tough and stringy inside. These will not fry well and become chewy. Pick pods that snap easily when bent.

Credit: littlesproutslearning.co
Preparing Okra For Freezing
Preparing okra for freezing is key to keeping its fresh taste and texture. The process starts with cleaning the okra properly. Then, you cut it to the right size for frying. These steps help the okra stay crisp and delicious after freezing.
Washing And Drying
Rinse the okra pods under cold water gently. Remove any dirt or debris without bruising the pods. Spread the okra out on a clean towel or paper towels. Pat them dry carefully to remove all moisture. Dry okra freezes better and avoids ice crystals forming.
Trimming And Slicing
Cut off the stem ends of the okra pods. Avoid cutting into the pod too deeply to keep the seeds inside. Slice the okra into pieces about ½ inch thick. Uniform slices cook evenly when fried later. You can slice lengthwise or into rounds, based on your recipe.
Blanching Techniques
Blanching is a vital step before freezing okra for fried okra. It helps keep the okra fresh and crisp. This process stops enzymes that cause spoilage. Proper blanching preserves the okra’s color, flavor, and texture. It also reduces the sliminess that okra can have when cooked.
Why Blanch Okra
Blanching slows down natural enzyme activity. This prevents the okra from becoming mushy or discolored. It keeps the okra firm and tasty after freezing. Without blanching, the okra might lose its good texture. It also helps remove dirt and kills bacteria.
Step-by-step Blanching Process
- Fill a large pot with water and bring to a boil.
- Trim the okra by cutting off the stems.
- Place okra into boiling water carefully.
- Let it boil for 3 to 4 minutes.
- Stir gently to ensure even blanching.
Cooling And Draining
- Prepare a large bowl of ice water.
- Remove the okra from boiling water quickly.
- Place okra immediately into ice water.
- Cool for 3 to 5 minutes to stop cooking.
- Drain the okra well using a colander or paper towels.
Freezing Methods
Freezing okra properly keeps it fresh and tasty for fried okra dishes later. The right freezing methods help maintain okra’s texture and flavor. This makes your fried okra crispy and delicious. Two key steps are flash freezing and proper packaging.
Flash Freezing For Crispiness
Flash freezing stops okra pods from sticking together. It also locks in freshness and texture. To flash freeze, spread okra pieces in a single layer on a baking sheet. Place the sheet in the freezer for 2-3 hours. Once frozen solid, transfer the okra to storage bags. This process helps keep the okra crisp after frying.
Packaging For Freezer Storage
Use airtight bags or containers to store frozen okra. Remove as much air as possible to prevent freezer burn. Label bags with the date for easy tracking. Keep okra in small portions for quick use. Proper packaging preserves okra quality and flavor for months.
Tips For Frying Frozen Okra
Frying frozen okra can be a game-changer for quick and tasty meals, but getting it just right requires a few tricks. How you handle frozen okra before frying makes a big difference in texture and flavor. Let’s dive into some practical tips that can help you achieve that perfect crispy bite every time.
Thawing Or Frying Directly
You might wonder if you should thaw frozen okra before frying or throw it in the hot oil straight from the freezer. Skipping the thawing step saves time and keeps the okra from becoming soggy. However, frying frozen okra directly can cause oil splatter, so be cautious and use a splatter guard.
If you prefer a less messy experience, lightly pat the okra with paper towels after thawing. This helps remove excess moisture that could make your fried okra soggy. Have you tried both ways? You might find frying directly gives a crunchier result, but thawing offers more control over texture.
Coating For Extra Crunch
Coating frozen okra properly is key to a crispy finish. A simple mix of cornmeal and flour works wonders, but adding a pinch of cayenne or smoked paprika can elevate the flavor. You can also dip okra in beaten egg or buttermilk before coating for better adhesion.
Try this tip: after coating, let the okra sit on a wire rack for 10 minutes before frying. This little step helps the coating stick better and prevents it from falling off in the oil. What’s your favorite spice to add to the coating? Experimenting with flavors can make your fried okra uniquely yours.
Ideal Frying Temperature And Time
Maintaining the right oil temperature is crucial. Aim for 350°F (175°C) to 375°F (190°C) to get a crispy exterior without burning the coating. Use a thermometer to keep the temperature steady, as fluctuating heat can lead to greasy or unevenly cooked okra.
Fry the okra in small batches to avoid overcrowding the pan, which drops the oil temperature. Usually, 3 to 5 minutes per batch is enough to achieve golden brown perfection. Have you noticed how patience during frying changes the texture? Don’t rush the process—your taste buds will thank you.

Credit: www.evolvingtable.com
Common Mistakes To Avoid
Freezing okra for fried okra is easy but can go wrong. Certain mistakes affect texture and taste. Avoid these errors to keep okra fresh and crispy.
Freezing Without Blanching
Blanching okra before freezing stops enzymes that cause spoilage. Skipping this step leads to mushy okra. Blanch in boiling water for 3-4 minutes. Then cool in ice water to keep color and flavor.
Using Wet Okra
Freezing wet okra causes ice crystals to form. This damages the texture and makes okra slimy when cooked. Always dry okra completely before freezing. Use paper towels or a clean cloth to remove moisture.
Overcrowding The Pan
When frying, overcrowding lowers the oil temperature. Okra soaks up oil and becomes greasy. Fry in small batches for even cooking and crispiness. Spread okra pieces apart for best results.
Frequently Asked Questions
How Do You Prepare Okra For Freezing?
Wash okra thoroughly and pat dry. Trim the stems without cutting into pods. Blanch in boiling water for 3 minutes, then plunge into ice water. Drain and dry completely before freezing to maintain texture and flavor for fried okra.
Can Frozen Okra Be Used Directly For Frying?
Yes, you can fry frozen okra without thawing. Frying straight from frozen helps keep it crispy. Avoid overcrowding the pan for even cooking. This method preserves okra’s texture and makes preparation quicker for fried okra recipes.
How Long Does Frozen Okra Last In The Freezer?
Frozen okra lasts up to 12 months in a freezer. Store it in airtight containers or freezer bags to prevent freezer burn. Label with the freezing date to ensure freshness. Proper storage maintains flavor and texture for delicious fried okra.
Should Okra Be Blanched Before Freezing?
Blanching okra before freezing is essential. It stops enzyme activity that causes spoilage. Blanching preserves color, flavor, and texture. Skip this step, and frozen okra may turn mushy or lose its taste during frying.
Conclusion
Freezing okra keeps it fresh and ready for frying anytime. Clean and dry the okra well before freezing to avoid ice crystals. Cut it into pieces or freeze whole, based on your recipe. Store in airtight bags to keep the flavor and texture.
Frozen okra cooks quickly and stays tasty when fried. Enjoy your fried okra anytime without the worry of spoilage. Simple steps save time and reduce food waste in your kitchen. Give frozen okra a try for easy, delicious meals.