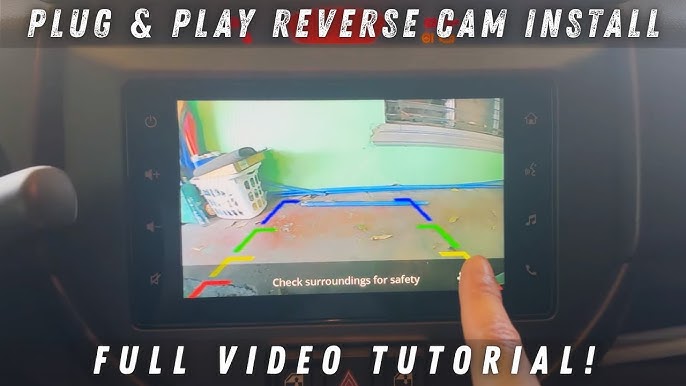
Installing a backup camera on your car can make parking and reversing safer and easier than ever before. Imagine being able to see what’s behind you clearly, avoiding those tricky blind spots that cause stress and accidents.
If you’ve ever struggled with tight parking spaces or worried about missing small obstacles, this guide is for you. You don’t need to be a tech expert or spend a fortune to add this helpful feature to your vehicle. Keep reading, and you’ll discover simple, step-by-step instructions to install a backup camera yourself—saving time, money, and giving you peace of mind every time you drive.
Choosing The Right Backup Camera
Installing a backup camera improves safety and makes parking easier. Picking the right camera is important for good results.
Consider the camera type, features, and your budget. This guide helps you choose the best backup camera for your car.
Types Of Backup Cameras
Backup cameras come in different types. Each type fits different cars and needs.
- License Plate Cameras:Attach to the license plate area. Easy to install.
- Flush Mount Cameras:Installed inside the car’s bumper for a clean look.
- Wireless Cameras:Connect without wires, reducing installation work.
- Mirror Backup Cameras:Built into rearview mirrors with a display screen.
Key Features To Consider
Look for features that improve safety and ease of use. Some features matter more than others.
- Wide Viewing Angle:Shows more area behind your car.
- Night Vision:Helps see clearly in the dark.
- Waterproof Design:Protects the camera from rain and dirt.
- Guidelines:Lines on the screen help judge distance.
- Image Quality:Clear video helps you spot obstacles easily.
Budget And Brand Options
Backup cameras vary in price. Choose one that fits your budget and has good reviews.
Popular brands offer reliable products but can cost more. Cheaper models may lack some features.
- High-end brands: Offer best quality and features.
- Mid-range brands: Balance price and performance well.
- Budget brands: Affordable but check reviews carefully.

Credit: www.amazon.com
Tools And Materials Needed
Installing a backup camera on your car needs some specific tools and materials. Getting these ready before starting makes the process smoother.
This guide lists the essential tools and extra supplies for a proper installation.
Essential Tools List
These are the main tools you will use to install the backup camera safely and correctly.
- Screwdrivers (Phillips and flathead)
- Wire stripper and cutter
- Power drill with drill bits
- Electrical tape
- Multimeter or test light
- Socket wrench set
- Trim removal tools
- Measuring tape
Additional Supplies For Installation
These extra supplies help secure the camera and complete the wiring properly.
| Supply | Purpose |
| Zip ties | Organize and secure cables |
| Electrical connectors | Connect wires safely |
| Butt connectors or soldering kit | Join wires firmly |
| Backup camera kit | Includes camera and monitor |
| Fuse tap | Connect to car’s fuse box |
| Rubber grommets | Protect wires passing through metal |
Preparing Your Vehicle
Installing a backup camera requires proper preparation of your car. This ensures the camera works correctly and lasts a long time.
Start by getting your vehicle ready. Focus on where to mount the camera and how to access the wiring system.
Locating The Mounting Spot
Choose a clear spot at the rear of your car to install the camera. The best place is usually near the license plate.
- Look for a flat, clean surface without obstructions
- Ensure the camera will have a wide view of the area behind
- Avoid spots where dirt and water collect often
- Check that the mounting area has enough space for the camera and wiring
Accessing The Wiring System
Find the wiring system to connect the camera to your car’s power and display screen. This usually involves the rear lights or the trunk area.
| Location | Purpose | Tips |
| Rear light cluster | Power source for camera | Use fuse tap for safe connection |
| Trunk interior | Run wires safely inside car | Remove interior panels carefully |
| Dashboard monitor wiring | Connect video feed | Consult car manual for access points |
Credit: dashcamtalk.com
Installing The Camera
Installing a backup camera improves safety by showing what is behind your car. This guide explains the main steps to install the camera properly.
Follow these instructions carefully to mount the camera, run the wires, and connect to a power source.
Mounting The Camera
Choose a spot near the rear license plate to mount the camera. Clean the surface so the camera sticks well. Use the supplied screws or adhesive to fix the camera in place.
- Pick a location with a clear view behind the car.
- Clean and dry the area before mounting.
- Attach the camera using screws or double-sided tape.
- Adjust the angle so the camera captures the correct view.
Running The Wires
Run the camera wires from the back to the front of the car. Hide the wires under trim panels or carpets to keep them safe. Avoid sharp edges and moving parts that can damage the wires.
| Wire Section | Tips for Routing |
| Rear to Trunk | Use existing grommets to pass wires safely |
| Trunk to Cabin | Hide wires under floor mats or panels |
| Cabin to Dashboard | Secure wires to avoid interference with controls |
Connecting To Power Source
Connect the camera power wire to the car’s reverse light circuit. This ensures the camera turns on when the car is in reverse. Use a multimeter to find the correct wires and splice carefully.
- Locate the reverse light wiring at the rear of the car.
- Use a multimeter to identify the positive and negative wires.
- Splice the camera’s power wire to the positive reverse light wire.
- Connect the ground wire to the car’s chassis or negative wire.
- Test the camera by shifting the car into reverse gear.
Connecting To The Monitor
Connecting your backup camera to the monitor is a key step. It lets you see the camera’s video while driving.
The connection type affects how easy the setup is and the video quality you get on the screen.
Wiring To The Display Screen
Wired connections use cables to link the camera to the display. This method is very reliable.
You usually run the wires from the rear of the car to the front where the screen is installed.
- Use a power cable to connect the camera to the reverse light.
- Run a video cable from the camera to the display monitor.
- Secure all cables to avoid damage or loose connections.
Wireless Vs Wired Connections
Wireless connections send video signals without cables. This cuts down on wiring work.
Wired connections are more stable but take more time to install than wireless systems.
- Wireless:Quick setup, no long cables, may have signal delay.
- Wired:Strong signal, no interference, needs cable running.

Credit: www.youtube.com
Testing The Backup Camera
After installing a backup camera, testing is important. It ensures the camera works well and is safe to use.
Testing helps find problems early. You can fix issues before driving with the camera.
Powering On And Calibration
Turn on your car to power the backup camera. The screen should show the camera view automatically.
Calibration adjusts the camera for clear images. Some cameras need you to set the angle or guidelines.
- Check that the image appears on the screen when in reverse gear.
- Adjust the camera angle for a full view behind the car.
- Set parking lines if your camera supports them.
- Follow the camera manual for specific calibration steps.
Troubleshooting Common Issues
If the camera does not turn on, check the power connection. Make sure the fuse is not blown.
Blurry or dark images can mean the lens is dirty or the camera is misaligned. Clean and adjust it.
- No image: Check wiring and power supply.
- Flickering screen: Inspect the cable connections.
- Image upside down: Rotate the camera or change settings.
- Poor image quality: Clean the lens and check lighting.
Final Adjustments And Tips
After installing your backup camera, you need to make final adjustments. These help the camera work well and keep it safe. Follow simple steps to get the best view and keep wires neat.
Taking time with these details improves your driving safety. It also keeps the camera in good condition for a long time.
Adjusting Camera Angle
Adjust the camera angle so you see clearly behind your car. The best angle shows the ground and the area just behind the vehicle. Avoid pointing the camera too high or too low.
Test the view by sitting in the driver’s seat. Make small changes until you get a full view of the rear area. Tighten the camera mount after adjusting to hold it steady.
- Look for a wide view behind your car
- Check the screen from the driver seat
- Tighten the camera mount after adjusting
- Avoid pointing the camera at the sky or ground only
Securing Wires And Finishing Touches
Keep all wires safe and hidden. Use zip ties or clips to hold wires close to the car body. This stops wires from moving or getting damaged while driving.
Check that all wires are connected properly. Cover any exposed wire with electrical tape or heat shrink tubing. This protects wires from water and dirt.
- Use zip ties to bundle wires neatly
- Hide wires inside panels if possible
- Cover exposed wires with electrical tape
- Test the camera after securing wires
Frequently Asked Questions
How Do I Install A Backup Camera On My Car?
To install a backup camera, mount it near the license plate, connect the power to the reverse light, and run the video cable to the monitor inside your car. Follow the camera’s manual for specific wiring instructions and test the camera before finalizing the setup.
What Tools Are Needed For Backup Camera Installation?
You will need basic tools like a screwdriver, wire strippers, electrical tape, and a drill. A multimeter helps check connections. Some installations may require a panel removal tool and zip ties to secure cables safely and neatly inside your car.
Can I Install A Backup Camera Myself?
Yes, most backup cameras are designed for easy DIY installation. Basic knowledge of car wiring is helpful. Carefully follow the included instructions to avoid damaging your vehicle’s electrical system. If unsure, consider professional installation to ensure safety and functionality.
How Much Does It Cost To Install A Backup Camera?
DIY installation costs mainly include the camera kit price, ranging from $30 to $200. Professional installation may add $50 to $150. Costs vary by camera type and car model. Budget accordingly for tools if you don’t already own them.
Conclusion
Installing a backup camera boosts your car’s safety. It’s an easy process. Just follow the steps, and you’ll succeed. Gather your tools before starting. Carefully connect wires to the correct terminals. Ensure the camera is securely mounted. Test the system to confirm it works properly.
Practice using the camera to get comfortable. This small upgrade can prevent accidents. It offers peace of mind when reversing. A backup camera is a smart addition to any vehicle. Enjoy the confidence it brings to your driving experience.