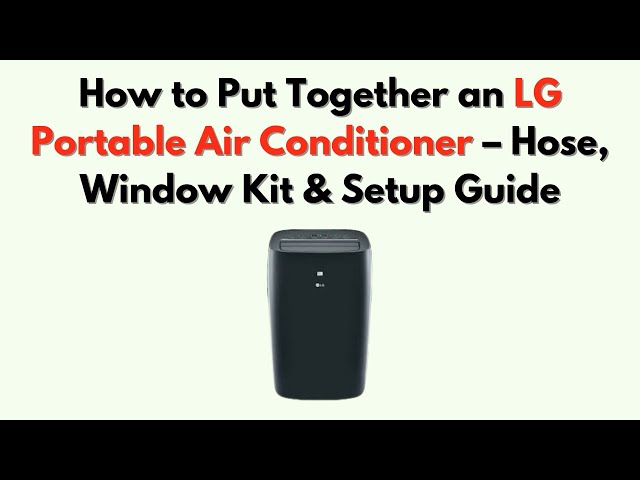
Are you ready to beat the heat without breaking a sweat? Installing your LG portable air conditioner might seem tricky, but it’s easier than you think.
With the right steps, you can have cool, fresh air flowing in your space quickly. In this guide, you’ll discover simple, clear instructions that save you time and frustration. Keep reading to learn how to set up your LG portable air conditioner the right way—so you can enjoy comfort all summer long.
Choosing The Right Location
Finding the best spot for your LG portable air conditioner helps it work well. The right location keeps your room cool and comfortable.
Think about space and airflow before placing the unit. This will improve its efficiency and lifespan.
Consider Room Size And Ventilation
Pick a room that fits the air conditioner’s cooling capacity. Too large a room will not cool well.
Good ventilation helps the air conditioner remove hot air. Make sure the exhaust hose can reach a window or vent.
- Measure your room size before buying
- Check that the unit’s BTU matches the room
- Place near a window for exhaust hose
- Allow space for air to flow freely
Avoid Obstructions And Heat Sources
Keep the air conditioner away from objects that block airflow. Walls, furniture, or curtains can reduce cooling.
Do not put the unit near heat sources like lamps or ovens. Heat makes the air conditioner work harder and wastes energy.
- Leave at least 20 inches of space around the unit
- Keep vents clear from curtains and furniture
- Avoid placing near direct sunlight or heaters
- Check the area for good airflow before installation
Unpacking And Inspecting The Unit
Before installing your LG portable air conditioner, carefully unpack the box. Check the contents to make sure nothing is missing.
Inspect the unit and parts for any damage from shipping. This helps avoid problems later.
Check For Damages
Look at the air conditioner for dents, cracks, or scratches. Check the power cord and control panel for damage.
If you find any damage, do not use the unit. Contact the seller or manufacturer for help.
Gather All Components
Make sure you have all parts before starting installation. This includes the main unit and all accessories.
- LG portable air conditioner unit
- Exhaust hose
- Window kit (panels and adapters)
- Remote control
- User manual
- Screws and mounting hardware
Installing The Window Kit
Installing the window kit is important for your LG portable air conditioner. It helps vent hot air outside. This guide will show you how to fit the kit properly.
The window kit fits in most sliding or sash windows. You need to measure and secure it tightly. This keeps your room cool and stops hot air from coming back in.
Measure And Adjust The Window Panel
First, measure your window opening. The window panel must fit the size of your window. Use a tape measure to get the width and height.
Adjust the window panel to match your window size. Most kits have sliding panels. Slide the panel to fit snugly in the window frame.
- Measure the window width from side to side
- Check the window height if needed
- Slide the window panel to fit the width
- Make sure the panel fits firmly in the window
Secure The Kit In The Window
Place the window panel into the window opening. Make sure it sits flush against the window frame. This helps keep air from leaking.
Use the included screws or fasteners to hold the panel in place. Tighten them so the panel does not move. Secure the exhaust hose to the panel slot.
- Insert the window panel into the window frame
- Check that the panel fits tightly without gaps
- Screw the panel into the window frame
- Attach the exhaust hose to the panel opening
- Seal any gaps with foam or weatherstripping
Connecting The Exhaust Hose
Connecting the exhaust hose is key to using your LG portable air conditioner. It removes hot air from the room.
Follow the right steps to attach the hose and connect it to the window kit safely.
Attach Hose To The Unit
First, locate the exhaust port on the back of your air conditioner. This is where the hose will connect.
Align the hose end with the port and twist it clockwise until it locks in place. Make sure it is secure.
- Find the exhaust port on the unit
- Place hose end on the port
- Twist hose clockwise to lock
- Check for a tight fit
Connect Hose To Window Kit
Next, attach the other end of the hose to the window kit. This allows hot air to exit outside.
Insert the hose end into the window kit opening. Turn it until it fits tightly to prevent air leaks.
- Place window kit in the open window
- Insert hose end into the window kit
- Turn hose to secure connection
- Seal any gaps around the window kit
Setting Up The Drainage System
Setting up the drainage system is important for your LG portable air conditioner. It helps remove water that builds up inside the unit. Proper drainage keeps the air conditioner working well and prevents leaks.
This guide explains how to locate the drain plug and how to use the drain hose or empty the water tank.
Locate The Drain Plug
Find the drain plug on the back or side of your air conditioner. It is usually a small rubber or plastic cap. This plug blocks the hole where water drains out.
Before moving the air conditioner, remove the drain plug to let the water flow out. Always place a container below to catch the water. This step helps avoid spills when you drain the water.
Use The Drain Hose Or Empty Water Tank
Your LG portable air conditioner may come with a drain hose. Attach this hose to the drain hole after removing the plug. Point the hose toward a floor drain or a bucket to collect water.
If the unit does not have a drain hose, you must empty the water tank manually. Check the water level regularly and pour out the water when the tank is full.
- Attach the drain hose securely to avoid leaks
- Place the hose end lower than the air conditioner
- Empty the water tank in a safe place
- Keep the drainage area clean and dry

Credit: www.dreo.com
Powering On And Testing
After installing your LG portable air conditioner, it is important to power it on and check that it works properly. This ensures you get cool air and the unit runs safely.
Follow simple steps to plug in the air conditioner and run the first cooling test. This helps spot any problems early.
Plug In The Air Conditioner
Make sure the power cord is fully inserted into a grounded outlet. Avoid using extension cords or adapters to prevent electrical hazards.
- Check the voltage matches the unit’s rating on the label.
- Keep the plug dry and free from dust.
- Plug the unit into a dedicated power source.
- Do not force the plug if it does not fit easily.
Run Initial Cooling Test
Turn on the air conditioner using the power button on the unit or remote. Set it to cool mode and choose a low temperature.
| Test Action | What to Check |
| Power On | Unit lights up, no error codes |
| Cooling Mode | Cold air flows from the vent |
| Fan Speed | Fan changes speed smoothly |
| Drain Hose | No leaks or water buildup |
| Noise Level | Normal humming, no rattling |
If the air conditioner does not cool or shows errors, unplug it and check the manual for troubleshooting tips.
Maintaining Your Portable Ac
Keeping your LG portable air conditioner clean helps it work well. Regular care can make it last longer.
Simple maintenance steps keep the air fresh and cool. Follow these tips to keep your AC in good shape.
Clean Or Replace Filters Regularly
Filters catch dust and dirt from the air. Clean or replace them often to keep the AC working well.
A dirty filter blocks air and makes the AC less effective. Check the filter every two weeks.
- Remove the filter from the unit carefully
- Wash it with warm water and mild soap
- Let it dry completely before putting it back
- Replace the filter if it is damaged or very dirty
Store Properly During Off-season
Store your portable AC in a dry, clean place when not in use. Proper storage keeps it safe from damage.
Before storing, clean the unit and drain all water. Cover it to protect from dust and dirt.
- Turn off and unplug the AC
- Drain any water from the tank
- Clean the filters and surfaces
- Cover the unit with a cloth or plastic
- Store in a place with stable temperature

Credit: www.youtube.com

Credit: www.lg.com
Frequently Asked Questions
How Do I Install An Lg Portable Air Conditioner Window Kit?
First, attach the window kit to the window frame. Next, connect the exhaust hose from the unit to the window kit. Ensure the window is closed securely around the kit for a tight seal. This setup allows proper ventilation and efficient cooling.
Can I Install An Lg Portable Ac Without Tools?
Yes, many LG portable AC units come with a tool-free window kit. The kit usually includes adjustable panels that fit most windows. Simply slide the panels to size, attach the exhaust hose, and secure the window. This makes installation quick and easy.
Where Should I Place My Lg Portable Air Conditioner?
Place the unit near a window for exhaust hose connection. Ensure it’s on a flat, stable surface with good airflow. Avoid placing it near heat sources or direct sunlight to optimize cooling performance and energy efficiency.
How Do I Connect The Exhaust Hose To The Lg Ac Unit?
Attach one end of the exhaust hose to the unit’s exhaust port. Twist or lock it in place according to the model instructions. Connect the other end to the window kit securely to allow hot air to exit your room properly.
Conclusion
Installing your LG portable air conditioner is straightforward. Follow the steps carefully. Ensure all parts are securely connected. Check your manual for specific guidance. Proper installation enhances performance and efficiency. Remember to regularly clean filters. This maintains air quality and prolongs the unit’s life.
Enjoy cool air and comfort in your space. If challenges arise, consult customer support or a professional. With the right setup, your air conditioner will serve you well. Stay cool and relaxed all year round!