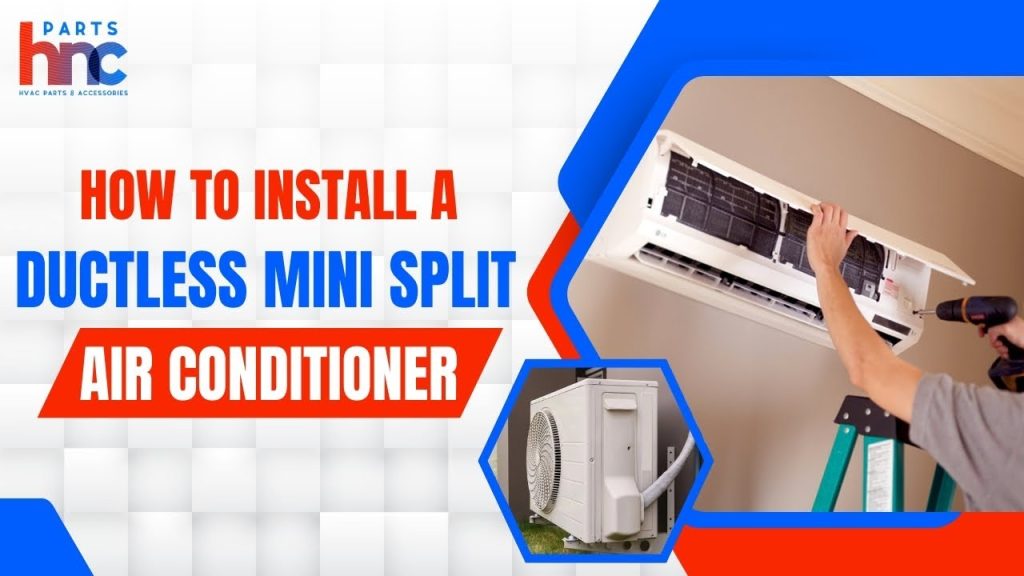
Looking to stay cool without the hassle of bulky window units or expensive central air? Installing a mini split air conditioner could be the perfect solution for your home or office.
You might think it’s complicated, but with the right steps, you can do it yourself and save both time and money. In this guide, you’ll discover exactly how to install a mini split air conditioner quickly and safely. Keep reading—you’ll be enjoying cool, comfortable air before you know it.
Choosing The Right Mini Split System
Picking the right mini split system is important for cooling your space efficiently. A good choice saves energy and keeps the room comfortable.
Think about your room size, cooling needs, and energy ratings before buying a unit. These factors help you find the best fit.
Assessing Room Size And Cooling Needs
Measure your room to know how big the mini split system should be. Larger rooms need more powerful units to cool well.
Consider how many people usually stay in the room and if there are heat sources like lights or electronics. These add to the cooling load.
- Measure room length, width, and height
- Note the number of people in the room
- Count heat-producing appliances or lights
Selecting The Appropriate Btu Rating
BTU means British Thermal Unit and shows how much cooling power the system has. Choose the right BTU for your room size.
A unit with too low BTU will not cool well. One with too high BTU wastes energy and costs more to run.
| Room Size (sq ft) | Recommended BTU |
|---|---|
| 100 – 300 | 6,000 – 8,000 BTU |
| 300 – 500 | 9,000 – 12,000 BTU |
| 500 – 800 | 12,000 – 18,000 BTU |
| 800 – 1,200 | 18,000 – 24,000 BTU |
Considering Energy Efficiency Ratings
Energy efficiency ratings show how well a mini split uses electricity. Higher ratings mean lower energy bills.
Look for the SEER or EER ratings on the system label. Pick a unit with a high rating to save money over time.
- SEER stands for Seasonal Energy Efficiency Ratio
- EER means Energy Efficiency Ratio
- Higher numbers mean better efficiency
- Efficient units reduce electricity use
Gathering Necessary Tools And Materials
Installing a mini split air conditioner needs the right tools and materials. Getting these ready first makes the job easier and faster.
This guide lists what you need to install the unit safely and correctly. Check all items before starting the installation.
Essential Tools For Installation
You need specific tools to install a mini split air conditioner. These tools help with mounting, wiring, and connecting refrigerant lines.
- Drill with various bits
- Screwdrivers (flat and Phillips)
- Pipe cutter for copper tubing
- Vacuum pump to remove air from lines
- Manifold gauge set for refrigerant
- Torque wrench for proper tightening
- Level to ensure unit is straight
- Wire stripper and crimping tool
- Measuring tape
- Hammer and chisel
- Safety gloves and goggles
Required Installation Materials
You also need some materials to connect and secure the air conditioner. These materials keep the unit safe and working well.
- Mini split air conditioner indoor and outdoor units
- Mounting brackets and hardware
- Copper refrigerant lines with insulation
- Electrical wiring and conduit
- Drain pipe for condensate water
- Sealant or caulk for wall openings
- Wall sleeve or hole cover plate
- Refrigerant (if not pre-charged)
Preparing For Installation
Installing a mini split air conditioner starts with good preparation. This ensures the unit works well and lasts longer.
Before installation, check the space and tools you need. Planning helps avoid problems later.
Finding The Ideal Location
Pick a spot inside the room that cools evenly. Avoid places near heat sources or direct sunlight.
- Choose a wall with good airflow
- Keep the unit away from windows and doors
- Allow space around the unit for air circulation
- Make sure the outdoor unit has enough room for ventilation
Checking For Electrical Requirements
Confirm your home’s electrical system can support the mini split. This prevents overloads and safety issues.
| Requirement | Details |
| Voltage | Check unit voltage matches home supply (usually 110-240V) |
| Circuit Breaker | Use dedicated breaker per manufacturer specs |
| Wiring | Use correct wire size for power and length |
| Grounding | Ensure proper grounding to avoid shocks |
Ensuring Proper Wall Support
The wall must hold the indoor unit’s weight safely. Check the wall type and strength before mounting.
- Use a solid wall like concrete or brick
- Avoid drywall or weak materials without reinforcements
- Install support brackets if needed
- Check for studs and use anchors where possible
Mounting The Indoor Unit
Mounting the indoor unit is a key step in installing a mini split air conditioner. The unit must be secure and level for best performance.
This guide covers how to install the mounting bracket and secure the indoor unit properly.
Installing The Mounting Bracket
Start by choosing a strong wall to hold the indoor unit. The wall should support the weight and be near the outdoor unit.
Attach the mounting bracket using screws and a level to keep it straight. Mark the spots before drilling holes.
- Use a pencil to mark the drill holes
- Drill holes into the wall at the marked spots
- Fix the bracket with screws and anchors if needed
- Check the bracket is level with a spirit level
Securing The Indoor Unit
Lift the indoor unit and hang it on the mounted bracket. The unit should fit snugly without gaps.
Connect the pipes and cables carefully. Tighten screws to secure the unit, but do not over-tighten.
- Align the unit hooks with the bracket slots
- Slide the unit into place until it clicks
- Connect refrigerant and electrical lines
- Use a screwdriver to tighten securing screws
Installing The Outdoor Unit
Installing the outdoor unit of a mini split air conditioner is a key step. It must be placed correctly to work well and last long.
This guide covers how to choose the best outdoor location and how to place and secure the unit safely.
Choosing The Best Outdoor Location
Pick a spot with good airflow around the outdoor unit. Avoid places that block the fan or vents.
Keep the unit away from direct sunlight and heavy rain. This helps it stay cool and dry.
- Find a flat surface that drains water well.
- Leave at least 2 feet of space around the unit.
- Keep it away from noisy areas to reduce disturbance.
- Avoid places near plants or trees that drop leaves.
Placing And Securing The Outdoor Unit
Place the unit on a solid base like a concrete pad or metal brackets. This stops it from moving or tipping.
Secure the unit with bolts or straps to keep it stable during wind or vibrations.
- Use a level to make sure the unit is even.
- Attach anti-vibration pads to reduce noise.
- Check that all connections are tight and sealed.
- Leave space for easy access during maintenance.
Connecting Refrigerant Lines
Connecting refrigerant lines is an important part of installing a mini split air conditioner. These lines carry the refrigerant between the indoor and outdoor units.
Careful connection ensures the system works well and avoids leaks or damage.
Running The Lines Through The Wall
First, choose a spot on the wall to run the refrigerant lines. The hole should be slightly bigger than the lines for easy fitting.
Drill a clean, straight hole through the wall. Use a sleeve or protective cover to prevent damage to the lines.
- Measure the length and diameter of the lines
- Drill a hole at a slight downward angle outside
- Insert a sleeve to protect the lines
- Feed the lines carefully through the hole
Connecting The Lines To The Indoor And Outdoor Units
Next, connect the refrigerant lines to the indoor unit. Use the correct flare nuts and tighten them by hand first.
After that, connect the other ends to the outdoor unit. Use a torque wrench to tighten the nuts to the manufacturer’s specs.
- Remove protective caps from the line ports
- Attach flare nuts to the line ends
- Hand-tighten connections to avoid cross-threading
- Use a torque wrench for final tightening
- Check for leaks using a leak detector or soapy water
Wiring The Electrical Connections
Wiring the electrical connections is an important part of installing a mini split air conditioner. It ensures the unit gets power safely and works correctly.
Careful wiring helps prevent electrical problems and keeps your home safe. Follow the instructions closely to connect the wires properly.
Running The Electrical Wire
First, run the electrical wire from your home’s main power source to the mini split outdoor unit. Use wires rated for outdoor use and proper voltage.
Keep the wire away from sharp edges and heat sources. Secure it with clips or conduit to protect it from damage.
- Use a conduit to protect wires outside the home
- Keep wires neat to avoid tangling
- Follow local electrical codes for wire size and type
- Turn off power before working on wiring
Connecting The Electrical Components
Connect the wires to the outdoor unit’s electrical terminal block. Match wire colors to the unit’s wiring diagram.
Connect the indoor unit wires to the control board inside the air handler. Make sure each connection is tight and secure.
- Attach the ground wire to the green grounding screw
- Connect the live and neutral wires to the correct terminals
- Use wire nuts or terminal screws as needed
- Double-check all connections before restoring power

Credit: www.youtube.com
Testing The System
After installing a mini split air conditioner, testing the system is key. This ensures it works well and safely.
Testing includes checking for leaks, powering the unit, and verifying its operation.
Checking For Refrigerant Leaks
Look for refrigerant leaks before turning on the system. Leaks reduce cooling and cause damage.
- Inspect all pipe connections and joints.
- Use a leak detection spray or soapy water.
- Watch for bubbles forming on sprayed areas.
- Listen for hissing sounds near connections.
- If leaks appear, tighten fittings or call a professional.
Powering On The System
Turn on the mini split air conditioner carefully. Follow these steps to avoid damage.
- Make sure the power supply matches the unit’s requirements.
- Switch on the circuit breaker connected to the system.
- Use the remote control to power on the indoor unit.
- Listen for the fan and compressor starting.
- Check for any error codes on the display.
Verifying System Operation
Confirm the system cools and heats properly. Use the table below to check key points.
| Check | What to Do | Expected Result |
|---|---|---|
| Airflow | Feel air from indoor unit | Steady, strong airflow |
| Temperature | Measure air temperature | Cool air for cooling mode |
| Noise | Listen to the unit running | Low, steady sound |
| Remote Control | Test all functions | All buttons respond correctly |
| Error Codes | Check display panel | No error codes shown |
Maintenance Tips
Keeping your mini split air conditioner clean and well-maintained helps it work better. It also lasts longer and uses less energy.
Regular care is simple. You only need a few tools and some time to keep your unit in top shape.
Regular Cleaning Procedures
Clean the filters and indoor unit every two weeks. Dust and dirt can block airflow and reduce cooling.
- Turn off the power before cleaning.
- Remove and wash air filters with warm water.
- Dry filters completely before reinstalling.
- Wipe the indoor unit’s surface with a soft cloth.
- Check and clean the outdoor unit’s fan and coils.
Seasonal Maintenance Checklist
Perform these checks at the start of each season to keep your mini split running smoothly.
| Task | Details | Frequency |
| Inspect refrigerant levels | Check for leaks and proper pressure | Yearly |
| Clean condenser coils | Remove dirt and debris from outdoor coils | Yearly |
| Check electrical connections | Tighten loose wires and inspect contacts | Yearly |
| Test thermostat settings | Ensure correct temperature control | Seasonally |
| Clear drainage channels | Prevent water buildup and mold growth | Seasonally |

Credit: www.youtube.com

Credit: m.youtube.com
Frequently Asked Questions
What Tools Are Needed To Install A Mini Split Air Conditioner?
You need a drill, screwdriver, level, pipe cutter, vacuum pump, and refrigerant gauge. These tools help ensure a precise, secure installation and proper refrigerant flow.
How Long Does It Take To Install A Mini Split System?
Installation typically takes 4 to 8 hours depending on experience and home layout. Proper setup ensures optimal performance and efficiency.
Can I Install A Mini Split Air Conditioner Myself?
DIY installation is possible with basic skills, but professional help is recommended. Proper handling prevents leaks, electrical issues, and system damage.
Where Should The Indoor Unit Be Installed?
Install the indoor unit high on a wall, away from direct sunlight and obstructions. This placement ensures efficient cooling and airflow.
Conclusion
Installing a mini split air conditioner can save you money and energy. Follow the steps carefully to ensure a smooth setup. Take your time with each part to avoid mistakes. Proper installation means better cooling and longer unit life. Enjoy a cooler home with less hassle and noise.
Remember, safety and precision matter most during installation. Now, you are ready to feel comfortable all year round.