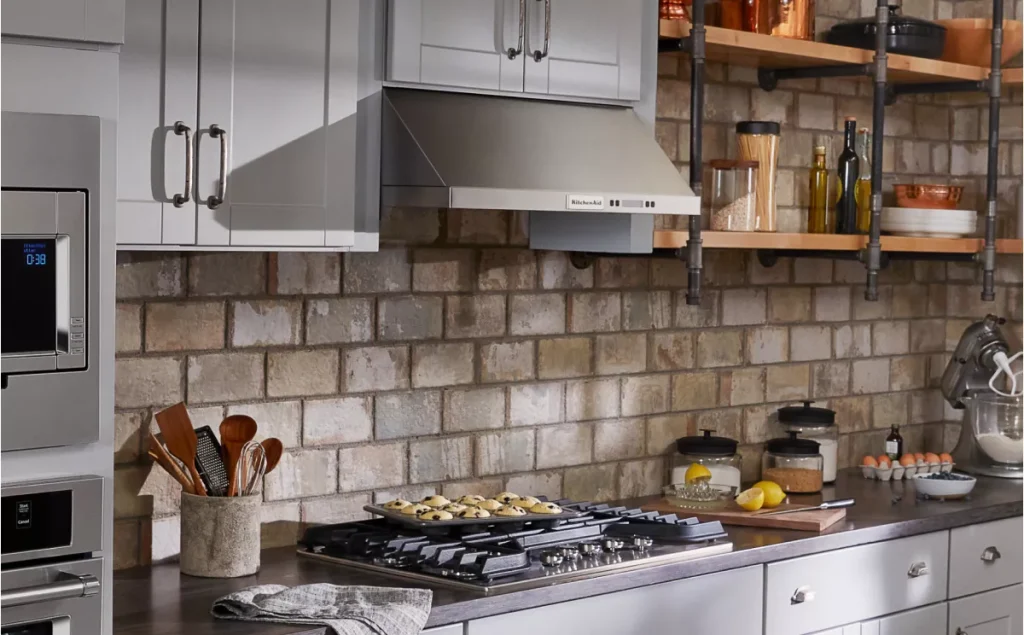
Are you tired of smoke and lingering cooking odors in your kitchen? Installing a range hood under your cabinet might be the perfect solution.
Not only does it keep your kitchen air fresh, but it also enhances your cooking environment. You might think this is a daunting task, but with the right guidance, you can do it yourself without breaking a sweat. Imagine the satisfaction of upgrading your kitchen with your own hands.
In this guide, we’ll walk you through the simple steps to install a range hood under your cabinet, empowering you with practical tips and tricks. Stick around to transform your kitchen into a cleaner, more enjoyable space to cook.
Choose The Right Range Hood
Choosing the right range hood is crucial before you begin installation. It affects your kitchen’s air quality, noise levels, and even the overall style. Picking the perfect model means balancing size, venting options, and sound to fit your cooking habits and kitchen layout.
Measure Your Space
Start by measuring the width of your cooktop or range. Your range hood should be at least as wide as your cooking surface, ideally a few inches wider on each side to catch all the smoke and steam.
Also, check the height between your countertop and the bottom of the cabinets. This will determine the maximum height your hood can have without making your kitchen feel cramped.
Select Venting Type
Decide whether you want a ducted or ductless hood. Ducted hoods vent air outside, which is more effective for strong odors and smoke. Ductless hoods filter the air and recirculate it back into the kitchen, which can be easier to install but less powerful.
Think about your kitchen’s layout and if installing ductwork is feasible. Sometimes, ductless is the only option, but it requires changing filters regularly to maintain performance.
Consider Noise Levels
Range hoods vary widely in how loud they are. If you cook often or have an open kitchen, a quieter model can make a big difference in your comfort.
Look for the sone rating—a measure of noise. Models under 3 sones are whisper-quiet, while anything above 6 sones can be distracting. Have you noticed how some kitchens feel peaceful while others are noisy? That’s often the hood’s noise level at work.

Credit: www.create-enjoy.com
Gather Necessary Tools
Before you start installing your range hood under the cabinet, gathering the right tools is key. Having everything ready prevents frustrating interruptions and ensures a smoother, faster installation. Let’s look at the essential items you’ll need to get the job done effectively.
Basic Hand Tools
Most installations require a few simple hand tools that you probably already have at home. A cordless drill will make drilling holes and securing screws easier and faster. A screwdriver set, including both Phillips and flathead types, will help you handle various screws.
Don’t forget a tape measure to check distances accurately, and a level to make sure your hood is perfectly aligned. A pencil is handy for marking where holes should go. These basic tools form the foundation of your installation toolkit.
Safety Equipment
Your safety matters as much as the installation itself. Protective gloves shield your hands from sharp edges and hot surfaces. Safety glasses protect your eyes from debris and dust while drilling or cutting.
Consider wearing a dust mask if you’re drilling into drywall or insulation. These precautions keep you safe and comfortable, helping you focus on the task without injury concerns.
Additional Materials
Beyond tools, you’ll need some materials specific to your range hood and kitchen setup. Make sure you have mounting brackets or screws that came with your hood. If your installation involves venting outside, duct tape and ducting pipes or vent covers will be essential.
Electrical tape and wire nuts might be necessary if you need to connect wiring. Having these materials on hand before starting saves you from last-minute trips to the store.
Prepare The Installation Area
Preparing the installation area is a key part of fitting your range hood under the cabinet. This step ensures a smooth setup and helps avoid problems later. Taking time here makes the process safer and faster.
Clear The Cabinet Space
Remove all items from the cabinet where the range hood will go. Check for any dust or grease and clean the area well. This prevents dirt from falling during installation. Make sure there is enough room to work comfortably.
Mark Mounting Points
Use a pencil and a measuring tape to mark where the hood will be fixed. Check the height and width measurements from the manual. Mark spots for screws or brackets clearly on the cabinet bottom. Accurate marks keep the hood level and secure.
Check Electrical Connections
Look for a power source near the installation spot. Confirm that the outlet or wiring meets the range hood’s requirements. Turn off the main power before touching any wires. This step avoids electrical hazards and ensures the hood will work properly.
Install The Mounting Bracket
Installing the mounting bracket is a crucial step in setting up your under-cabinet range hood. This bracket will hold the entire unit securely in place, so accuracy and strength are key. Taking the time to position and attach it correctly will save you headaches later.
Locate Studs
Begin by finding the studs behind your kitchen wall. Studs provide the strongest support for the heavy range hood. Without anchoring into studs, your installation could fail.
Use a stud finder tool to scan the area where the hood will hang. Mark the edges of each stud with a pencil. If you don’t have a stud finder, try tapping the wall and listen for a solid sound or gently drill small holes to identify the wooden studs.
Attach Bracket Securely
Once you’ve marked the studs, align the mounting bracket with those marks. Hold it firmly against the wall under the cabinet. Double-check that it is level, as a crooked bracket will affect the hood’s performance and appearance.
Use heavy-duty screws designed for wood to attach the bracket directly into the studs. Avoid drywall anchors alone, as they may not support the weight. Tighten each screw fully but be careful not to strip them out.
Ask yourself: Have you tested the bracket’s stability by gently pulling on it? If it feels loose, reassess your screw placement. A solid bracket is essential for a safe, long-lasting installation.
Mount The Range Hood
Mounting the range hood under your cabinet is a crucial step that ensures it functions properly and looks great. This part of the installation requires care and precision to align the hood correctly and secure it safely. Taking your time here can save you from headaches later, especially when it comes to stability and vent efficiency.
Lift And Align Hood
Start by carefully lifting the range hood and bringing it close to the mounting bracket you installed earlier. It’s best to have a helper for this part to avoid dropping or damaging the unit. Align the hood so the screw holes on the hood line up perfectly with those on the bracket.
Check that the hood sits flush against the cabinet bottom and is centered over your cooktop. If it tilts or feels uneven, adjust the position slightly until it fits snugly. This alignment affects both the look and the performance of your hood, so don’t rush this step.
Secure Hood To Bracket
Once the hood is properly aligned, grab your screws and a screwdriver or drill. Insert the screws through the holes on the hood into the bracket, tightening them firmly but not overly tight to avoid stripping the screws or damaging the hood.
Double-check the hood’s stability by gently shaking it. It should feel solid and unmoving. If there’s any wobble, loosen the screws, realign, and tighten again. Remember, a secure mount is essential for safe operation and long-term durability.

Credit: www.create-enjoy.com
Connect Venting And Wiring
Connecting the venting and wiring is a crucial part of installing your range hood under the cabinet. This step ensures that your hood will effectively remove smoke and odors while running safely and efficiently. Pay close attention to the details during this phase, as improper connections can lead to poor performance or even safety hazards.
Attach Vent Duct
Start by securing the vent duct to the hood’s exhaust outlet. Use metal foil tape or clamps to ensure a tight seal and prevent air leaks. Avoid using duct tape, as it can degrade over time and cause gaps.
Check the duct’s path to make sure it’s as straight and short as possible. Sharp bends or long runs reduce airflow and make your hood work harder. Have you noticed your vent hose sagging? Secure it with brackets or straps to keep it in place and maintain airflow efficiency.
Make Electrical Connections
Before you begin, turn off the power at the circuit breaker to avoid any accidents. Connect the range hood’s wiring to your home’s electrical supply following the manufacturer’s instructions. Typically, you’ll match black to black (hot), white to white (neutral), and green or bare copper to ground.
If your hood has a plug, simply plug it into a nearby outlet. For hardwired models, use wire nuts to secure the connections and wrap them with electrical tape. Don’t forget to tuck the wires neatly into the junction box to prevent damage.
Test For Proper Function
Restore power and turn on the range hood to check if the fan and lights work correctly. Listen for unusual noises that might indicate loose parts or poor installation. Is the airflow strong enough to pull smoke away effectively?
Check the vent outside to confirm air is exiting properly. If you find weak airflow, revisit your duct connections and wiring to spot any issues. Testing early saves you from frustration down the line and ensures your kitchen stays fresh and smoke-free.
Finish And Test Installation
After securing your range hood under the cabinet, the final step is to finish and test the installation. This ensures the hood works properly and looks great. Proper finishing touches improve performance and safety in your kitchen. Testing confirms the hood removes smoke and odors effectively.
Install Filters And Covers
Attach the filters according to the manufacturer’s instructions. Most filters slide or snap into place easily. Covers protect the internal parts and give a clean look. Make sure they fit tightly to avoid gaps where air can escape.
Check For Airflow
Turn on the range hood and feel for strong airflow at the vent. Good airflow clears smoke and cooking smells quickly. If airflow feels weak, check for blockages or loose connections. Proper airflow means the hood is venting air outside or through a filter correctly.
Inspect For Noise And Vibration
Listen to the hood while it runs. A quiet hood means parts are secure and balanced. Notice any rattling or vibration sounds. These could mean loose screws or an unbalanced fan. Tighten any loose parts and adjust the fan if needed to reduce noise.

Credit: www.create-enjoy.com
Troubleshooting Tips
Installing a range hood under a cabinet can sometimes bring unexpected challenges. Troubleshooting these issues quickly helps you keep your kitchen functional and safe. Here are some practical tips to tackle common problems you might encounter during or after installation.
Fixing Loose Mounts
If your range hood feels shaky or loose, it might not be mounted securely. Check that all screws and brackets are tightly fastened to the cabinet and wall studs.
Sometimes, the cabinet material might be too weak to hold the weight. In that case, use longer screws or add mounting blocks inside the cabinet for better support.
Have you noticed any wobbling when the hood is running? This could mean the mounts are loosening over time. Regularly inspect and tighten them to avoid damage or accidents.
Dealing With Poor Ventilation
Poor ventilation reduces your range hood’s effectiveness and might cause lingering odors or smoke. Start by ensuring the ductwork is properly connected and free from obstructions like grease buildup or debris.
Short, straight ducts improve airflow. If your ductwork has many bends or is too long, consider rerouting it for better performance.
Are you using a recirculating range hood without proper filters? Replace or clean charcoal filters regularly to maintain airflow and odor control.
Electrical Issues
Electrical problems can stop your range hood from working entirely or cause flickering lights. Confirm the hood is properly plugged in or hardwired according to the manufacturer’s instructions.
Check your circuit breaker to see if it has tripped. Resetting it might solve the issue quickly.
If the fan or lights don’t respond, test the switches for faults. Sometimes, replacing a faulty switch or a blown fuse inside the hood fixes the problem.
Are you comfortable handling electrical repairs? If not, hiring a professional is safer and ensures your range hood functions correctly.
Frequently Asked Questions
How Do I Measure For An Under Cabinet Range Hood?
Measure the width of your cooktop first. Choose a range hood the same width or slightly wider. Also, check the cabinet depth and ceiling height for proper fit and ventilation.
What Tools Are Needed To Install A Range Hood?
You will need a drill, screwdriver, measuring tape, level, pencil, and possibly a stud finder. Safety gear like gloves and goggles is also recommended.
How High Should I Mount The Range Hood?
Mount the range hood 24 to 30 inches above the cooktop. This height ensures optimal ventilation and safety while cooking.
Can I Install A Range Hood Without External Venting?
Yes, you can install a ductless range hood with charcoal filters. These recycle air but may be less effective than vented hoods.
Conclusion
Installing a range hood under your cabinet improves kitchen air quality. It helps remove smoke, steam, and cooking odors fast. Follow each step carefully for a safe, secure fit. Take your time measuring and drilling to avoid mistakes. A well-installed hood makes cooking more comfortable and clean.
You can enjoy a fresher kitchen every day. Simple tools and clear instructions make this project doable. Start your installation with confidence and breathe easier soon.