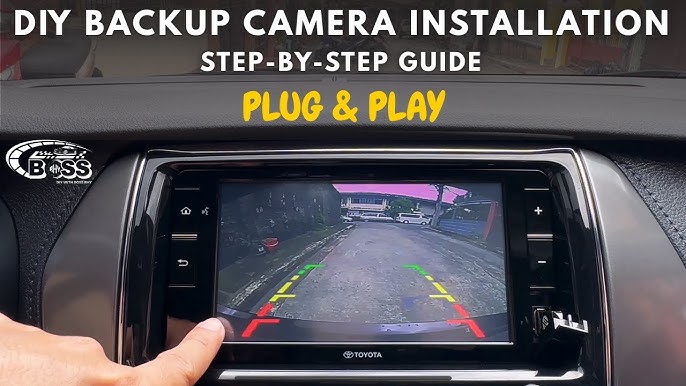
Have you ever struggled to see what’s right behind your car while backing up? Installing a rear view camera can change that instantly, making parking safer and easier for you.
Imagine avoiding those tricky blind spots and protecting your loved ones from unexpected accidents. In this guide, you’ll learn exactly how to install a rear view camera on your car step-by-step, even if you’ve never done anything like this before.
Keep reading, and you’ll soon gain the confidence to upgrade your vehicle with this smart, life-saving tool.
Choosing The Right Rear View Camera
Installing a rear view camera helps you see behind your car. This guide focuses on picking the best camera for your needs.
Knowing different camera types and features will make your choice easier. Also, check if the camera fits your car model.
Types Of Rear View Cameras
Rear view cameras come in several styles. Each type offers unique benefits and installation options.
- Wired Cameras:Connect by cables. They offer stable signals but require more installation work.
- Wireless Cameras:Use Wi-Fi or radio signals. Easier to install but can face interference.
- License Plate Cameras:Mount on or near the license plate for a clear rear view.
- Flush Mount Cameras:Fit inside the car’s body for a sleek look.
- Trailer Cameras:Designed for towing, showing the trailer’s rear area.
Key Features To Consider
Look for features that improve safety and ease of use. These can affect how well the camera works for you.
| Feature | Description |
| Resolution | Higher resolution gives clearer images. |
| Night Vision | Allows you to see clearly in low light. |
| Wide Angle Lens | Covers a larger rear view area. |
| Waterproof | Protects the camera from rain and dust. |
| Guidelines | Shows parking lines on the screen. |
Compatibility With Your Car
Check if the camera matches your car’s make and model. Not all cameras fit every vehicle.
- Verify your car’s display type for video input.
- Consider power supply options for the camera.
- Look at mounting spots suitable for your car style.
- Check if you need extra adapters or connectors.
Credit: dashcamtalk.com
Tools And Materials Needed
Installing a rear view camera on your car needs the right tools and materials. Preparing these ahead makes the job easier and safer.
Below is a list of essential tools and some additional supplies you might need to complete the installation.
Essential Tools
These tools help you open panels, connect wires, and fix the camera securely on your vehicle.
- Screwdrivers (Phillips and flathead)
- Wire strippers and cutters
- Electrical tape
- Drill with drill bits
- Socket wrench set
- Multimeter or voltage tester
- Plastic trim removal tools
Additional Supplies
You may need these extra items depending on your car model and camera system type.
| Supply | Purpose |
|---|---|
| Zip ties | Organize and secure wires |
| Double-sided tape | Mount the camera without drilling |
| Fuse tap | Connect to the car’s fuse box safely |
| RCA video cable | Transmit video signal from camera to monitor |
| Wire connectors | Join wires securely |
Preparing Your Car For Installation
Installing a rear view camera on your car improves safety and makes parking easier. Before starting, prepare your car carefully for the installation.
Proper preparation saves time and ensures the camera works well. Focus on choosing the right spot and getting the area clean.
Selecting The Mounting Location
Pick a place on your car’s rear that gives a clear view behind. The camera should not be blocked by the license plate or other parts.
Common spots include above or near the license plate or on the trunk lid. Make sure the spot is flat and stable for mounting.
- Choose a location with a wide view of the area behind
- Avoid places blocked by car parts or dirt
- Check for a flat surface to attach the camera firmly
- Make sure the wires can reach the inside of the car easily
Cleaning And Accessing The Area
Clean the mounting spot well to help the camera stick properly. Dirt or grease can weaken the hold.
Use soap and water to clean the area. Dry it fully before installing the camera.
- Wash the area with mild soap and water
- Remove all dirt, grease, and dust
- Dry the surface completely with a clean cloth
- Check if you can access the inside of the car near this spot for wiring
Installing The Rear View Camera
Installing a rear view camera helps you see behind your car. It makes parking and reversing safer.
This guide shows how to mount the camera, run the wiring, and connect to power.
Mounting The Camera
Find a good spot on the back of your car to attach the camera. Usually, the center above the license plate works best.
Clean the area well before attaching the camera. Use screws or strong double-sided tape to secure it in place.
- Choose a spot with a clear view behind the car
- Avoid places blocked by the trunk or bumper
- Make sure the camera lens points downward slightly
Running The Wiring
Run the camera’s wires from the back to the front of the car. Hide the cables under trim panels or carpet.
Use wire clips or zip ties to keep cables neat and prevent damage. Avoid sharp edges or moving parts.
- Start at the camera and follow existing wiring paths
- Use a panel tool to gently remove trim pieces
- Secure wires tightly but avoid pinching them
Connecting To Power Source
Connect the camera’s power wire to your car’s reverse light wire. This powers the camera only when you reverse.
Use a wire tap connector or solder the wires. Then, secure connections with electrical tape or heat shrink tubing.
- Locate the reverse light wiring in the trunk
- Connect the camera’s positive wire to the reverse light positive wire
- Attach the camera’s ground wire to a metal part of the car
Wiring The Camera To The Display
Wiring a rear view camera to the display is a key step in installation. It lets the camera send video to your screen.
You need to connect the camera’s video and power cables carefully. This guide shows how to do it right.
Locating The Display Unit
Find the display unit inside your car first. This is usually the screen on the dashboard or rearview mirror.
Check your car’s manual if you are unsure. The display unit must be close enough for wiring the camera.
Connecting Video And Power Cables
Connect the camera’s video cable to the display’s video input. This sends the picture from the camera to the screen.
Next, connect the camera’s power cable to a power source. Use the car’s reverse light wire for power. This turns the camera on only when reversing.
- Video cable goes from camera to display video input
- Power cable connects to reverse light wire
- Ground the camera to the car’s metal frame
Securing And Hiding Wires
Secure wires with clips or tape to prevent damage. Keep cables away from moving parts or heat sources.
Hide wires under trim panels or carpet. This keeps the installation neat and safe from wear.
- Use clips or zip ties to secure wires
- Run wires under trim panels or carpet
- Avoid sharp edges and hot areas

Credit: m.youtube.com
Testing The Camera System
After installing your rear view camera, you need to test it. Testing ensures the camera works well and shows clear images.
This step helps you find and fix any problems early. It also lets you adjust the camera for the best view.
Powering On And Initial Setup
Turn on your car’s ignition to start the camera system. The display screen should power on automatically.
Check that the camera feed appears clearly on the screen. If it does not, check all wiring connections again.
- Make sure the camera is connected to power and ground
- Verify the video cable is plugged into the display unit
- Switch to the correct input on the display if needed
Adjusting Camera Angle
Adjust the camera lens so you get a clear view behind your car. The angle should show the ground and nearby objects.
Loosen the mounting screws slightly to move the camera up or down. Tighten the screws once you find the right angle.
- Check the image on the screen while adjusting
- Aim the camera to cover the bumper and rear area
- Test in different lighting conditions for best results
Troubleshooting Common Issues
If the camera image is blurry or missing, check the lens for dirt or damage. Clean the lens with a soft cloth.
Other issues include no image or flickering screen. These often come from loose wires or power problems.
- Ensure all cables are securely connected
- Check the fuse for the camera circuit
- Restart the car to reset the system
- Replace faulty wires or connectors
Maintaining Your Rear View Camera
Keeping your rear view camera clean and checked helps it work well. Regular care improves safety while driving.
Simple maintenance can stop problems and keep the camera clear. Use easy steps for best results.
Cleaning Tips
Clean your rear view camera often to remove dirt and water spots. Use a soft cloth and mild cleaner.
Avoid harsh chemicals and rough materials that can scratch the lens. Wipe gently for clear images.
- Use a microfiber cloth for cleaning
- Apply water or mild soap solution
- Gently wipe the camera lens
- Dry with a soft, dry cloth
- Clean after rain or mud exposure
Regular Checks And Updates
Check your rear view camera often to ensure it works correctly. Look for loose wires and damage.
Keep the camera’s software updated if it has a digital interface. Updates improve performance and fix bugs.
- Inspect camera lens for cracks or dirt
- Check the wiring for secure connections
- Test the camera display before driving
- Update software or firmware as needed
- Fix any issues quickly to avoid accidents
Credit: www.crvownersclub.com
Frequently Asked Questions
What Tools Are Needed To Install A Rear View Camera?
You need a drill, screwdriver, wire stripper, electrical tape, and a multimeter. These tools help mount the camera and connect wiring safely.
How Long Does Rear View Camera Installation Take?
Installation usually takes 1 to 2 hours. Time varies based on car model and camera type. Proper wiring and testing ensure safety.
Can I Install A Rear View Camera Myself?
Yes, with basic tools and instructions, DIY installation is possible. Follow a guide carefully to avoid wiring errors or damage.
Where Should The Rear View Camera Be Mounted?
Mount the camera near the license plate or rear bumper center. This position provides a clear, wide-angle view behind the vehicle.
Conclusion
Installing a rear view camera improves your driving safety. It helps you see blind spots clearly. The steps are simple to follow and do not take long. You only need basic tools and some patience. After installation, test the camera to ensure it works well.
This small upgrade makes parking easier and safer. Take your time and enjoy the benefits of better vision on the road.