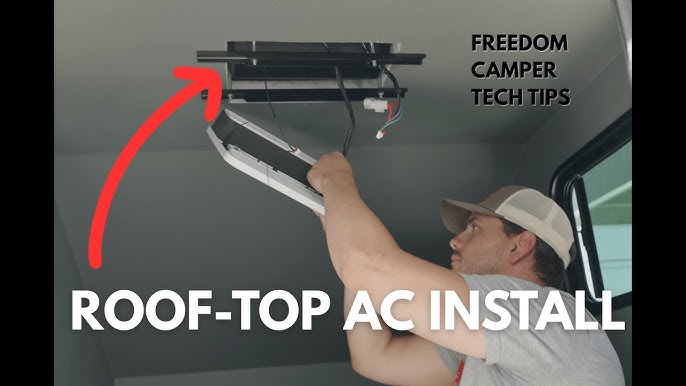
Are you tired of sweating through your RV trips? Installing an RV air conditioner can make your adventures much more comfortable.
But if you’re worried it’s too complicated or expensive, don’t be. This guide will walk you through every step in a clear, simple way. By the end, you’ll know exactly how to install your RV air conditioner and enjoy cool, refreshing air wherever you go.
Keep reading, and you’ll discover tips that save time, money, and frustration. Your perfect RV climate is closer than you think!
Choosing The Right Rv Air Conditioner
Selecting the right air conditioner for your RV is important for comfort. The right choice keeps your space cool without wasting energy.
This guide helps you understand types, sizing, and energy efficiency of RV air conditioners.
Types Of Rv Air Conditioners
There are several types of air conditioners made for RVs. Each has unique features and installation needs.
- Roof-Mounted:Most common type. Installed on top of the RV.
- Portable:Can be moved around. Needs a vent for hot air.
- Window Units:Fits into a window opening. Easy to install but less common in RVs.
- Ducted Systems:Uses ducts to cool multiple areas. Usually found in larger RVs.
Sizing Your Air Conditioner
Choosing the right size air conditioner is key. A unit that is too small won’t cool well. One that is too large wastes energy and money.
| RV Size (feet) | Cooling Capacity (BTU) |
| Up to 20 | 5,000 – 8,000 |
| 20 to 30 | 8,000 – 13,500 |
| 30 to 40 | 13,500 – 15,000 |
| Over 40 | 15,000 – 18,000+ |
Energy Efficiency Considerations
Energy use matters in an RV. Efficient air conditioners save power and extend your battery life.
- Look for units with Energy Star ratings.
- Choose models with variable speed fans.
- Consider units with programmable thermostats.
- Check if the unit uses eco-friendly refrigerants.

Credit: www.youtube.com
Gathering Necessary Tools And Materials
Installing an RV air conditioner needs some tools and materials. Getting them ready saves time. It also makes the job safer and easier.
Below are the main items you will need. They fall into three groups: tools, materials, and safety gear. Check each group carefully before you start.
Essential Tools
- Cordless drill with various drill bits
- Socket wrench set
- Flathead and Phillips screwdrivers
- Measuring tape
- Utility knife
- Caulking gun
- Wire stripper and cutter
- Level tool
- Safety glasses
Required Materials
| Material | Purpose |
| RV air conditioner unit | Cooling device to install |
| Mounting screws and bolts | Secure air conditioner to roof |
| Weatherproof sealant | Seal gaps and prevent leaks |
| Electrical wiring kit | Connect power to the unit |
| Insulation foam tape | Reduce vibration and noise |
| Roof vent cover (if needed) | Protect air conditioner from weather |
Safety Gear
Wear safety gear to protect yourself. It helps avoid injuries during the installation.
- Work gloves to protect your hands
- Non-slip shoes for steady footing
- Safety glasses to shield your eyes
- Dust mask if working with sealants or insulation
- Helmet if working on a high or unstable surface
Preparing The Installation Site
Installing a new RV air conditioner needs careful site preparation. This helps ensure the unit works well and lasts long.
Before installing, clear the area and check for any problems. Proper preparation avoids leaks and damage.
Removing The Old Air Conditioner
Start by turning off power to the RV. Remove screws holding the old air conditioner in place. Carefully lift the unit off the roof.
Disconnect the wiring and drain tubes. Keep these parts safe if you plan to reuse them.
Cleaning The Roof Area
Clean the roof surface where the air conditioner sits. Remove dirt, old sealant, and debris. This step helps the new unit seal tightly.
- Use a soft brush to clear dust and leaves.
- Scrape off old caulk and sealant with a plastic tool.
- Wash the area with mild soap and water.
- Dry the surface completely before continuing.
Inspecting For Damage
Check the roof for cracks, holes, or soft spots. Damage can cause leaks and weaken the roof.
| Type of Damage | Signs to Look For | Action Needed |
| Cracks | Visible lines or splits | Seal with roofing sealant |
| Holes | Open gaps or punctures | Patch with roofing material |
| Soft Spots | Areas that feel spongy or weak | Replace damaged roof section |
Credit: www.rvtrader.com
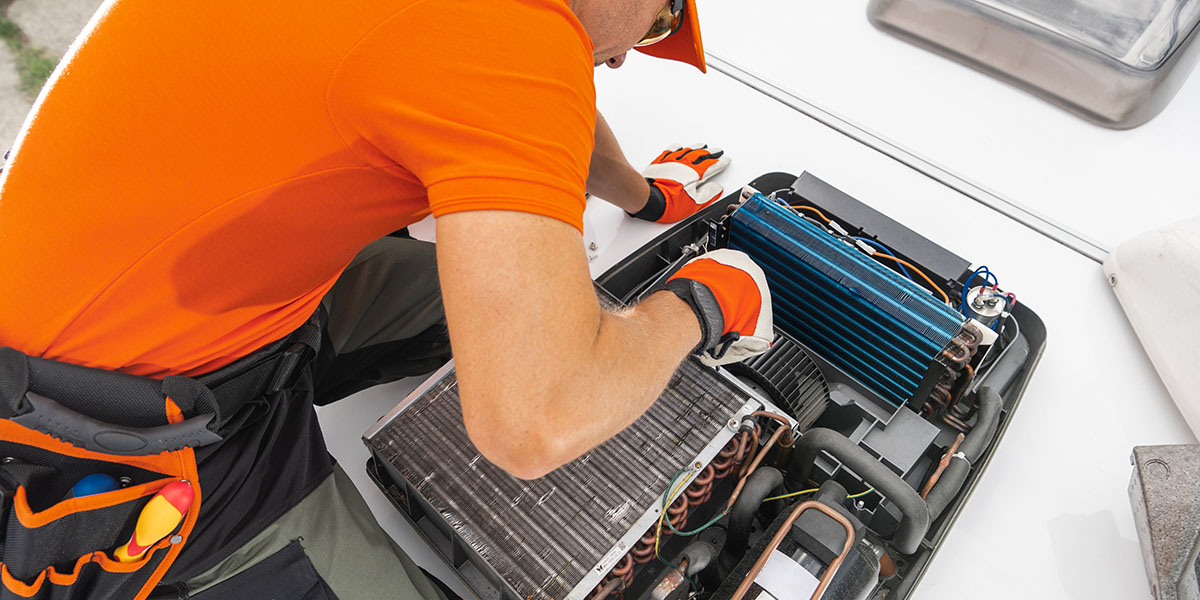
Installing The New Air Conditioner
Installing a new RV air conditioner requires careful steps to ensure it works well. You need to position the unit correctly, seal it tightly, and connect the electrical parts safely.
This guide covers the main parts of installing the air conditioner. Follow each section to complete your installation.
Positioning The Unit
Start by placing the air conditioner on the roof opening. Make sure it fits snugly without gaps. The unit should be centered to balance weight on the roof.
Check that the mounting holes line up with the holes in the roof. This alignment helps to secure the unit firmly in place.
Sealing And Securing
Use a good sealant around the base of the air conditioner. This stops water from leaking into the RV. Apply the sealant evenly to cover all edges.
- Apply a continuous bead of sealant around the roof opening.
- Set the air conditioner down carefully on the sealant.
- Secure the unit with screws in all mounting holes.
- Check for any gaps and add extra sealant if needed.
Connecting Electrical Components
Turn off power before working with electrical connections. Connect the air conditioner’s wires to the RV’s power supply as shown in the table below.
| Wire Color | Function | Connection Point |
| Black | Power (Hot) | Battery or Fuse Box |
| White | Neutral | Neutral Bus Bar |
| Green | Ground | Chassis Ground |
| Red | Thermostat Signal | Thermostat Terminal |
Secure all wire connections with wire nuts or terminal blocks. Double-check that no wires are loose or exposed before restoring power.
Testing And Troubleshooting
After installing your RV air conditioner, testing it is important. This ensures it works well and safely.
Troubleshooting helps fix issues early. It keeps your RV cool and comfortable on trips.
Powering On The Unit
Turn on the air conditioner using the control panel or remote. Check if it starts without problems.
Listen for the fan and compressor. The unit should blow cool air after a few minutes.
- Ensure the power supply is connected properly
- Check the breaker or fuse if it does not start
- Use the remote or control panel to power on
- Wait a few minutes to feel cool air
Checking For Leaks And Noise
Look under and around the unit for water leaks. Small leaks can cause damage over time.
Listen for unusual noises like rattling or hissing. These sounds can mean loose parts or refrigerant leaks.
- Inspect seals and connections for water leaks
- Check drain lines for blockages
- Listen for loud or strange noises
- Tighten loose screws and bolts
Common Installation Issues
Some problems happen often during installation. Spotting these early saves time and money.
Wrong wiring, poor sealing, and bad placement are common issues. Fix these to improve performance.
- Check all wiring matches the manual instructions
- Seal gaps around the unit to stop air leaks
- Ensure the unit is level and stable
- Keep vents clear for good airflow

Credit: www.youtube.com
Maintenance Tips For Longevity
Keeping your RV air conditioner in good shape helps it last longer. Regular care prevents problems and saves money.
Simple maintenance tasks can improve its performance and keep your RV cool during trips.
Regular Cleaning
Clean the air conditioner often to remove dirt and dust. This helps air flow better and stops damage.
Check and clean the filters every month. Dirty filters make the AC work harder and use more power.
- Remove and wash the filters with warm water
- Wipe the exterior with a damp cloth
- Clear debris from vents and coils
Seasonal Care
Prepare your air conditioner for each season. This prevents damage and keeps it ready to use.
Before summer, check for leaks and clean inside parts. Before winter, cover the unit to protect it from weather.
- Inspect seals and screws for tightness
- Use a protective cover in cold months
- Store the remote control in a safe place
When To Call A Professional
Some problems need expert help. Calling a professional stops small issues from becoming big ones.
Get help if the air conditioner leaks, makes strange sounds, or does not cool well.
- Unusual noises or vibrations
- Water leaking inside the RV
- AC does not turn on or cool properly
- Electrical problems or burning smells
Frequently Asked Questions
How Do I Install An Rv Air Conditioner Myself?
To install an RV air conditioner, first turn off power. Remove the old unit, clean the opening, and place the new AC. Secure it with screws and reconnect wiring. Seal edges to prevent leaks. Test the AC to ensure it works properly.
What Tools Are Needed For Rv Ac Installation?
You need a screwdriver, drill, caulking gun, measuring tape, and wire cutters. Also, have sealant and electrical tape ready. These tools help safely remove the old unit and install the new air conditioner securely.
How Long Does It Take To Install An Rv Air Conditioner?
Installation typically takes 2 to 4 hours. This depends on your experience and the RV’s complexity. Proper preparation and following instructions can speed up the process and ensure a smooth installation.
Can I Install An Rv Air Conditioner Without Professional Help?
Yes, you can install it yourself with basic skills. Follow the manufacturer’s guide carefully. Ensure power is off and use proper safety precautions. If unsure, consult a professional to avoid damage or injury.
Conclusion
Installing an RV air conditioner can make your trips much more comfortable. Follow each step carefully and take your time. Check all connections before turning the unit on. Proper installation helps the air conditioner work well and last longer. Enjoy cool air on hot days inside your RV.
Stay safe and consult a professional if unsure. With patience, you can do this yourself. Fresh, cool air is worth the effort.