Are you tired of sweating through hot days and high electricity bills? Installing a split unit air conditioner can be the perfect solution to keep your home cool and comfortable.
But maybe you’re wondering if you can handle the installation yourself. Good news—you absolutely can! In this guide, you’ll discover simple, step-by-step instructions that make the process easy and manageable. By the end, you’ll have the confidence to install your own split unit air conditioner and enjoy cool air without waiting or paying extra for professional help.
Let’s get started and transform your space into a refreshing oasis!

Credit: www.youtube.com
Tools And Materials Needed
Gather the right tools and materialsfor a smooth installation. Basic tools include a drill, screwdriver, level, and tape measure. Use a pipe cutterto trim copper pipes. A vacuum pumpremoves air and moisture from the system. You will also need a manifold gauge setto check pressure levels.
Materials include copper pipes, insulation, electrical wires, and mounting brackets. Secure the outdoor unit with strong brackets or a concrete pad. Ensure you have sealant and screwsfor tight connections. Use cable tiesto organize wires neatly.

Credit: m.youtube.com
Choosing The Right Location
The indoor unitshould be placed where air flows freely. Avoid spots near heat sources or direct sunlight. Mount it high on a wall for better cooling. Leave space around the unit for easy maintenance. Keep it away from doors and windows to stop warm air entering.
The outdoor unitneeds a flat and strong surface. Place it in a shaded area to protect from sun and rain. Ensure good airflow around the unit for better performance. Avoid placing it near noisy areas to reduce disturbance. Keep it away from places with dust or dirt buildup.
Preparing The Mounting Surface
Choose a flat and strong wall for the unit. It must hold the weight safely. Clean the surface to remove dust and dirt. Use a spirit level to check if the wall is even. Uneven walls can cause problems later.
Mark the spots for drilling holes carefully. Use a pencil for clear marks. Check the height; it should be easy to reach for maintenance. Avoid places near heat sources or direct sunlight.
- Measure twice before drilling
- Use proper anchors for your wall type
- Keep space around the unit for air flow
- Ensure the unit will not block windows or doors
Installing The Indoor Unit
Secure the mounting bracket firmly on the wall. Use a level tool to keep it straight. Choose a wall that can hold the weight of the indoor unit.
Drill a hole through the wall for the piping. Make the hole slightly slanted downwards. This helps water drain out easily.
Connect the pipes and wires carefully. Use proper insulation on the pipes to stop heat loss. Tighten all connections to avoid leaks. Check that wires match the unit’s wiring diagram.
Installing The Outdoor Unit
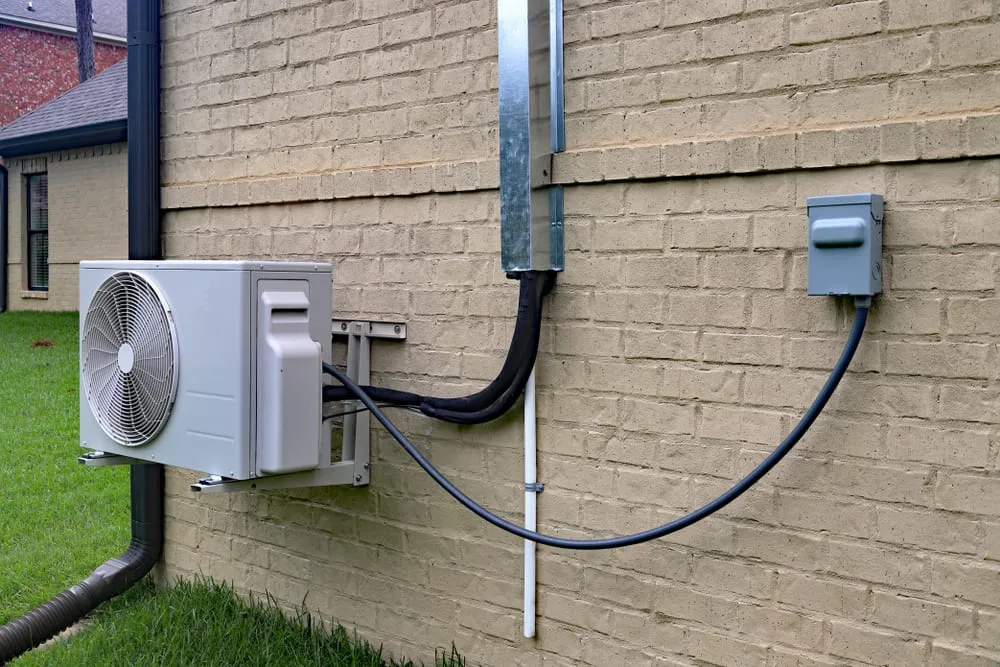
The outdoor unitshould be placed on a flat and stable surface. Choose a location with good air flow and away from direct sunlight. Avoid spots near dust or dirt sources to keep the unit clean.
Use strong brackets or a concrete pad to secure the unit. This prevents shaking and noise during operation. Make sure it is firmly fixed to avoid damage from wind or vibration.
Connect the refrigerant linescarefully. These lines carry the cooling gas between indoor and outdoor units. Use proper tools to tighten the connections and avoid leaks. Insulate the pipes to keep the system efficient.
Electrical Connections
Wiring the indoor and outdoor unitsrequires careful attention. Use the correct cablesspecified by the manufacturer. Connect the indoor unit’s wires to the outdoor unit through the copper tubingor conduit. Make sure the connections are tight and secureto avoid power loss or short circuits.
The power supplymust match the air conditioner’s voltage and current needs. Use a dedicated circuit breakerto protect the system. Connect the wires to the breaker following the color codes: usually black or red for live, white for neutral, and green or bare for ground.
- Turn off the main power before starting any wiring.
- Use a voltage tester to check wires.
- Follow the wiring diagram in the user manual.
- Secure all wire connections with wire nuts or terminal blocks.
- Ensure the system is properly grounded to avoid shocks.
Testing The System
Testing the system ensures the split unit air conditioner works correctly after installation. Check for cooling efficiency and listen for unusual sounds. Confirm all parts are secure and functioning before final use.
Checking For Leaks
Inspect all connectionsfor any signs of leaks. Use a soap and water solution on joints and pipes. Look for bubbles that show escaping gas. Tighten fittings if bubbles appear. Leaks reduce efficiency and can harm the system. Check both indoor and outdoor units carefully.
Powering On And Functionality Test
Turn on the power supply to the air conditioner. Use the remote or control panel to start cooling mode. Listen for unusual noises like rattling or hissing. Check if cold air blows steadily from the unit. Monitor temperature drop after a few minutes. Confirm the unit switches off properly when powered down.
Maintenance Tips
Cleaning filters is important to keep the air fresh and clear. Dirty filters block airflow and reduce cooling power. Remove filters gently and wash them with water. Let them dry completely before putting them back. Clean filters every two weeks for best results.
Regular inspections help catch problems early. Check the unit for dust buildup and leaks. Look at the pipes and wiring for any damage. Tighten loose screws and clean the outer parts with a soft cloth. Schedule a professional check-up once a year to keep the system running smoothly.
Credit: www.youtube.com
Frequently Asked Questions
What Tools Are Needed To Install A Split Ac?
To install a split AC, you need a drill, screwdriver, wrench, level, and measuring tape. Additionally, wall brackets, screws, and a pipe cutter are essential. Ensure you have safety gear like gloves and goggles. Having these tools will facilitate a smoother and efficient installation process.
How Do You Choose The Right Location?
Choose a location with minimal sunlight and away from heat sources. Ensure adequate airflow around the unit. The indoor unit should be mounted on a wall strong enough to support its weight. Keep it at a comfortable height for optimal cooling efficiency and easy maintenance.
Can I Install A Split Ac By Myself?
Yes, but it requires technical skills and tools. Follow manufacturer instructions closely. If unsure, hiring a professional is recommended to ensure proper installation. Incorrect installation can lead to inefficiency or damage, so professional help ensures safety and optimal performance.
How Long Does Installation Usually Take?
Installation generally takes 3 to 6 hours. Factors like complexity, experience, and location may affect this duration. Preparing the area in advance can reduce installation time. A professional installation might be faster due to their expertise and equipment.
Conclusion
Installing a split unit air conditioner can make your home cooler and more comfortable. Follow the steps carefully to avoid mistakes. Take your time with each part of the process. Use the right tools and safety gear to stay safe.
After installation, test the unit to ensure it works well. Regular maintenance helps your air conditioner last longer. Enjoy the cool air and energy savings from your new unit. Simple steps lead to great results. You can do this!