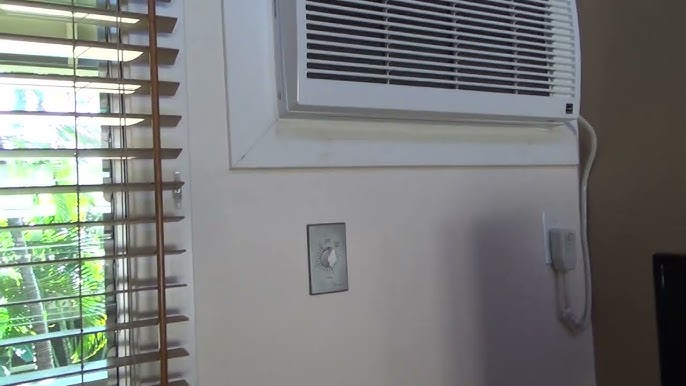
Are you tired of feeling hot and uncomfortable in your own home? Installing a wall mounted air conditioner can be the perfect solution to keep your space cool and refreshing.
But you might be wondering, “Can I do it myself? ” The good news is, yes—you can! With the right steps and a bit of guidance, you’ll have your air conditioner up and running in no time. You’ll discover simple, clear instructions that make the installation process easy and stress-free.
Keep reading, and you’ll learn how to take control of your comfort today.

Credit: www.youtube.com
Choosing The Right Air Conditioner
Selecting the right wall mounted air conditioner is important for comfort. The right unit cools your room well and saves energy.
Think about the size of your room, energy ratings, and extra features before buying.
Consider Room Size
The size of your room decides what air conditioner you need. A small room needs less power than a big one.
Check the square feet of your room to pick the right cooling capacity.
- Up to 150 sq. ft.: 5,000 BTU
- 150 to 250 sq. ft.: 6,000 BTU
- 250 to 350 sq. ft.: 8,000 BTU
- 350 to 450 sq. ft.: 10,000 BTU
- 450 to 550 sq. ft.: 12,000 BTU
Energy Efficiency Ratings
Energy ratings show how much power the air conditioner uses. A high rating means less electricity use.
Look for units with an Energy Efficiency Ratio (EER) or Seasonal Energy Efficiency Ratio (SEER) label.
- Higher EER or SEER means better energy saving
- Energy Star certified models save more power
- Lower electricity bills come from efficient units
Features And Functions
Extra features make using your air conditioner easy and comfortable. Think about what you need.
Some features to consider are remote control, timers, and sleep mode.
- Remote control for easy operation
- Timer to set automatic on/off times
- Sleep mode for quiet and energy saving
- Adjustable fan speeds for comfort
- Air filters to improve air quality
Gathering Necessary Tools And Materials
Installing a wall mounted air conditioner needs careful preparation. You must have all the right tools and materials before starting.
This guide will list the essential tools and required materials to help you get ready.
Essential Tools List
Using the right tools makes installation easier and safer. Gather these tools before you begin.
- Drill with bits for wood and masonry
- Stud finder to locate wall supports
- Level to ensure the unit is straight
- Screwdrivers (both flathead and Phillips)
- Measuring tape for accurate placement
- Wrench set for tightening bolts
- Utility knife for cutting insulation or packaging
- Safety goggles to protect your eyes
- Gloves to protect your hands
Required Materials
Having all materials ready keeps the installation process smooth. Here is a table of what you need.
| Material | Purpose |
| Wall mounted air conditioner unit | Main cooling device |
| Mounting bracket | Holds the unit securely on the wall |
| Sealant or weather stripping | Prevents air leaks around the unit |
| Insulation foam | Improves energy efficiency |
| Electrical wiring and connectors | Provides power to the unit |
| Drain pipe | Removes condensation water |
| Screws and anchors | Fixes the bracket and unit firmly |
Selecting The Installation Location
Choosing the right spot for your wall mounted air conditioner is important. The location affects how well it cools your room and how easy it is to install.
Look for a place that supports the unit and allows good airflow. Avoid areas with too much direct sunlight or heat sources.
Evaluating Wall Structure
Check if the wall can hold the air conditioner’s weight. The wall should be strong and stable, like concrete or solid wood.
Find studs or beams inside the wall to secure the unit. Avoid drywall or hollow walls without support.
- Use a stud finder to locate wall studs
- Measure the wall thickness and material
- Ensure the wall can carry the unit’s weight safely
Avoiding Obstructions
Look for clear space around the air conditioner. Avoid placing it near furniture or curtains that block airflow.
Make sure there are no electrical wires, pipes, or vents behind the wall. These can cause problems during installation.
- Keep at least 6 inches of space on each side
- Check for hidden pipes or wires with a detector
- Avoid areas with heavy foot traffic
Preparing The Installation Area
Preparing the area for your wall mounted air conditioner is key for a safe install. Clear the wall space and gather your tools before starting.
Check that the wall can hold the unit’s weight. A sturdy surface helps avoid damage later.
Marking The Mounting Points
Mark where you will place the mounting brackets on the wall. Use the air conditioner’s mounting template for accuracy.
- Hold the mounting template against the wall at the desired height.
- Use a level to ensure the template is straight.
- Mark the drill holes with a pencil through the template.
- Double-check all marks before drilling.
Drilling Holes
Drill holes at the marks to fit the mounting hardware. Use the right drill bit size for your wall type.
| Wall Type | Drill Bit Type | Drill Bit Size |
| Concrete | Masonry bit | 6-8 mm |
| Brick | Masonry bit | 6-8 mm |
| Wood | Wood bit | 4-6 mm |
| Drywall with studs | Wood bit | 4-6 mm |
Mounting The Bracket
Mounting the bracket is a key part of installing a wall mounted air conditioner. It holds the unit securely in place. Careful mounting keeps the air conditioner stable and safe.
Follow the instructions closely to mount the bracket. Check the wall type and use the right tools. This helps avoid damage and ensures a strong hold.
Securing The Bracket
First, find the studs inside the wall. These wooden beams support the bracket best. Use a stud finder or tap the wall to locate them.
Use heavy-duty screws to attach the bracket to the studs. Do not use drywall anchors alone, as they may not hold the weight. Tighten screws firmly but avoid over-tightening.
- Locate wall studs for strong support
- Use heavy-duty screws for mounting
- Check the bracket fits the air conditioner model
- Tighten screws securely without stripping
Ensuring Level Alignment
Use a spirit level to check if the bracket is straight. A level bracket keeps the air conditioner balanced and working well.
If the bracket is not level, adjust the screws or use shims. Double-check the level before tightening all screws completely.
- Place a spirit level on the bracket
- Adjust until the bubble is centered
- Use shims to fix uneven surfaces
- Recheck level before final tightening
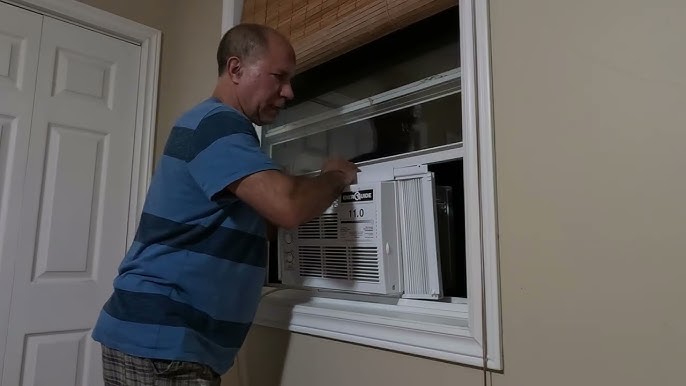
Credit: m.youtube.com
Installing The Air Conditioner Unit
Installing a wall mounted air conditioner requires careful handling. You must position the unit correctly and secure it tightly to the bracket. This guide helps you install the unit safely.
Follow the steps below to ensure your air conditioner works well and stays in place.
Positioning The Unit
Choose a spot on the wall that allows good air flow and easy access to power. Avoid placing the unit near heat sources or direct sunlight.
- Find a flat, sturdy wall surface
- Ensure the unit is at a comfortable height
- Leave space around the unit for air circulation
- Check that the power outlet is nearby
- Avoid areas with heavy dust or moisture
Securing The Unit To The Bracket
Once the unit is positioned, attach it firmly to the mounting bracket. Use the screws and tools recommended by the manufacturer to keep the unit stable.
| Tool | Purpose | Tip |
|---|---|---|
| Drill | Make holes for screws | Use a bit size that matches screws |
| Screwdriver | Tighten screws | Use the correct head type |
| Level | Check unit is straight | Adjust bracket if needed |
| Wrench | Tighten bolts | Do not over-tighten |
Connecting Electrical Components
Connecting electrical parts correctly is key for your wall mounted air conditioner. It keeps the unit safe and working well. Follow instructions carefully to avoid problems.
Use the right tools and check all wires before you start. Make sure power is off to stay safe while working.
Wiring Connections
Match each wire to the correct terminal. Usually, the wires are color-coded. Connect the ground wire first to prevent shocks.
- Black or red wires connect to the live terminal.
- White wires connect to the neutral terminal.
- Green or bare wires connect to the ground terminal.
- Use wire nuts or connectors to secure each connection.
- Check that no wires are loose or exposed.
Testing Power Supply
Test the power supply before turning on the air conditioner. This helps find wiring problems early. Use a multimeter for safety checks.
| Test | What to Check | Expected Result |
| Voltage | Live to Neutral | Matches unit rating |
| Continuity | Ground Wire | Low resistance |
| Power On | After wiring | Unit powers up without sparks |
Setting Up The Drainage System
Setting up the drainage system is a key part of installing a wall mounted air conditioner. It helps remove water that the unit collects during use. Proper drainage keeps your walls dry and prevents damage.
Follow the instructions carefully to install the drain hose and ensure water flows out smoothly. This will keep your air conditioner running well.
Installing Drain Hose
Attach the drain hose to the air conditioner’s drain outlet tightly. Make sure the hose is long enough to direct water outside or to a suitable drainage spot. Avoid sharp bends or kinks in the hose.
- Use a hose with the correct diameter for your unit.
- Secure the hose with clamps or ties to prevent leaks.
- Position the hose so it slopes downward for water to flow freely.
- Check the hose for cracks or damage before use.
Ensuring Proper Water Flow
Water must flow smoothly through the drain hose to avoid backups. Check the hose and drainage path regularly. Clear any blockages or debris found.
| Drainage Tip | Why It Matters |
| Keep hose slope at least 1 inch per 10 feet | Prevents water from pooling inside |
| Inspect hose monthly | Find and fix leaks early |
| Use a drip pan if needed | Catches any stray water drops |
| Place hose outlet away from walls | Avoids water damage to building |
Testing The Air Conditioner
After installing your wall mounted air conditioner, it is important to test it. Testing ensures the unit works properly and cools your room well.
This guide covers two key steps: checking for airflow and adjusting temperature settings.
Checking For Airflow
Turn on the air conditioner and listen for any unusual sounds. Check if air flows smoothly from the vents.
Feel the air with your hand to see if it is blowing out strongly. Weak airflow may mean a problem with installation.
- Make sure the vents are not blocked
- Confirm the fan is running
- Check both indoor and outdoor units
- Look for any air leaks around the unit
Adjusting Temperature Settings
Use the remote control or the unit’s panel to set the temperature. Start with a comfortable setting around 72°F (22°C).
Give the air conditioner some time to reach the set temperature. Adjust settings if the room does not feel cool enough.
- Lower the temperature to cool faster
- Raise it if the room feels too cold
- Set the mode to “Cool” for best results
- Use the “Fan” mode to circulate air without cooling
Troubleshooting Common Issues
Installing a wall mounted air conditioner can sometimes lead to problems. These issues might affect how well your unit works or cause noise.
Knowing how to fix common problems helps keep your air conditioner running smoothly. This guide covers noise problems and cooling issues.
Addressing Noise Problems
Noise from a wall mounted air conditioner can be annoying. It might come from loose parts or dirt inside the unit.
Check if the unit is mounted tightly on the wall. Loose screws or brackets can cause vibration sounds.
- Tighten all mounting screws and brackets
- Clean the fan blades and air filters
- Look for any loose parts inside the unit
- Make sure the unit is level on the wall
Fixing Cooling Inefficiencies
If your air conditioner is not cooling well, start by checking the air filter. A dirty filter blocks airflow and reduces cooling.
Also, make sure the outside unit is free from dirt and debris. Blocked airflow lowers cooling power.
- Clean or replace the air filter regularly
- Remove dirt and leaves from the outside unit
- Check that windows and doors are closed
- Ensure the thermostat is set to the right temperature

Credit: airgreen.ca
Frequently Asked Questions
How Do I Install A Wall Mounted Air Conditioner?
First, choose a suitable wall location near a power source. Next, mount the bracket securely. Then, connect the unit to the electrical supply and seal any gaps. Finally, test the air conditioner to ensure it cools properly.
What Tools Are Needed For Installation?
You will need a drill, screwdriver, level, measuring tape, and wrench. Additionally, have mounting brackets, screws, sealant, and a voltage tester ready for safe installation.
Can I Install A Wall Air Conditioner Myself?
Yes, with basic DIY skills, you can install it yourself. Follow the manufacturer’s instructions carefully and ensure safety precautions are in place. If unsure, consult a professional.
How To Ensure Proper Airflow After Installation?
Install the unit away from obstacles like furniture or curtains. Ensure the air filter is clean and the unit is leveled. This helps maintain efficient airflow and cooling performance.
Conclusion
Installing a wall mounted air conditioner can save space and cool your room well. Follow each step carefully for a safe and steady setup. Check the instructions and use the right tools to avoid problems. Take your time and ask for help if needed.
Enjoy a cooler home with your new air conditioner working properly.