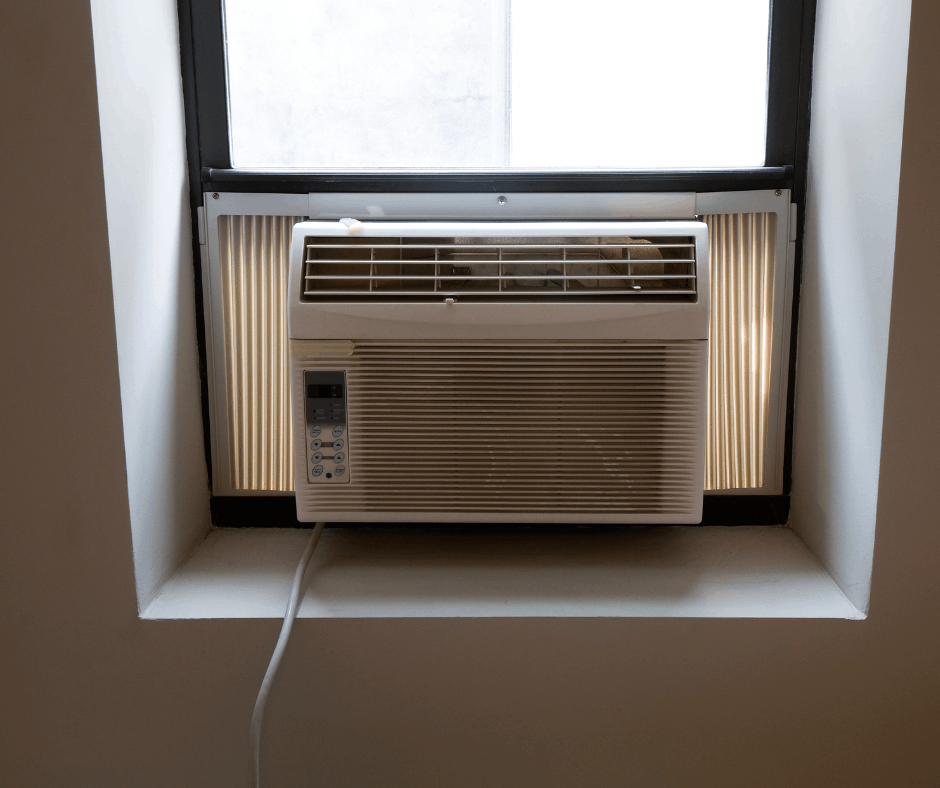
Are you ready to beat the heat without breaking the bank? Installing a window unit air conditioner yourself is easier than you think—and it can save you time and money.
Whether it’s your first time or you want to make sure you’re doing it right, this guide will walk you through every step clearly and simply. By the end, you’ll have your cool, refreshing oasis set up just the way you want it.
Keep reading to discover how to make your home comfortable and chill all summer long.

Credit: thelenmechanical.com
Choose The Right Window Unit
Choosing the right window air conditioner ensures your room cools efficiently. A proper unit fits your window and matches your cooling needs.
This guide helps you pick the best window unit for your space and comfort.
Measure Your Window
Check the width and height of your window opening. This helps you find a unit that fits securely without gaps.
Calculate The Room Size
Measure the room’s length and width to get its square footage. The cooling power of the unit depends on this size.
Match Cooling Capacity
Air conditioners come with different cooling capacities measured in BTUs. Choose one that suits your room size for effective cooling.
| Room Size (sq ft) | BTU Capacity Needed |
| 100 – 150 | 5,000 – 6,000 |
| 150 – 250 | 6,000 – 8,000 |
| 250 – 350 | 8,000 – 10,000 |
| 350 – 450 | 10,000 – 12,000 |
| 450 – 550 | 12,000 – 14,000 |
Consider Energy Efficiency
Look for units with the Energy Star label. These models use less electricity and save money over time.
Check Additional Features
- Fan speeds for better airflow control
- Timer settings for automatic shut-off
- Remote control for easy use
- Dehumidifier function to reduce moisture

Credit: archexteriors.com
Gather Necessary Tools And Materials
Installing a window unit air conditioner needs careful preparation. You must have the right tools and materials ready.
This step helps make the installation easier and faster. It also ensures safety and proper fitting.
Tools Required
- Screwdriver (flathead and Phillips)
- Measuring tape
- Level
- Drill with drill bits
- Utility knife
- Caulking gun
- Wrench or socket set
These tools help you measure, cut, drill, and secure the air conditioner in place.
Materials Needed
| Material | Purpose |
| Window air conditioner unit | Main cooling device |
| Mounting brackets | Support and hold the unit |
| Weatherstripping | Seal gaps to prevent air leaks |
| Screws and bolts | Secure brackets and unit |
| Foam insulation strips | Fill gaps around the unit |
| Drip pan (optional) | Catch condensation water |
Check if all materials fit the size and model of your window and air conditioner.
Safety Equipment
- Work gloves
- Safety goggles
- Dust mask
Wear safety gear to protect your hands, eyes, and lungs during installation.
Prepare The Window
Preparing your window is important before installing a window unit air conditioner. A clean and ready window helps the unit fit well and work properly.
This guide shows how to get your window ready for the air conditioner installation.
Remove Obstacles
Clear any items near or on the window. This gives you space to work and stops damage to the air conditioner.
Move plants, furniture, or decorations away from the window area. Check the window sill and frame for any objects that block the installation.
- Remove curtains or blinds if needed
- Clear the window sill of dirt and debris
- Move furniture at least two feet from the window
- Keep the area outside the window free from plants or objects
Check Window Condition
Look for damage in the window frame or sill. The window should be strong enough to hold the air conditioner.
Fix cracks, loose parts, or broken glass before installing. Make sure the window opens and closes easily.
- Inspect the frame for cracks or rot
- Check the window glass for cracks or chips
- Make sure the window slides or lifts smoothly
- Repair or replace damaged parts as needed
Install The Mounting Brackets
Mounting brackets hold your window air conditioner in place. Installing them correctly is important for safety and function. This guide will help you install the brackets step by step.
Follow the instructions carefully to make sure the unit stays secure. Use the tools and parts that come with your air conditioner.
Gather The Needed Tools And Parts
Before starting, gather all tools and mounting parts. This will make the installation easier and faster.
- Screwdriver or drill
- Measuring tape
- Mounting brackets (usually included)
- Screws and bolts
- Level tool
- Protective gloves
Position The Brackets Correctly
Place the brackets on the window sill where you want to install the unit. Use a level tool to make sure they are straight and even.
Mark the screw holes on the window frame with a pencil. This will help you drill in the right spots.
Secure The Brackets To The Window Frame
Use a drill or screwdriver to attach the brackets to the window frame. Make sure the screws are tight and the brackets do not move.
| Bracket Part | Description | Installation Tip |
|---|---|---|
| Bottom Bracket | Supports the weight of the unit on the sill. | Level it carefully to avoid tilting. |
| Side Brackets | Hold the sides of the unit in place. | Attach firmly to window frame edges. |
| Support Brackets | Provide extra support under the unit. | Use if the unit is heavy or window sill is narrow. |
Check Stability Before Installing The Ac Unit
Once the brackets are installed, press down gently on them. Make sure they do not shift or loosen.
- Ensure all screws are tight
- Brackets should not wobble
- Use extra screws if needed for safety
Position The Air Conditioner
Placing your window unit air conditioner correctly helps it work better. You need to position it securely and level for safety and efficiency.
Follow careful steps to lift and align the unit before final installation. This guide focuses on two main tasks: lifting carefully and aligning with brackets.
Lift Carefully
Lift the air conditioner with help from another person. These units can be heavy and awkward to handle alone. Use the following tips to lift safely:
- Bend your knees, not your back, when lifting
- Hold the unit firmly from the bottom and sides
- Keep the unit close to your body while lifting
- Move slowly and avoid twisting your body
- Place the unit gently on the window sill or support
Align With Brackets
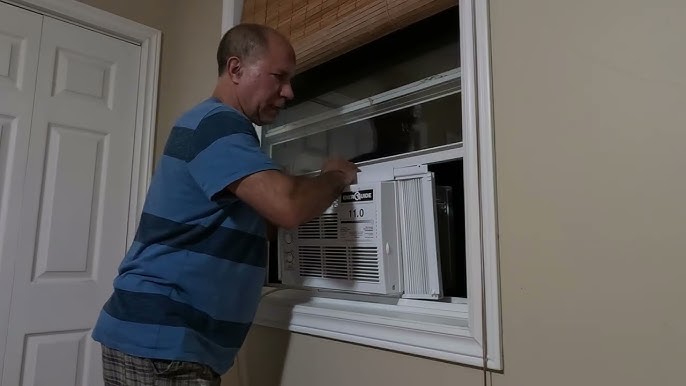
Align the air conditioner with the mounting brackets before securing it in place. Proper alignment ensures stability and prevents air leaks.
| Bracket Part | Purpose | Alignment Tip |
|---|---|---|
| Bottom Support | Holds weight of the unit | Level with window sill |
| Side Brackets | Secure sides of the unit | Flush with window frame edges |
| Top Bracket | Prevents unit from falling out | Fits snugly above the unit |
Credit: www.youtube.com
Secure The Unit
Securing your window air conditioner is important for safety and performance. It helps keep the unit steady and stops it from moving or falling.
Follow these steps to fasten the side panels and tighten the screws properly. This will ensure your air conditioner stays in place.
Fasten Side Panels
Side panels fill the gaps between the air conditioner and the window frame. They stop air leaks and hold the unit securely.
Extend the side panels to fit the window width. Then, attach them to the unit and window frame using the tabs or screws.
- Pull the panels out gently to fit the window
- Make sure the panels are flush with the window frame
- Use the tabs to lock the panels in place
- Secure panels with screws if tabs are not enough
Tighten Screws
Tighten all screws to keep the unit stable. Loose screws can cause the air conditioner to move or fall.
Check screws on the side panels, mounting brackets, and window frame. Use a screwdriver to make sure they are tight but do not over-tighten.
- Start with side panel screws
- Check mounting bracket screws
- Tighten window frame screws if needed
- Do not force screws to avoid damage
Seal The Gaps
After installing your window unit air conditioner, sealing the gaps is key. Gaps let warm air in and cool air out. Proper sealing keeps your room comfortable and saves energy.
Use the right materials to close all spaces around the unit. This guide covers foam insulation and checking for air leaks to help you seal well.
Use Foam Insulation
Foam insulation fills gaps between the air conditioner and the window frame. It stops air from passing through and adds extra support to the unit.
- Choose foam strips or panels that fit your window size.
- Cut foam to cover all visible gaps.
- Press the foam tightly around the edges of the unit.
- Use weather-resistant tape to secure foam if needed.
- Check that the foam does not block airflow from the unit.
Check For Air Leaks
Air leaks reduce cooling efficiency. Check all sides of the unit for cracks or holes. Use a simple test to find leaks and seal them quickly.
Here is a table to help identify common leak spots and suggested fixes:
| Leak Location | Signs of Leak | Fix |
|---|---|---|
| Bottom of the Unit | Air feels drafty or warm | Apply foam insulation or weatherstripping |
| Window Frame Edges | Light or air passes through | Use caulk or foam tape |
| Side Panels | Gaps visible or loose panels | Secure panels tightly and seal edges |
| Behind the Unit | Condensation or moisture | Check for proper sealing and drainage |
Connect To Power
After placing your window air conditioner, you need to connect it to power. This step ensures your unit runs safely and efficiently.
Using the right power source protects the unit and your home from electrical problems. Follow these tips to connect your air conditioner correctly.
Plug Into Outlet
Always plug your window air conditioner directly into a grounded outlet. Avoid using extension cords or power strips.
The outlet should match the plug type and provide enough power for the unit’s needs. Check the air conditioner’s manual for power requirements.
- Use a dedicated 115V or 230V outlet based on your unit
- Make sure the outlet is grounded to avoid shocks
- Do not overload the outlet with other devices
Use A Surge Protector
A surge protector can guard your air conditioner from power spikes. These spikes can damage the unit or shorten its lifespan.
Choose a surge protector with a high joule rating. This rating shows how much energy it can absorb during power surges.
- Select a surge protector designed for heavy appliances
- Check that it supports the voltage of your air conditioner
- Replace the surge protector after a major power surge
Test The Unit
After installing your window air conditioner, you need to test it. Testing makes sure it works well and cools your room.
Check the unit carefully to find any problems early. This helps you fix issues before regular use.
Check Cooling Performance
Turn on the air conditioner and set it to the coolest setting. Wait for about 10 to 15 minutes to let it start cooling.
Feel the air coming from the unit. It should be cold and strong. Check if the room temperature begins to drop.
- Make sure cold air flows out steadily
- Listen for unusual noises or rattles
- Watch for water leaks or drips
- Check that the fan runs smoothly
Adjust Settings
Set the temperature to a comfortable level once cooling is good. Use the fan speed control to adjust airflow.
Try different modes, like cool, fan only, or energy saver. Pick the setting that works best for your room.
- Use lower fan speed for quiet operation
- Energy saver mode turns off the compressor when not needed
- Adjust temperature gradually for comfort
- Make sure remote control works properly
Maintenance Tips
Keeping your window unit air conditioner well-maintained helps it work longer. Regular care saves energy and keeps the air clean.
Check your unit often to avoid big problems. Simple steps can make a big difference in how well it cools your room.
Clean Filters Regularly
Filters trap dust and dirt from the air. When they get dirty, your air conditioner works harder. Clean filters improve airflow and cool air better.
- Remove the filter from the unit carefully
- Use a vacuum to clean dust off the filter
- Wash the filter with warm soapy water if very dirty
- Let the filter dry completely before placing it back
- Clean filters every two weeks during heavy use
Inspect For Damage
Look over your air conditioner to find any damage early. Small issues can turn into big repairs if you do not fix them soon.
| Part | What to Check | Action |
| Power Cord | Frays or cracks | Replace if damaged |
| Window Seal | Gaps or tears | Seal or replace |
| Unit Exterior | Dents or rust | Clean and repair |
| Air Vents | Blockages or dirt | Clear and clean |
Frequently Asked Questions
How Do I Prepare My Window For Installing A Unit Ac?
Clean the window frame and remove any obstacles. Measure the window to ensure the AC fits properly. Open the window sash and check for stability before installation.
What Tools Are Needed To Install A Window Air Conditioner?
You will need a screwdriver, measuring tape, level, weatherstripping, and support brackets. These tools help secure the unit and ensure a tight fit.
How Do I Secure The Air Conditioner In The Window?
Place the unit on the windowsill, then lower the sash to hold it. Use brackets and screws to anchor the unit firmly. Seal gaps with weatherstripping to prevent air leaks.
Can I Install A Window Ac Unit Alone Safely?
Yes, if the unit is light and you follow instructions carefully. However, for heavy units, having a second person helps ensure safety and proper installation.
Conclusion
Installing a window air conditioner is easier than you think. Follow each step carefully for best results. Make sure the unit fits your window snugly and seals well. Check the power source before plugging in the air conditioner. Keep safety in mind while handling tools and heavy parts.
With proper installation, your room will stay cool and comfortable. Enjoy the fresh, cool air all summer long. Simple steps lead to a cooler home without stress. You can do this!